Cleaning Rust from Toilet Tank: Safe, DIY Guide
Learn to safely remove rust from your toilet tank using gentle cleaners, practical tips, and maintenance steps to prevent future corrosion. A Corrosion Expert step-by-step approach for DIY enthusiasts.

In this guide, you’ll learn how to safely clean rust from a toilet tank and restore metal components without damaging seals. You’ll remove the tank lid, protect the tin and porcelain, and follow a step-by-step routine using gentle abrasives, white vinegar, and a corrosion-safe brush. Expect improvements in flushing and odor with proper maintenance.
What causes rust in toilet tanks
Rust in toilet tanks typically arises when iron-containing water passes through aging metal hardware inside the tank or on the fill valve and screws. Over time, oxidation forms reddish-brown stains that can discolor porcelain and, in some cases, damage metal components. Corrosion Expert analysis shows that mineral-rich water and humid bathroom environments accelerate rust formation around exposed metal parts. The rust may appear as small freckles on screws, bands around the fill valve, or larger patches on metal fittings. While rust itself is generally cosmetic, it can corrode metal components and degrade seals, potentially causing leaks or fluctuations in water level. Understanding the source helps you choose the right cleaning approach and prevent recurring rust. For many homes, the primary culprits are old galvanized hardware and iron-containing supply lines. If you’re unsure about the source, inspect the tank hardware and water line for visible rust and corrosion.
Safety and assessment before you start
Before you begin cleaning rust from a toilet tank, prioritize safety and plan. Turn off the supply valve and flush the tank to drain as much water as possible. Remove the tank lid carefully and place it on a soft surface to avoid chipping the porcelain. Put on gloves and safety goggles to protect your hands and eyes from splashes. Use a towel or cardboard to protect the bathroom floor from drips. Check the fill valve and metal screws for active rust; if you see significant corrosion on plastic or rubber parts, consider replacing them instead of cleaning. If your water is hard or iron-rich, expect rust residues to reappear over time and plan for periodic maintenance. Ventilate the bathroom and avoid mixing cleaners that could release harmful fumes. Finally, gather all tools and materials before starting to minimize back-and-forth trips.
Cleaning strategies: vinegar, baking soda, and gentle tools
A practical, low-risk approach starts with common household cleaners. White distilled vinegar dissolves light to moderate rust deposits on exposed metal without aggressive scrubbing. Dampen a rag with vinegar and lay it over rusty screws or fittings for 5–10 minutes to loosen oxidation, then wipe clean with a soft brush. For stubborn rust, make a paste with baking soda and water and apply with a non-metal brush; let it sit briefly before scrubbing. Citric acid or lemon juice can be used as an alternative acidity if vinegar isn’t available. Always avoid harsh metal pads on porcelain and never mix acidic cleaners with bleach, which can create harmful fumes and damage rubber seals. The goal is to lift stains and reduce surface oxidation while preserving gaskets and valve components. Prolonged exposure to strong acids should be avoided, especially near seals.
Cleaning the metal components: screws, fill valve, internal hardware
Not all rust is cosmetic; attacking metal hardware inside the tank requires gentleness. Remove any easily detachable metal screws or brackets and clean them separately using the vinegar-soaked cloth method, then scrub with a plastic brush. Do not force apart sealed components; if the fill valve shows heavy corrosion or leaks, replace it rather than attempt a risky cleaning. Dry all parts thoroughly before reassembly to prevent new rust from forming. If you must lubricate threads, use a small amount of a water-safe, silicone-based lubricant approved for potable use and never apply oil directly to rubber seals.
Post-cleaning inspection and prevention
Once cleaning is complete, reassemble the tank carefully and refill it fully. Flush several times to ensure new water is circulating and that there are no leaks around the seals. Wipe down the porcelain and metal surfaces to remove moisture; a dry environment reduces the chance of immediate re-oxidation. Consider installing a basic water-softening filter or a rust-inhibiting treatment if your home has hard iron-rich water. Periodic inspection every 6–12 months can catch early rust signs before they worsen. By maintaining clean hardware and tightening connections, you extend the life of the tank and its components. Corrosion Expert notes that ongoing maintenance, rather than one-off cleaning, yields the best long-term results.
Common mistakes to avoid
- Skipping safety gear or rushing cleaning near electrical fixtures in the bathroom.
- Using abrasive scrub pads on porcelain or metal hardware, which can scratch or wear seals.
- Mixing cleaners (especially bleach) with acids, which can release toxic fumes and damage rubber gaskets.
- Overlooking concealed rust behind brackets or in valve threads, leading to recurring issues.
- Ignoring the root cause (iron-rich water) and treating symptoms, not sources, of rust.
Tools & Materials
- Gloves (nitrile or latex)(Protect hands from cleaners and sharp edges)
- Safety goggles(Shield eyes from splashes)
- Plastic bucket or bowl(For rinsing and dipping brushes)
- Paper towels or rags(Dry spills and wipe surfaces)
- White distilled vinegar(5–8% acetic acid; mild rust remover)
- Baking soda(Create gentle abrasive paste with water)
- Non-metal scrub brush(Avoid scratching porcelain)
- Old toothbrush(Clean tight gaps and fittings)
- Plastic scraper/spatula(Gently lift rust without scratching)
- Mild, non-acidic cleaner(For final wipe-down if desired)
- Penetrating oil (optional, near hardware only)(Only if you need to treat stubborn threaded parts; avoid rubber seals)
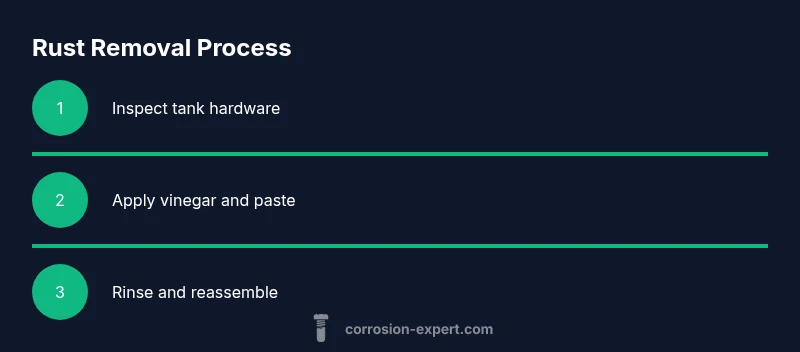
Steps
Estimated time: 30-60 minutes
- 1
Turn off water and drain the tank
Shut off the bathroom shut-off valve and flush the tank to empty it as much as possible. This minimizes splashes and makes it safer to handle metal parts. Remove the tank lid gently and set it on a soft surface.
Tip: Have towels handy and work slowly to prevent chips or slips. - 2
Inspect rusted areas and plan your approach
Look for rust on screws, brackets, the fill valve, and internal hardware. Decide whether you’ll clean, replace parts, or both. If you see heavy corrosion on gaskets or seals, plan for replacement rather than cleaning.
Tip: Document damaged parts with a quick photo to reference during reassembly. - 3
Prepare cleaning solutions
Mix a shallow tray with white vinegar for soaking and have baking soda paste ready for tougher spots. Avoid mixing acids with bleach or ammonia. Keep a damp cloth handy for quick wiping between steps.
Tip: Label your solutions to prevent accidental misuse. - 4
Apply vinegar and baking soda as needed
Dampen a cloth with vinegar and place it on rusty screws or fittings for 5–10 minutes, then wipe with a soft brush. For persistent rust, apply a baking soda paste and gently scrub with the non-metal brush.
Tip: Don’t over-soak metal parts to avoid water seeping into seals. - 5
Rinse, dry, and inspect
Rinse all cleaned areas with fresh water, wipe dry with towels, and re-inspect for remaining rust. If any rust remains or if you notice leakage, plan for replacement parts before reassembly.
Tip: Dry everything thoroughly to prevent immediate re-oxidation. - 6
Reassemble and test the tank
Place the tank lid back, turn the water back on, and flush to test for leaks and proper operation. If rust reappears quickly, consider upgrading hardware to corrosion-resistant components.
Tip: Monitor the first few refills and address any leaks promptly.
Quick Answers
Is it safe to use vinegar to clean rust in a toilet tank?
Yes, vinegar is a mild cleaner that can dissolve rust on exposed metal without harming porcelain. Avoid prolonged exposure on rubber seals, and rinse thoroughly after use.
Vinegar is safe for rust on metal parts, but rinse well and avoid seals.
Can I use bleach in a toilet tank to remove rust?
Bleach should not be mixed with acids or used near metal components and rubber seals. It can degrade gaskets and create dangerous fumes; use milder cleaners instead.
Bleach isn’t recommended near rusted tank hardware; stick to milder cleaners.
Will cleaning rust damage the porcelain tank?
If you use non-abrasive cleaners and avoid harsh pads, porcelain should be safe. Avoid steel wool or metal scrapers which can scratch the glaze.
Porcelain stays safe with gentle scrubbing and non-abrasive tools.
What should I do if rust returns after cleaning?
If rust recurs, check for ongoing iron in the water or failing hardware. Replace rusty parts and consider a rust-preventive strategy for the long term.
If rust comes back, inspect the water and hardware and replace parts as needed.
Should I replace rusty parts after cleaning?
Yes, if hardware shows persistent rust or leaks. Clean-only fixes are temporary; replace with corrosion-resistant parts when possible.
Replace rusty parts if corrosion keeps returning; cleaning alone isn’t enough.
Watch Video
Quick Summary
- Inspect rust sources before cleaning
- Use vinegar and gentle abrasives to avoid damage
- Protect gaskets and seals during cleaning
- Plan for replacement parts if corrosion is extensive