How to Get Rust Out of a Motorcycle Gas Tank
Learn a safe, effective DIY method to remove rust from a motorcycle gas tank, plus sealing tips to prevent recurrence. This comprehensive guide covers chemical and mechanical options, safety, and when to seek professional help.

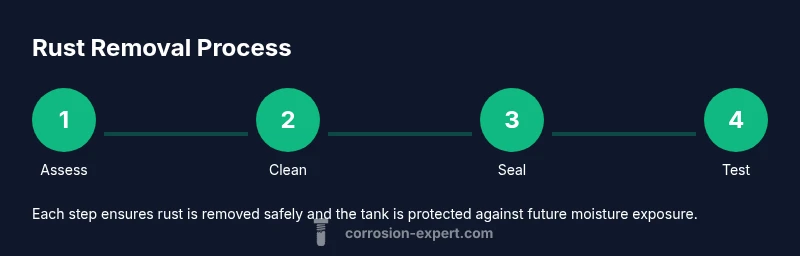
Based on our process, you will learn to safely assess, clean, rinse, and seal a motorcycle gas tank to remove rust and prevent future corrosion. You'll need basic tools, safety gear, and the right rust-removal approach for your tank material. According to Corrosion Expert, rust in gas tanks often forms where moisture meets ethanol-blend fuels, so proper cleaning and sealing are essential.
Why rust forms in a motorcycle gas tank
Rust in motorcycle gas tanks is usually the result of moisture entering the fuel system and interacting with ethanol-blend fuels. Water condensates inside the tank when temperatures fluctuate, and rust begins where steel walls are exposed or where protective coatings have worn away. Over time, this rust can flake off and mix with the fuel, leading to clogged filters, reduced performance, and potential engine damage. According to Corrosion Expert analysis, understanding the exact environment inside your tank—fuel type, humidity, and temperature cycles—helps you choose the right cleaning method and sealing strategy. By recognizing early signs such as a metallic taste in fuel, rough engine idling, or visible orange-brown specks in the gas, you can intervene before the rust becomes structural.
In practice, the interior of a tank is often coated or lined to resist corrosion; however, coatings can degrade. The rust you see is usually surface-level initially but can progress into pinholes if left untreated. The goal of this section is to help you distinguish light surface rust from deep-seated corrosion that requires professional help.
- Look for rusty flakes or staining on the fuel strainer, cap, or inside the filler neck.
- Note any sediment that resembles reddish-brown dust in the tank.
- Assess fuel quality: a stale odor, varnish-like residue, or clogged filters are warning signs.
Understanding the problem sets you up for a safer cleaning process that preserves fuel system integrity.
How rust forms in fuel systems
Rust forms in fuel systems when iron or steel components come into contact with water and oxygen, accelerated by water-soluble components in certain fuels. Ethanol-containing fuels absorb water more readily than pure gasoline, which increases the likelihood of moisture pooling inside metal tanks. Over time this moisture creates iron oxide on the tank walls. Chemical reactions begin at imperfections in coatings or around seams, and once started, rust can spread along the interior surface. If rust flakes break free, they travel through the fuel line, potentially clogging jets or filters and reducing fuel flow to the engine.
The interior environment of a motorcycle fuel tank is often a complex mix of liquid fuel, water droplets, and air. Temperature changes, vibration, and sloshing during riding can drive condensation that deposits water on the tank’s inner surface. This makes prevention and timely intervention essential. The practical takeaway: regular inspection and maintenance save you from more invasive repairs later.
- Rust typically starts at the weakest protective area—where coatings have worn, around welds, or near baffles.
- A tank with poor sealing will accumulate more moisture, accelerating corrosion.
- Early rust is easier to remove with non-invasive methods; advanced corrosion may require professional treatment.
Before you start: safety and planning
Working with rusted fuel systems poses fire and health hazards. Always work in a well-ventilated area away from open flames or sparks. Disconnect the motorcycle battery to prevent any accidental ignition and prepare a containment plan for any fuel you remove from the tank. Collect rainwater or rinse water in a sealed container to prevent spills, and keep a fire extinguisher nearby as a precaution. The cleaning process may involve chemicals that produce vapors; always use appropriate personal protective equipment (PPE) such as nitrile gloves, splash goggles, and a respirator rated for organic vapors when required.
Plan your steps and gather all materials before you begin to minimize peak exposure time. Confirm the type of tank (steel vs. aluminum) and its coating status, as this will influence which rust removers are safe to use. If the tank has a compromised seam or heavy pitting, consider a professional evaluation instead of attempting a DIY fix.
- Verify fuel is drained and stored safely until you reintroduce it later.
- Work in a flame-free zone and keep ignition sources away from the workspace.
- Wear PPE and read all chemical labels before use.
Cleaning options overview: chemical, mechanical, and combined
There are two broad paths for rust removal in gas tanks: chemical rust removers and mechanical cleaning with flushing. Chemical products range from phosphoric acid–based cleaners that convert rust into a soluble compound to safer, water-based rust removers designed for metal surfaces. Mechanical cleaning involves physically abrading the interior with brushes or media blasters, followed by thorough rinsing and flushing to remove debris. Some riders combine both approaches: they use a mild chemical remover to loosen rust, then mechanical agitation to dislodge flakes, and finally rinse until the tank interior is clean.
Safety and tank material compatibility are critical. You must choose products labeled safe for steel, and for aluminum if applicable. Always test a small area first, and never mix cleaners or attempt aggressive acids without understanding the tank’s coatings. Finally, you should plan for sealing the tank after cleaning to prevent moisture ingress and future rust.
- Chemical methods work best on light to moderate rust, with minimal coating damage.
- Mechanical methods can remove heavy rust but require careful handling to avoid introducing new scratches or particles into the fuel system.
- Sealing after cleaning is essential to prevent recurrence.
Chemical rust removers and how to use them safely
Chemical rust removers often rely on acids or chelating agents that react with iron oxide, dissolving rust and leaving a clean metal surface. Safe options include products marketed for automotive fuel tanks, with explicit instructions for interior use. When using chemical removers, you must ensure the product is compatible with your tank’s material and any coatings. Always follow the label directions, wear PPE, and work in a ventilated area. Before applying, flush the tank to remove loose rust particles, and consider masking any rubber seals or plastic components that could be damaged by the cleaner. After the dwell time specified by the manufacturer, rinse thoroughly with water and then with a compatible fuel substitute to prevent residue.
A practical tip from Corrosion Expert: avoid highly aggressive acids on tanks with questionable coatings. If in doubt, start with a milder product and test on a disposable section first. Always ensure complete drying before sealing or reusing the tank.
- Test compatibility with a small, inconspicuous area first.
- Use the manufacturer’s dwell time and rinse instructions exactly.
- Discard any leftover cleaner safely according to local regulations.
Mechanical cleaning and fuel system flushing
Mechanical cleaning uses brushes, abrasive media, or mechanical blasting to remove stubborn rust from the tank walls. After draining and disconnecting the fuel line, gently abrade the interior with a soft steel or nylon brush, taking care not to gouge the metal. Flushing with clean water and then a compatible fuel substitute helps remove rust flakes and cleaner residues. A compressed air blow-out helps dry the interior, but ensure you avoid spinning the tank while venting to prevent static buildup. This method is effective for moderate rust and can significantly extend the life of the tank when paired with proper sealing afterwards.
- Use short, controlled brush strokes to minimize metal damage.
- Flush thoroughly to prevent cleaner residues from entering the engine.
- Dry completely before applying sealants to avoid trapping moisture.
Sealing the tank and preventing future rust
Sealing the interior after rust removal is essential to slow oxidation and moisture ingress. Choose a tank sealant or lining kit that is gasoline-compatible and designed for the tank material (steel or aluminum). Apply according to the product instructions, ensuring the interior is completely dry and free of residues. Some riders opt for epoxy liners, while others use fuel-tank sealants designed for minimal emissions and fuel compatibility. After sealing, gradually reintroduce fuel and monitor for any signs of sealant leakage. Regular inspections, keeping the tank full or with a consistent fuel level, and using fuel stabilizers in seasonal storage can reduce moisture buildup.
Corrosion Expert recommends documenting the service with a write-up and keeping a maintenance schedule for periodic checks. If repeated rust returns within a year, reconsider the option of a replacement tank or professional restoration.
- Ensure full curing time before exposing the tank to fuel.
- Use additives that stabilize the fuel and reduce water absorption when storage is long-term.
When to call a professional
DIY rust removal can save money, but there are critical limits. If you observe deep pits, structural corrosion, leaks, or compromised seams, a professional assessment is essential. If the tank has been compromised by previous bad sealing or incompatible sealants, professionals can assess whether internal coating restoration or complete replacement is required. Advanced methods such as tank liners, professional blasting, or specialized coatings may be appropriate for severe rust. Remember that improper cleaning can lead to engine damage or hazardous fuel vapors, so when in doubt, seek expert help.
Quick-field checklist for rust removal inside a motorcycle gas tank
- Drain and ventilate; remove the battery and work in a flame-free area.
- Inspect interior for rust depth and coating condition.
- Choose a rust-removal method compatible with your tank material.
- Use PPE and follow product labels precisely.
- Rinse thoroughly and dry completely before sealing.
- Apply a compatible sealant or liner; allow proper curing time.
- Refill and test; monitor for signs of leakage or rust return.
Tools & Materials
- Safety gear (nitrile gloves, splash goggles, respirator)(Select chemical-resistant PPE; ensure proper fit and filtration as needed)
- Fuel-safe container for transfer(Metal or sturdy plastic approved for fuels; sealable)
- Rust remover/cleaner (gasoline-compatible)(Follow label; test on a small area first)
- Tank sealer or lining kit(Choose a product compatible with your fuel type and tank material)
- Rags, brushes, and soft scrubbers(Lint-free materials; avoid fibers that shed into the tank)
- Basic hand tools (screwdrivers, wrenches)(For removing components and accessing the tank)
- Flushing supplies (water, gasoline substitute, or approved solvent)(Use only approved liquids for flushing; never mix incompatible cleaners)
Steps
Estimated time: 4-8 hours (excluding curing time for sealants)
- 1
Drain and isolate fuel
Safely drain the tank into a suitable container and remove fuel lines if necessary. Keep the container closed and away from ignition sources. Allow vapors to dissipate in a well-ventilated area before proceeding.
Tip: Label the container and store fuel properly; never pour used fuel into household drains. - 2
Inspect tank interior
Visually inspect the interior for rust depth, coating integrity, and signs of pitting. Check the filler neck and outlet passages for obstructions. This step guides whether you use a chemical remover or mechanical cleaning.
Tip: Take photos to document conditions before cleaning. - 3
Choose cleaning method
Decide whether to use a mild chemical rust remover, mechanical brushing, or a combined approach based on rust severity and coating status. Ensure compatibility with tank material.
Tip: When in doubt, start with gentler methods to minimize coating damage. - 4
Apply rust remover (if chosen)
Follow the product directions to apply the remover inside the tank. Agitate gently to loosen rust, then let it dwell for the recommended time. Avoid splashing or aerosolizing chemicals.
Tip: Test a small area first and never exceed recommended dwell time. - 5
Rinse and flush
Rinse thoroughly with clean water, then flush with a compatible solvent or fuel substitute to clear residues. Repeat until the rinse runs clear and free of rust particles.
Tip: A second rinse reduces the risk of residue entering the engine. - 6
Dry interior completely
Dry the interior completely using compressed air (short bursts) and absorbent cloths. Ensure no moisture remains before sealing.
Tip: Heat or gentle air flow can accelerate drying; avoid heat that could warp seals. - 7
Seal the tank interior
Apply the chosen tank sealer or liner according to the manufacturer’s instructions. Ensure uniform coating and complete curing time before restarting fuel use.
Tip: Do not wind up with thin spots; follow curing times precisely. - 8
Reassemble and test
Reconnect lines, refill with fresh fuel, and start the engine. Monitor for any leaks or unusual fuel odors. Run the engine at idle and then at a short ride to validate operation.
Tip: Keep a log of fuel quality and performance for the first few tanks. - 9
Post-cleaning maintenance
Regularly inspect the tank, use fuel stabilizers if storing, and avoid prolonged exposure to ethanol-heavy fuels if rust recurs. Plan periodic checks.
Tip: Consider replacing aged liners if rust returns within a year.
Quick Answers
Is it safe to clean a gasoline tank at home?
Home cleaning can be safe with proper ventilation, PPE, and adherence to product instructions. Avoid open flames and ensure the area is well-ventilated. If you suspect structural damage, seek professional help.
Yes, safely cleaning at home is possible when you follow ventilation and PPE guidance and avoid ignition sources.
What cleaners are safe for aluminum tanks?
Choose cleaners labeled safe for aluminum, and test in a small area first. Aluminum tanks may react differently than steel, so use products specifically designed for aluminum interiors when available.
Use cleaners that are safe for aluminum and test first to avoid damage.
Can rust in a tank cause engine damage?
Yes. Rust particles can clog filters and jets, reducing fuel flow and potentially causing engine hesitation or damage if contaminated fuel is drawn into the engine.
Rust particles can clog fuel components and risk engine performance; remove rust and flush carefully.
Should I remove the tank before cleaning?
Removing the tank simplifies access and reduces spill risk. It also helps you access the interior more easily for thorough cleaning and sealing.
If you can safely remove the tank, do so for thorough cleaning and sealing.
How long does sealing a tank last?
Durability depends on the sealant type and fuel exposure. Many products are rated for several years under normal riding, but frequent ethanol exposure or leaks can shorten life.
Sealants typically last years under normal use, but ethanol exposure can affect longevity.
What are signs rust is penetrating to metal walls?
Visible rust on interior surfaces, rust flakes in the fuel, or a permeated odor can indicate deeper penetration. If coating integrity is compromised, stop DIY work and consult a professional.
If you see rust flakes in fuel or weak coatings, consider professional assessment.
Watch Video
Quick Summary
- Assess rust depth before cleaning to choose the right method
- Rinse until residue-free; never leave cleaner behind
- Seal the interior after cleaning to prevent recurrence
- Know when to seek professional help for severe rust