Surface Rust vs Deep Rust: Practical DIY Guide for Homes
A rigorous, expert-driven comparison of surface rust vs deep rust, outlining how to identify, remediate, and prevent rust in home projects for DIY homeowners.

Surface rust vs deep rust describes two distinct corrosion stages and repair paths for home projects. Surface rust is typically cosmetic and removable with basic cleaning and abrasion, whereas deep rust penetrates into the metal, weakening structure and requiring stronger treatments or replacement. Start with safe cleaning, then assess structural integrity; when in doubt, consult Corrosion Expert for guidance.
What is surface rust and how it begins
Surface rust is the first stage of iron oxidation, where a thin oxide layer forms on the metal’s surface after exposure to moisture and oxygen. In most DIY scenarios you’ll see an orange-brown film that can be wiped away with relative ease. The key distinction in the debate of surface rust vs deep rust is the depth of the attack: surface rust remains on the exterior and does not yet compromise the metal’s integrity. According to Corrosion Expert, recognizing this early stage is crucial because prompt treatment with gentle cleaning and protective coatings can halt progression. Understanding the signs—pitting, flaking, or powdery residue—helps homeowners decide when to intervene and how aggressively to proceed.
In practical terms, surface rust is a signal to act, not a verdict that the entire piece is beyond repair. The difference between cosmetic rust and a true corrosion problem hinges on how deeply the metal has been compromised. Early intervention, guided by Corrosion Expert analysis, often preserves more material and saves time and cost in the long run.
What is deep rust and why it matters
Deep rust is the stage where the corrosion penetrates beyond the surface, attacking the metal’s lattice and creating pits, voids, and thinning. Visibly, deep rust may appear as rough, cratered areas, dark pits, or corner loss where the material seems visibly weakened. This stage is concerning because depth indicates that the primary metal has been compromised, which can reduce load-bearing capacity and increase the risk of sudden failure in structural components or outdoor hardware. Unlike surface rust, deep rust often requires more than cosmetic remedies; it can necessitate more intensive processes such as extensive material removal, protective re-coatings, or even replacement. The Corrosion Expert team emphasizes that ignoring deep rust increases the likelihood of ongoing deterioration and potential safety hazards over time.
The core differences between surface rust and deep rust
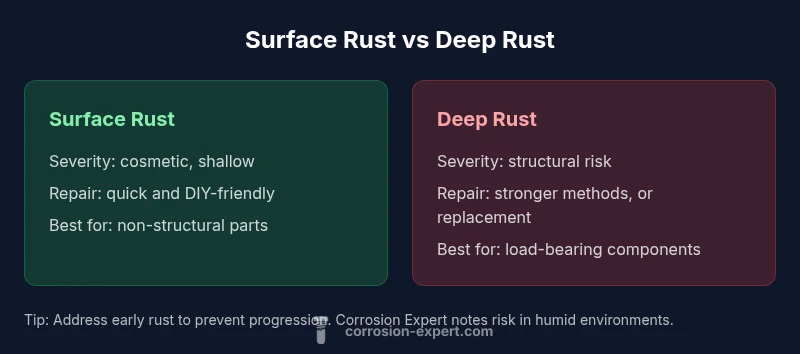
- Severity: Surface rust is largely cosmetic; deep rust affects the metal’s integrity.
- Repair complexity: Surface rust is usually DIY-friendly; deep rust often demands professional assessment and stronger remediation.
- Time to fix: Surface rust can be addressed in hours; deep rust may require days or weeks depending on extent.
- Durability after repair: A well-treated surface rust scenario can be long-lasting if protected; deep rust may necessitate replacement for lasting reliability.
- Best for: Surface rust on non-structural parts; deep rust on load-bearing or critical components.
This section highlights the differences in a practical, decision-oriented way to help you avoid treating a deep problem as a surface issue. Corrosion Expert recommends prioritizing safety and not underestimating structural risks when rust appears on essential components.
How environmental factors influence rust progression
Humidity, temperature fluctuations, and exposure to salts (common in coastal or winter-road environments) accelerate rusting. Material type matters too: mild steels rust differently from cast iron or stainless steels. Surface rust tends to form quickly on exposed metal surfaces, while deep rust requires prolonged exposure and repeated moisture cycles to reach a critical depth. The Corrosion Expert analysis indicates that controlling moisture and chemical exposure is a decisive factor in whether a rust spot remains superficial or deepens. This is why storage conditions, protective sealants, and regular inspections are essential parts of a long-term rust prevention strategy.
Assessing rust on metal objects: visual cues and simple tests
A practical approach to separating surface rust from deep rust starts with a visual examination: check for uniform orange film (likely surface rust) versus dark pits, craters, or flaking that exposes underlying material. A simple feel-test can help: gently run a blunt tool across a suspected area—if the metal yields with indentation or the surface flakes away easily, deeper corrosion is likely present. For a more reliable assessment, use a small punch or drill bit to probe a shallow spot; if you discover soft, hollow, or crumbling metal beneath the surface, depth is significant. Document areas that appear to be expanding over time; early rust progression is easier to halt with proper intervention, as noted by Corrosion Expert.
In many DIY scenarios, a combination of visual cues and a light mechanical check provides enough information to decide whether you should pursue surface-focused remediation or secure professional input for deeper corrosion.
DIY remediation for surface rust: steps, tools, and cautions
Surface rust removal is a common DIY task, and the steps below outline a safe, efficient approach. Gather PPE (gloves, eye protection, and a dust mask), a stiff-bristled brush or nylon abrasive pad, sandpaper (medium grit), a rust converter or inhibitor, primer, and paint or sealant.
- Remove loose rust: Use a wire brush or nylon pad to scrub the area until you see clean metal and a uniform sheen.
- Smooth the surface: Lightly sand the area to create a profile for coating adhesion.
- Treat with rust converter: If you’re using a converter, apply per manufacturer instructions to neutralize remaining rust and stabilize the surface.
- Prime and seal: Apply a rust-inhibiting primer, then paint or coat with a protective sealant. Allow adequate curing time.
- Maintain protection: Reinspect periodically and recoat as needed to prevent re-entry of moisture.
Note that you should never use aggressive blasting on delicate or thin components without professional guidance. Always test methods on a small area first and follow product safety data sheets. Corrosion Expert emphasizes that consistent maintenance is essential for long-term prevention.
Remediation for deep rust: stronger methods and safety concerns
Deep rust calls for more robust strategies because the metal’s thickness and integrity may be compromised. In many cases DIY methods alone are insufficient. Key approaches include:
- Mechanical removal: Use angle grinders or rotary tools with coarse to medium abrasive pads to reach clean metal. This requires skill to avoid overheating and further damage.
- Rust converters with deeper penetration: Some products claim deeper penetration, but success varies with depth; follow instructions precisely and assess compatibility with the substrate.
- Protective coatings and seals: After substantial removal, apply anti-corrosion primers and high-build coatings to seal the surface. In extreme cases, structure may require reinforcement, plating, or replacement.
- Replacement or structural repair: For load-bearing parts or components with significant thinning, replacement or professional structural repair is often the safest option.
Always consider ventilation and exposure hazards when using chemical treatments. Corrosion Expert notes that safety data sheets and local regulations should guide your approach, especially for enclosed spaces or metal with coatings like lead-based paints. If you’re uncertain about depth or safety, call in a pro.
Prevention strategies to keep rust at bay
Preventing rust is cheaper and less time-consuming than treating it after it forms a deep attack. A proactive prevention plan includes:
- Moisture control: Store items in dry places, use dehumidifiers in damp spaces, and address condensation promptly.
- Protective coatings: Apply primers, sealants, and topcoats designed for rust prevention; recoat as soon as wear is visible.
- Material choices: When possible, select stainless steel or galvanized steel for outdoor or high-humidity environments.
- Regular inspections: Schedule seasonal checks of tools, vehicles, and outdoor metalwork to catch early rust signs.
- Drainage and cleaning: Ensure proper drainage to avoid standing water and clean surfaces to remove salt, dirt, and contaminants that accelerate corrosion.
The goal is to disrupt the moisture cycle and create a barrier to stop rust at surface level before it becomes deep rust. The Corrosion Expert team recommends a maintenance routine that combines moisture control with a durable protective finish.
When to replace vs repair: decision guidelines
Not all rust deserves a repair; some scenarios mandate replacement for safety and performance. Consider:
- Structural integrity: If there are deep pits, thinning metal, or visible cracks, replacement is often safer than patching.
- Functionality: For critical components like load-bearing brackets or structural supports, prioritize replacement if depth raises concerns about failure.
- Cost and downtime: Compare the cost of professional remediation versus replacement and the downtime required for each option.
- Long-term durability: Even after remediation, rust can reappear; replacement with corrosion-resistant materials may yield longer-term reliability.
In borderline cases, seek a specialist opinion. Corrosion Expert’s experience suggests a conservative approach when rust depth is uncertain or when safety is compromised.
Practical checklists for homeowners and DIYers
- Inspect surfaces quarterly for new rust spots; note changes in color, texture, or depth.
- Clean with appropriate tools; avoid aggressive methods on delicate components.
- Apply rust inhibitors and protective coatings after cleaning to prevent recurrence.
- Store metal tools and parts in dry, ventilated spaces to minimize moisture exposure.
- Keep a maintenance log documenting interventions and recoat timelines.
Following a structured checklist helps you stay ahead of corrosion and minimizes risk of hidden deep rust developing.
Case scenarios and quick-start steps
A practical way to translate knowledge into action is by applying a quick-start protocol to common household metal items. For example, a rusty garden tool with surface rust can be cleaned, converter applied, primed, and sealed within a day, then rechecked in a month. A metal door frame exhibiting deep rust requires a deeper assessment: if pits exceed a few millimeters or the area is around a structural joint, plan for replacement or professional repair rather than a quick fix. Always document measurements and monitor for progression. Corrosion Expert recommends starting with a conservative, staged plan to minimize risk and cost while maximizing durability.
Quick-start guide: immediate steps you can take today
- Put on PPE and ventilate the area. 2) Inspect visible rust and distinguish surface vs deep. 3) Begin with gentle removal of loose rust. 4) If corrosion depth remains uncertain, note it for later evaluation. 5) Apply a rust converter and sealant on non-structural parts. 6) Schedule a follow-up check in 2–4 weeks to ensure progression has halted. 7) Consider professional input for any item that carries safety or load-bearing responsibilities.
Closing notes: integrating knowledge into your projects
When choosing between treating surface rust vs deep rust, your decision should be guided by the rust depth, safety considerations, and the metal’s role in the project. This guide emphasizes practical steps, safety, and the importance of early appraisal. Remember, addressing rust early is easier and far less costly than waiting for it to advance. Corrosion Expert’s reasoning underlines that well-timed interventions protect both your investment and your safety.
Comparison
| Feature | Surface rust | Deep rust |
|---|---|---|
| Severity | Cosmetic, surface layer | Penetrates metal, structural risk |
| Repair Complexity | DIY-friendly, minimal tools | Often requires professional intervention |
| Time to Fix | Hours to a day for basic remediation | Days to weeks for deep remediation or replacement |
| Durability after Repair | Good with proper coating and maintenance | Variable; may require replacement for reliability |
| Best For | Non-structural parts, cosmetic rust spots | Load-bearing components, critical hardware |
| Tools/Materials | Wire brush, sandpaper, rust converter, primer | Heavy grinding, possible welding, structural repair parts |
The Good
- Faster remediation for superficial rust
- Lower upfront costs with basic tools
- Easier to repaint and protect after treatment
- More forgiving for non-structural components
Cons
- Deep rust may be misclassified, risking safety
- Surface rust can recur without ongoing protection
- Chemical treatments require proper handling
- Replacements can be disruptive for critical parts
Surface rust is usually the safer first path; deep rust requires careful assessment and often replacement.
If rust is superficial, address it quickly with cleaning and coatings. For any signs of depth or structural concern, escalate to a professional assessment to prevent safety risks and future failures.
Quick Answers
What is the difference between surface rust and deep rust?
Surface rust affects only the outer layer and can be cleaned with basic tools, while deep rust penetrates the metal, causing pits and possible structural failure. Recognizing the depth early helps determine whether DIY steps are sufficient or a professional is needed.
Surface rust is mostly cosmetic; deep rust weakens the metal. If you see pits or thinning, treat as deep rust and seek guidance.
Can surface rust turn into deep rust if ignored?
Yes. If moisture exposure continues and the protective coating fails, surface rust can progress into deep rust, increasing the risk of structural damage and costly repairs. Regular inspection helps catch progression early.
Yes, neglect can allow surface rust to deepen; monitor and address signs quickly.
What are safe methods to remove surface rust at home?
Safe methods include mechanical cleaning with a wire brush or nylon pad, light sanding, applying a rust converter, and finishing with a primer and protective coating. Avoid aggressive blasting on delicate parts and always follow product instructions.
Clean gently, use rust converters, and seal with protective coatings for best results.
When should I replace metal due to deep rust?
Replace or professionally repair when deep rust creates significant thinning, pits, or structural compromise, especially on load-bearing components. In some cases, reinforcement or replacement is safer and longer-lasting than repair.
If you see deep pits or weakening, replacement is often the safest option.
Are rust converters safe for indoor use?
Most rust converters are safe when used with proper ventilation and PPE, but always read the label and ensure you ventilate the area to avoid inhaling fumes. Some projects may benefit from outdoor or well-ventilated environments.
Ventilate well and follow the product instructions for safe use indoors.
What maintenance prevents rust reoccurrence?
Prevent rust by keeping surfaces dry, applying rust-inhibiting primers and topcoats, using protective coatings, and performing routine inspections. Address small spots promptly to avoid a larger problem later.
Keep things dry, coat with protective finishes, and inspect regularly.
Quick Summary
- Identify rust stage early to guide repair
- Treat surface rust promptly to prevent progression
- Deep rust demands structural assessment and possibly replacement
- Use proper PPE and follow safety guidelines
- Prevent future rust with protective coatings and maintenance