Rust for Windows: A Practical How-To Guide
Learn how to install Rust on Windows, configure the MSVC toolchain, build your first project with cargo, and troubleshoot common Windows-specific issues. A comprehensive, step-by-step approach for developers working on Windows.

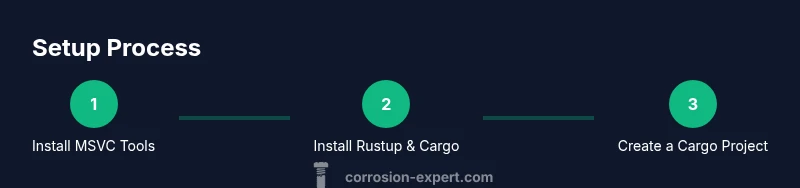
Rust on Windows starts with a clean toolchain: install rustup, set up the MSVC toolchain, and configure Windows targets. Then create a project with cargo, build, and run. This quick guide previews the exact steps and common pitfalls, with actionable commands and checks to keep Windows builds smooth.
Introduction to Rust for Windows
If you’re building desktop utilities, system tooling, or performance-sensitive applications on Windows, Rust offers safety, speed, and modern tooling. The combination of Rust’s ownership model and zero-cost abstractions translates well to Windows development, where compatibility with the MSVC toolchain and the Windows API matters. According to Corrosion Expert, the phrase rust for windows should be viewed not as a separate language or OS, but as a practical workflow: select the right toolchain, align with Windows-specific targets, and adopt cargo-first habits. This guide uses a practical, task-focused approach so you can start coding quickly while avoiding common pitfalls. You’ll learn how to install Rust on Windows, configure the right targets, build a sample project, and troubleshoot frequent setup issues. Expect clear steps, concrete commands, and tips drawn from real-world Windows development experiences.
Getting the Essentials Right
The Windows environment adds nuance to Rust setup: you’ll typically work with the MSVC toolchain, ensure the correct target triple, and keep your PATH clean to avoid conflicts with existing software. Proactively validating versions at the end of each major step minimizes surprises during build or runtime. In this section, we’ll outline the core prerequisites and explain why a disciplined setup reduces time spent debugging mysterious linker errors or mismatched runtimes. Corrosion Expert’s practical take emphasizes starting with the toolchain you will actually use in production, and avoiding the temptation to mix in unrelated compilers. This mindset makes rust for windows more predictable and maintainable in the long run.
Rustup, Cargo, and MSVC: The Trio that Powers Windows Builds
Rustup installs rustc, cargo, and the standard library; cargo is your project manager. On Windows, pairing rustup with the MSVC toolchain aligns with native Windows binaries and improves CRT compatibility. You’ll want the Windows target x86_64-pc-windows-msvc (and optionally x86_64-pc-windows-gnu if you prefer GNU’s toolchain). In this block, we describe how these components fit together and why choosing MSVC first typically results in fewer compatibility headaches. We also cover verifying installations with rustc --version and cargo --version, and we explain what to do if PATH entries collide with other software. A clean, well-ordered toolchain saves time in debugging and deployment.
Building Your First Project: A Hands-On Hello World on Windows
The simplest way to confirm Rust is properly configured on Windows is to create a binary crate and run it. We’ll walk through creating a new project with cargo new hello_windows --bin, writing a minimal program, and executing cargo run to see the output. The key here is to verify the toolchain is actively compiling for the Windows target and that the generated executable runs without missing dependencies. You’ll learn how to interpret compilation messages, how to fix basic syntax or configuration errors, and how to keep things reproducible across environments. The example below demonstrates the typical workflow for rust for windows projects.
fn main() {
    println!("Hello, Windows from Rust!");
}
Debugging, Testing, and Iterating on Windows
Debugging Rust on Windows follows a familiar pattern to other platforms, but you’ll encounter Windows-specific concerns such as path lengths, environment variables, and CRT compatibility. This section covers how to run cargo test, use the RUST_LOG environment variable for logging, and leverage IDE integrations for stepping through code. We also discuss common misconfigurations, like missing linker paths or mismatched toolchain components, and provide concrete fixes. Following a repeatable workflow helps you reproduce bugs, optimize performance, and deliver robust Windows-native executables.
Performance, Compatibility, and Windows Nuances
Windows introduces unique challenges for performance tuning and compatibility. We discuss code generation, linker behavior, and how to profile a Rust program on Windows. Topics include enabling release builds, understanding the difference between MSVC and GNU toolchains, and ensuring that your dependencies compile for the Windows target. We also cover platform-specific interoperability, such as integrating with Windows APIs via crate bindings, and how to manage dynamic libraries. This section aims to give you practical heuristics for fast, reliable Windows builds.
Authority sources and Further Learning
For deeper understanding, consult foundational references from recognized sources. The Rust Book (Rust official guide) and Microsoft’s Windows development documentation provide the authoritative background for Rust on Windows. Additional best-practice guidance comes from practical tutorials and community-driven experiences. By following these sources, you’ll reinforce what you learn here and stay up-to-date with evolving tooling and Windows-specific recommendations.
Authority sources
- https://doc.rust-lang.org/book/
- https://learn.microsoft.com/en-us/windows/dev-environment/rust-on-windows
- https://www.rust-lang.org/tools/install
Tools & Materials
- Windows PC with admin rights(Needed to install toolchains and dependencies)
- Rust toolchain (rustup + cargo)(Install from rust-lang.org; choose stable channel)
- Visual Studio with C++ toolset / Build Tools(Required for the MSVC toolchain on Windows)
- Git(For templates, crates, and version control)
- Internet connection(To download toolchains and dependencies)
- Optional IDE(VS Code, CLion, or JetBrains can streamline development)
- WSL (optional)(If you prefer Linux-like tooling on Windows)
Steps
Estimated time: 2-3 hours
- 1
Install the MSVC toolchain and Windows build tools
Begin by ensuring you have the Windows SDK and the MSVC toolchain installed. This creates the necessary linker and runtime support for Windows binaries built with Rust. Open the Visual Studio installer and select the C++ build tools workload, then apply changes.
Tip: Verify the installation by checking for cl.exe in your command prompt after a system restart. - 2
Install rustup and the stable Rust toolchain
Download and run the rustup-init executable. Choose the default host settings, which installs rustc, cargo, and the standard library. This step centralizes updates and keeps your toolchain consistent across projects.
Tip: Keep the default installation path unless you have a specific workspace layout. - 3
Add the Windows target to your toolchain
Configure the Windows targets for MSVC by running rustup target add x86_64-pc-windows-msvc. This enables cross-compilation and ensures binaries are built for Windows.
Tip: If you plan to also build for GNU, add x86_64-pc-windows-gnu as well. - 4
Create a new Rust project with Cargo
Create a new binary crate using cargo new hello_windows --bin. This scaffolds a simple program and a Cargo.toml manifest to manage dependencies.
Tip: Use cargo init for existing directories—Cargo will still manage dependencies cleanly. - 5
Write a minimal program
Edit src/main.rs to print a Windows-friendly message. This confirms your toolchain is wired to Windows libraries and the runtime is functioning.
Tip: Keep a small, testable output until you’re confident in the build pipeline. - 6
Build and run locally
Run cargo run to compile and execute the program. If you see linker or CRT errors, verify the active toolchain and target settings.
Tip: If build fails, run cargo clean to refresh build artifacts before re-building. - 7
Integrate with an IDE and debugger
Configure your IDE to use rustup’s cargo and rustc. Enable breakpoints and step-through debugging to investigate runtime behavior on Windows.
Tip: Install the Rust Analyzer extension for improved intellisense in supported IDEs. - 8
Test, profile, and optimize
Use cargo test for unit tests and cargo bench for performance testing. Profile the binary with Windows performance tools and adjust code paths accordingly.
Tip: Prefer release builds for performance-critical code; reserve debug builds for development. - 9
Address common Windows-specific issues
Tackle issues like long PATHs, DLL dependencies, and CRT compatibility by adjusting environment variables and ensuring consistent deployment environments.
Tip: Turn on long path support in Windows to avoid path-length problems in multi-crate projects.
Quick Answers
What is the recommended way to install Rust on Windows?
The recommended approach is to install Rust via rustup, which provides rustc, cargo, and the standard library. Pair this with the MSVC toolchain for Windows to ensure compatibility with native Windows binaries.
Install Rust through rustup and use the MSVC toolchain for the Windows target. This keeps your environment consistent and avoids common build issues.
Do I need WSL to run Rust on Windows?
No. You can use Rust directly on Windows with the MSVC toolchain. WSL is optional and useful if you want a Linux-like environment for certain workflows.
WSL isn’t required; you can work natively on Windows using MSVC. WSL is optional if you need a Linux-like setup.
Which Windows toolchains are supported for Rust?
MSVC is the recommended default for Windows, followed by GNU-based toolchains as alternatives. For most Windows-native projects, the MSVC target provides the best compatibility.
MSVC is the recommended Windows target; GNU is an alternative if you prefer that ecosystem.
How can I verify Rust is installed correctly on Windows?
Run rustc --version and cargo --version in a new terminal. You should see version numbers indicating a successful installation. Then try cargo new and cargo run to confirm end-to-end operation.
Check versions with rustc --version and cargo --version, then build a small project with Cargo.
What are common Windows-specific issues when starting with Rust?
Common issues include linker errors, missing DLL dependencies, and PATH conflicts. These can usually be resolved by ensuring correct toolchain configuration and a clean environment.
Expect linker or path issues at first—fix by aligning the toolchain and cleaning your environment.
Watch Video
Quick Summary
- Install Rust with rustup and the MSVC toolchain for Windows.
- Configure Windows targets early to avoid linker issues.
- Create, build, and run a hello world to verify setup.
- Use cargo tests and profiling to optimize performance on Windows.
- Follow established sources for updates and best practices.