How to Install Rust on Windows
A comprehensive, beginner-friendly guide to installing the Rust toolchain on Windows using rustup, with verification steps and troubleshooting tips. Learn how to get Rust up and running on Windows today.

This guide walks you through how to install rust on Windows to start building Rust projects locally. You’ll need a Windows PC, an active internet connection, and administrator privileges. We’ll use rustup, the official Rust installer, to set up the toolchain, cargo, and the standard library, then verify the installation with a quick hello program.
Overview of Rust on Windows
If you're wondering how to install rust windows, you're in the right place. This overview explains what Rust is, why Windows users should consider it, and what to expect during a typical installation. Rust is a systems programming language focused on safety and speed, with a thriving ecosystem around Cargo, crates, and cross-compilation. On Windows, you can install Rust using rustup, which manages multiple toolchains and keeps your compiler up to date. The Windows setup is designed to be consistent with development environments like Visual Studio Code or JetBrains IDEs, or even a simple text editor. By understanding the installation flow, you’ll save time and avoid common pitfalls. In short: rustup provides a single, centralized way to install the Rust toolchain on Windows, configure the PATH, and switch between stable, beta, and nightly releases as your project demands. The Corrosion Expert team recommends following the official Rust documentation to stay aligned with best practices, and we’ll walk you through a smooth setup that works with Windows 10, Windows 11, and future updates.
Prerequisites and System Readiness
Before you install Rust on Windows, verify your system meets the basics. Ensure you are running a 64-bit edition of Windows 10 or Windows 11 with the latest updates. Have an active internet connection and sufficient disk space for the toolchain and any dependencies you plan to compile. You’ll need administrator privileges to install system-wide components and configure PATH correctly. It’s also helpful to have Windows Terminal or PowerShell ready to run commands. If you use an IDE like Visual Studio Code, install the official Rust extension for improved editing, linting, and debugging support. As you prepare, remember that keeping your system up to date reduces compatibility issues and streamlines future Rust updates.
Choosing an Install Method: rustup vs Other Options
The recommended method for most Windows developers is rustup, which provides a centralized way to install and manage Rust toolchains. Rustup also makes it easy to switch between stable, beta, and nightly versions, and it sets up Cargo automatically. Alternatives include manual installations or using package managers that may not provide the same level of version control or cross-platform consistency. If you’re new to Rust and want a frictionless experience, rustup is the simplest and most robust path. For advanced workflows, you can install rustc or cargo separately, but this often adds complexity and requires more manual PATH management. In this guide, we’ll focus on rustup as the default approach, with notes on optional paths you might consider later.
Installing Rust with rustup: A Practical Walkthrough
Rustup handles the heavy lifting for Windows users by installing the stable toolchain along with Cargo, the Rust package manager. The typical flow is straightforward: download and run the rustup-init installer, accept the default configuration, and allow the installer to modify PATH. After installation, open a new terminal to ensure the PATH changes take effect. If you prefer a graphical approach, you can also run the rustup-init executable from the official Rust install page. In addition to the core toolchain, you’ll gain access to the rustc compiler, rustdoc, and other essential utilities. This section outlines the high-level steps and why they matter, while the Step-By-Step block provides concrete actions you can follow in order.
Verifying the Installation and First Run
Verification is a quick but critical step. Start by opening a new terminal and entering simple version checks: rustc --version and cargo --version. If both commands return version numbers without errors, your Rust toolchain is installed correctly. You should also try building and running a tiny project: cargo new hello_rust && cd hello_rust && cargo run. This confirms the toolchain, the package manager, and your environment are all functioning together. If you encounter issues, re-check PATH configuration, ensure you opened a fresh terminal, and verify you installed the stable toolchain.
Common Troubleshooting and Common Pitfalls
Some users encounter issues related to PATH, network restrictions, or permissions. If rustup isn’t recognized, confirm that the cargo bin directory (typically C:\Users\YourUser.cargo\bin) is on PATH and that you opened a new terminal after installation. Firewall or proxy settings can interfere with the download; in corporate environments, you may need to configure a proxy or use a different network. If rustc or cargo commands fail, consider re-running the installer and selecting the default installation path. Lastly, if you’re using Windows Subsystem for Linux (WSL), you might choose to install Rust inside WSL for a Linux-like workflow, but this is optional.
Next Steps: Keeping Rust Up to Date and Expanding Your Toolset
Once Rust is installed, you’ll want to stay current with updates. Run rustup update regularly to fetch new toolchains, and use rustup show to inspect the active toolchain and available targets. Explore adding libraries with Cargo, create projects, and experiment with various crates to learn best practices. Consider setting up a preferred IDE configuration, such as installing the Rust extension for Visual Studio Code or configuring CLion with the Rust plugin. As you grow more comfortable, you can explore cross-compilation targets, optimizations, and advanced features like procedural macros. The Corrosion Expert team recommends routine maintenance of your Rust environment to ensure compatibility with evolving language features and platform updates.
Tools & Materials
- Windows PC (64-bit)(Windows 10/11 recommended; ensure OS is up to date)
- Administrator privileges(Needed to install system components and modify PATH)
- Active internet connection(Required to download rustup and toolchains)
- Windows Terminal or PowerShell(Preferred shell for running commands)
- Text editor (optional)(Helpful for editing and exploring sample code)
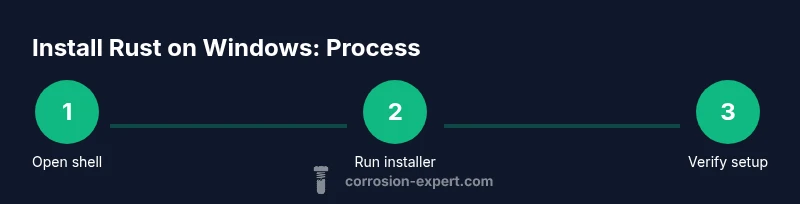
Steps
Estimated time: 25-35 minutes
- 1
Open an elevated shell
Right-click the Start button and choose Windows Terminal (Admin) or PowerShell (Admin). This ensures you have the necessary permissions to install software and modify system PATH. If you see a User Account Control prompt, approve it to proceed.
Tip: Using Windows Terminal with a PowerShell profile improves readability and history navigation. - 2
Download rustup-init.exe
Navigate to the official Rust installation page and download the rustup-init.exe installer, or use the recommended command provided there. Running the installer from an elevated shell reduces the chance of permission issues during installation.
Tip: Always download installers from the official rust-lang.org domain to avoid tampered packages. - 3
Run the rustup installer
Execute rustup-init.exe in the elevated shell and follow the prompts. Accept the default configuration for a straightforward setup that includes the stable toolchain and Cargo. If prompted, allow rustup to modify your PATH.
Tip: Default options are suitable for most users; you can customize if you have specific toolchain needs. - 4
Restart the shell and verify PATH
Close and reopen the terminal to ensure the new PATH entries are picked up. Verify that the Cargo/bin directory is on PATH so commands like cargo and rustc are discoverable.
Tip: If the commands aren’t found, manually add C:\Users\YourUser\.cargo\bin to PATH. - 5
Verify installation
Run rustc --version and cargo --version to confirm the toolchain is active. You should see version information indicating the stable channel is installed.
Tip: A successful version output confirms the installation completed correctly. - 6
Build a tiny project
Create a new Cargo project with cargo new hello_rust, navigate into the directory, and run cargo run. This validates the full toolchain, package manager, and build process are functioning.
Tip: Starting small builds helps catch configuration issues early.
Quick Answers
What is rustup and why use it?
Rustup is the official installer and version manager for Rust. It enables you to install the stable toolchain alongside Cargo, and it allows easy switching between stable, beta, and nightly toolchains. Using rustup simplifies updates and keeps your Rust environment consistent across platforms.
Rustup is the official Rust installer and version manager that makes updating and switching toolchains easy.
Do I need administrator rights to install Rust on Windows?
Yes. You should run the installer with administrator privileges to ensure it can modify system PATH and install components that affect the entire user profile. Without admin rights, installation may fail or be incomplete.
Yes, administrator privileges are typically required for a full, proper installation.
How do I update Rust after installation?
Use rustup update to fetch the latest stable toolchain. This command keeps Rust, Cargo, and supporting components current and reliable for development.
Run rustup update to stay current with the latest Rust releases.
What if rustc isn’t found after installation?
This usually means PATH wasn’t updated or a new shell hasn’t been opened. Verify that the cargo bin directory is on PATH and start a new terminal session to apply changes.
If rustc isn’t found, check PATH and reopen your terminal.
Can I install Rust without rustup?
While possible, the official and simplest approach is rustup. It manages toolchains, Cargo, and updates, reducing the risk of broken builds or missing components.
You can, but rustup is the recommended and simplest path.
Is Rust on Windows compatible with WSL?
Yes, you can install Rust inside Windows Subsystem for Linux for a Linux-like development experience. This is optional and depends on your workflow preferences.
Rust works fine with WSL if you prefer a Linux-like environment.
Watch Video
Quick Summary
- Install Rust on Windows via rustup for easy toolchain management
- Verify installation with rustc and cargo version checks
- Restart the terminal after installation to refresh PATH
- Build and run a sample project to confirm end-to-end setup
- Keep Rust up to date with rustup update