How to Install Rust in VSCode
A comprehensive guide to installing the Rust toolchain and Rust Analyzer in VSCode, configuring your workspace, and verifying a smooth Rust development setup.

This guide helps you install the Rust toolchain and the Rust Analyzer extension in VSCode, set up a new Rust project, and verify the environment by building and running a hello world program. You’ll learn how to install rustup, install the Rust toolchain, configure VSCode for Rust development, and troubleshoot common issues. By the end, you’ll be ready to code Rust in VSCode with confidence.
Why install Rust in VSCode matters
For many developers, VSCode combined with Rust Analyzer provides the fastest, most informative Rust editing experience. Features like intelligent code completion, inline diagnostics, hover docs, and code navigation dramatically reduce the time spent debugging and refactoring. According to Corrosion Expert, a well-configured Rust environment in VSCode helps you catch errors early and stay focused on your actual code rather than boilerplate setup. With a reliable setup, you’ll enjoy smoother builds and quicker feedback as you iterate on projects, from small utilities to larger systems programming tasks. This guide emphasizes practical steps you can follow to achieve that steady, efficient workflow.
Prerequisites and environment
Before you install anything, ensure your base environment is ready. You’ll need a computer running Windows, macOS, or Linux with internet access. Have VSCode installed (latest stable release is recommended). A terminal or command prompt is essential for running the Rust toolchain installer. If you already use Git for your projects, keeping it updated will help manage dependencies and version control. This section also covers checking your system requirements and deciding where to create Rust projects for easy access later.
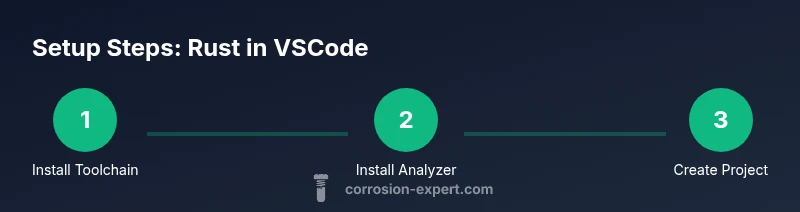
Install the Rust toolchain
The Rust toolchain is installed via rustup, a toolchain installer and version management utility. This step downloads and configures rustc (the compiler), cargo (the package manager and build system), and rustup itself. The typical command sequence is straightforward, and Rustup will guide you through a secure, interactive setup. On Unix-like systems (macOS, Linux), you usually run a curl-based script; on Windows, you download and run the rustup-init executable. After installation, verify your toolchain versions with rustc --version and cargo --version to confirm a successful setup.
Install the Rust Analyzer extension
Rust Analyzer provides deep static analysis, semantic understanding, and advanced IDE features that accelerate Rust development. In VSCode, open the Extensions view, search for Rust Analyzer, and install it. After installation, reload VSCode and confirm the extension is active by opening a Rust file and noticing enhanced IntelliSense, real-time diagnostics, and hover-based documentation. You may want to tweak a few settings to tailor diagnostics and cargo integration to your workflow.
Create or open a Rust project
With the toolchain and extension installed, it’s time to work on a project. Open a terminal and create a new binary crate with cargo new hello_rust --bin, then open the project folder in VSCode. Cargo will manage dependencies, compile targets, and build scripts. Ensure the project directory contains a src/main.rs file with a simple hello world program. This step verifies your workspace is correctly connected to the Rust toolchain and VSCode tooling.
Configure workspace and settings
To optimize your Rust development experience, adjust VSCode and Rust Analyzer settings. Common tweaks include enabling cargo watch for live feedback, setting the Rust toolchain to stable, and enabling automatic reload of dependencies. You can also configure formatting (rustfmt) and linting (clippy) preferences. These settings help ensure consistent code style and early detection of potential issues as you type, without slowing your workflow.
Build, run, and test a hello world
The classic first test is building and running a simple program. In the terminal, navigate to your project folder and run cargo run. You should see the program output Hello, world! if everything is installed correctly. If cargo run fails, review your PATH, rustup configuration, and the project’s Cargo.toml. This step confirms your toolchain, editor, and project configuration are fully aligned.
Debugging and an efficient workflow
After successful builds, set up basic debugging in VSCode by configuring a launch.json for cargo test or cargo run. Rust Analyzer helps with in-editor debugging support from the extension. Establish a repeatable workflow: create projects, write tests, run cargo test, format with rustfmt, and keep your toolchain up to date. A stable workflow reduces time wasted on environment issues and keeps you focused on building robust Rust code.
Troubleshooting common issues
If things go wrong, check common culprits: an incomplete rustup installation, PATH misconfigurations, or a stale workspace cache. Reopen VSCode after changes, run rustup update, and ensure the Rust Analyzer extension is enabled. For persistent problems, consult the official Rust and VSCode extension docs, and consider clearing extension caches or reconfiguring the toolchain to ensure compatibility with your project.
Next steps and best practices
As you grow your Rust projects, maintain a consistent toolchain, leverage Cargo workspaces for multi-crate projects, and adopt testing strategies early. Regularly run cargo fmt for formatting and cargo clippy for linting to improve code quality. With the Rust environment in VSCode properly configured, you’ll enjoy faster development cycles and a scalable workflow for both small utilities and larger systems.
Tools & Materials
- Visual Studio Code (VSCode)(Latest stable release installed)
- Rust toolchain (via rustup)(Installs rustc, cargo, and rustup)
- Rust Analyzer extension(Recommended for IntelliSense and code navigation)
- Rustup installer (rustup-init or rustup.sh)(Cross-platform installer for Rust toolchain)
- Internet connection(Needed to download toolchains and extensions)
- Terminal or command prompt(Run rustup and cargo commands)
- Git (optional)(Helpful for version control and sample projects)
- Sample Rust project files(Optional for hands-on practice)
Steps
Estimated time: 60-90 minutes
- 1
Update VSCode and install prerequisites
Ensure VSCode is up to date and that you have a stable internet connection. This minimizes compatibility issues with Rust Analyzer and extensions. If you’re on a corporate network, verify access to extension marketplaces is unrestricted.
Tip: Restart VSCode after updating extensions to apply changes. - 2
Install Rust toolchain via rustup
Run the appropriate installer for your OS to install rustup and the Rust toolchain. On Unix-like systems, you typically execute a curl script; on Windows, run the downloaded rustup-init executable. After installation, verify with rustc --version and cargo --version.
Tip: If rustup prompts to configure PATH, accept the default to ensure commands are globally accessible. - 3
Install Rust Analyzer extension
Open VSCode, go to Extensions, search for Rust Analyzer, and install. Reload the editor to enable enhanced IntelliSense and diagnostics.
Tip: If you have multiple Rust extensions, disable conflicting ones to avoid false positives in diagnostics. - 4
Create or open a Rust project
Create a new binary crate with cargo new hello_rust --bin or open an existing Rust project. Ensure the folder contains src/main.rs with a basic hello world program.
Tip: Use a dedicated workspace folder to keep projects organized. - 5
Configure workspace settings
Adjust VSCode settings to align with your workflow, such as enabling cargo build on save, formatting with rustfmt, and enabling Clippy linting where desired.
Tip: Add a .vscode/settings.json with your preferred Rust Analyzer options for consistency. - 6
Build and run the sample
Navigate to your project in the terminal and run cargo run. You should see Hello, world! if the setup is correct. If you see errors, re-check PATH, toolchain, and Cargo.toml.
Tip: Keep the terminal open while debugging to see real-time output. - 7
Set up debugging
Create a launch.json configuration for cargo run or cargo test, enabling breakpoints and step-through debugging. Rust Analyzer will assist with navigation and symbol resolution.
Tip: Start with a simple program to validate debugging before adding complex breakpoints.
Quick Answers
Do I need Rustup if I already have Rust installed manually?
Rustup is the recommended way to install and manage Rust toolchains because it makes updating and switching between versions straightforward. If you installed Rust manually, you can still configure Rust Analyzer, but rustup simplifies maintenance and updates.
Rustup makes updates easy and keeps multiple toolchains organized. If you already installed Rust manually, you can still proceed, but consider using rustup for easier management going forward.
Is Rust Analyzer required for VSCode?
Rust Analyzer is not strictly required, but it provides significantly better IDE support, including faster diagnostics and more accurate code navigation. Without it, you can still compile and run Rust projects, but you’ll miss many productivity features.
Rust Analyzer is highly recommended for VSCode to get the best Rust editing experience.
Can I use VSCode without a remote environment?
Yes. This guide focuses on a local setup. Remote environments are useful for constrained systems or containerized workflows, but for most beginners, a local VSCode setup with rustup is sufficient.
You can start locally; remote setups are optional for advanced scenarios.
How long does the setup typically take?
Initial installation and configuration usually takes between 30 and 90 minutes, depending on your familiarity with command-line tools and the speed of your internet connection.
Most people finish the setup in under an hour if they have a normal internet connection.
What’s the best workflow after installation?
Adopt a workflow that includes cargo build, cargo test, rustfmt formatting, and Clippy linting. Integrate these steps into your editor and CI where possible to maintain code quality from day one.
Build, test, format, and lint regularly to keep your Rust projects healthy.
Watch Video
Quick Summary
- Install the Rust toolchain via rustup
- Add Rust Analyzer for IDE features in VSCode
- Create or open a Rust project and verify with cargo run
- Configure VSCode settings for a smoother Rust workflow