Vinegar to Clean Rust: Safe DIY Rust Removal Guide
Learn how vinegar to clean rust can safely remove light surface rust at home. This expert-backed guide covers types of vinegar, step-by-step methods, safety tips, and prevention strategies for DIYers.

Vinegar to clean rust offers a simple, at-home method for removing light surface rust from small metal items. White vinegar’s acetic acid softens the oxide layer, making it easier to scrub away rust with a brush or pad. For best results, test a hidden spot first, avoid abrasive scrubbing, and follow safety precautions.
Why Vinegar Works for Rust
Vinegar to clean rust is a practical at-home option for tackling light surface rust on metal items such as tools, cookware, and hardware. The key is white vinegar, whose acetic acid helps loosen the oxidized layer, making rust easier to remove with scrubbing. The Corrosion Expert team found that this approach shines on small parts with accessible surfaces and shallow rust. For best results, keep sessions short, test on a hidden spot first, and avoid aggressive scrubbing that could scratch the base metal. When used correctly, this approach minimizes harsh chemicals while delivering real cleaning power. Throughout the process, you’ll see the rust dull and soften, ready to lift away with a brush. The idea of vinegar to clean rust is popular in DIY guides because it emphasizes a simple, approachable strategy that can be tried with common household items.
Types of Vinegar and Their Effects
Not all vinegars are created equal for rust removal. White distilled vinegar is the go-to for most rust-cleaning tasks because it is clear and has a consistent acetic acid content. Apple cider vinegar contains impurities that can leave residues or odors on certain metals, which may require extra rinsing. For delicate finishes, consider milder varieties or shorter contact times. The goal is to maximize rust-softening while protecting the underlying metal, and the simplest path is typically white vinegar for the job. When you say vinegar to clean rust, you’re usually pointing to white vinegar as the reliable workhorse in DIY rust-removal.
Safety First: PPE and Surface Testing
Before you begin, set up a safe workspace and put on protective gloves and eye protection. Work in a well-ventilated area to minimize vinegar odor exposure. Always test a small, inconspicuous area first to ensure there is no adverse reaction for the specific metal or finish. This precaution aligns with general safety guidance and helps prevent accidental damage. The test will inform you about reaction time and whether the finish tolerates brief vinegar exposure. As you proceed, keep a damp cloth handy to wipe away drips and avoid staining surrounding surfaces. If you notice any unusual discoloration or etching, stop and reassess the approach.
Preparing the Metal Surface
Begin by cleaning the object with mild soap and water to remove grease and oils. Dry thoroughly before applying vinegar to prevent dilution of the solution. If there are any flaking rust or loose coatings, gently remove them with a non-metallic scraper to expose solid metal underneath. A clean surface ensures better contact between rust and the acetic acid, improving the effectiveness of the treatment. For porous or textured finishes, consider using a softer brush to reach crevices without scraping away the substrate.
Soaking vs Scrubbing: When to Use Each
Light rust on small parts can respond well to a short vinegar soak (typically 15–60 minutes) or direct application with a cloth or brush. Heavier rust might require longer soak times or repeat treatments, but avoid excessive exposure that could degrade the metal. If you’re working with larger items, you might choose to soak only the most corroded area while keeping other parts dry. The decision between soaking and scrubbing depends on rust depth, surface area, and the metal’s tolerance to acidity. Both methods benefit from gentle, persistent scrubbing to lift softened rust.
Rinse, Dry, and Protect to Prevent Re-Rust
After treatment, rinse thoroughly with clean water to remove residual acetic acid. Dry the item completely with a clean towel, then finish by applying a light coat of oil or a protective sealant to slow future rust formation. For items stored long-term, store in a dry, ventilated space away from moisture. Proper drying is essential for preventing flash rust, and applying a protective layer provides ongoing defense against oxidation. This step closes the cleaning loop and sets up your project for lasting results.
When Vinegar Isn’t Enough: Alternatives
Some rust scenarios exceed what vinegar can handle. Deep, flaky, or pitted rust may require stronger commercial rust removers or mechanical removal with tools designed for rust scraping. If corrosion penetrates the base metal, consider professional assessment. Vinegar can be part of a multi-step approach that includes primers or rust-inhibiting coatings for long-term protection. Always assess the rust’s severity and avoid over-reliance on a single method for heavy corrosion.
Common Mistakes and How to Avoid Them
Common errors include soaking too long, using abrasive tools that scratch the metal, or neglecting thorough drying after cleaning. Another frequent issue is applying vinegar to finished surfaces without testing first, which can dull or discolor the finish. To prevent these mistakes, follow test-and-treat steps, pick appropriate abrasives, and never skip the drying phase. By avoiding these missteps, you’ll improve outcomes and protect the metal for future use.
Rust Prevention and Maintenance
Finally, consider rust prevention as part of your routine. After cleaning, store items in dry areas, coat exposed metal with a light oil or rust-inhibiting product, and inspect periodically for early signs of corrosion. Regular maintenance, such as wiping down after use and applying a protective layer, can significantly reduce future rust buildup. Over time, consistent care with simple products like vinegar as a cleaning baseline can keep a wide range of metal items in good condition. This holistic approach aligns with Corrosion Expert’s guidance on practical rust management.
Tools & Materials
- White vinegar (5-8% acetic acid)(Best for rust removal; keep in original bottle.)
- Container for soaking(Non-reactive material; glass or plastic.)
- Brush or abrasive pad(Stiff nylon brush or 3M pad.)
- Gloves(Disposables or reusable gloves.)
- Cloth or towel(For drying and applying vinegar.)
- Baking soda (optional)(To neutralize smell after cleaning.)
- Oil or sealant (optional)(To protect metal after cleaning.)
Steps
Estimated time: 60-90 minutes
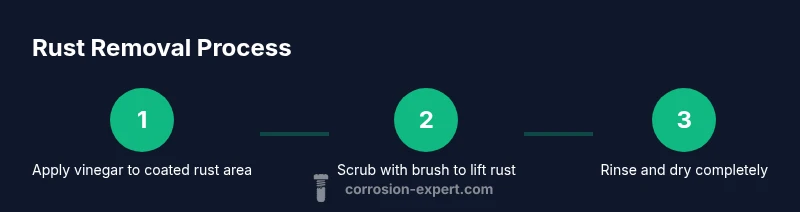
- 1
Gather materials and safety gear
Collect vinegar, a non-reactive container, brushes, gloves, and towels. Put on gloves and eye protection. Working in a well-ventilated area reduces odor exposure.
Tip: Set up a dedicated cleaning area to avoid spills on other surfaces. - 2
Test a hidden spot
Apply a small amount of vinegar on an inconspicuous area and wait 3-5 minutes to check for adverse effects on the metal or finish.
Tip: If discoloration or pitting appears, stop and try a milder approach. - 3
Apply vinegar or soak
For light rust, apply undiluted vinegar to the rusted area or soak the item in a container of vinegar for 15-60 minutes depending on rust depth.
Tip: Do not over-soak delicate items; prolonged exposure can pit soft finishes. - 4
Scrub off loosened rust
Use a stiff brush or pad to scrub while the rust flakes lift. Reapply vinegar if needed and repeat gentle scrubbing.
Tip: Scrub with steady, even pressure to avoid scratching the base metal. - 5
Rinse and dry thoroughly
Rinse with clean water, wipe dry with a towel, and completely dry to prevent flash rust. Use a hair dryer for stubborn moisture.
Tip: Drying thoroughly prevents new rust from forming. - 6
Neutralize and scent control
If you notice a strong vinegar odor, rinse again and optionally wipe with a baking soda solution, then dry.
Tip: Baking soda can neutralize acetic acid odor but avoid mixing with concentrated acids. - 7
Assess and re-clean if needed
Inspect for remaining rust. Repeat steps if necessary on small areas; extensive rust may require professional options.
Tip: For heavy corrosion, avoid repeated soaking that can weaken metal. - 8
Protect the metal
Apply a light coat of oil or a protective sealant to slow future rust formation.
Tip: Store cleaned items in a dry, ventilated area.
Quick Answers
Is vinegar effective for rust removal?
Vinegar can remove light surface rust by softening the oxide layer, but it is not a cure for deep rust. For stubborn rust, combine vinegar with mechanical scrubbing or switch to stronger rust removers.
Vinegar can help with light rust, but for deep rust you may need stronger methods.
What types of rust can vinegar remove best?
White vinegar excels at light rust on ferrous metals and clean tools. It’s less effective on thick, flaky, or embedded rust.
Best for light rust on metal tools.
Will vinegar damage polished metal?
Vinegar is generally safe on many polished surfaces when used briefly and thoroughly rinsed, but it can dull or etch very soft finishes. Always test first.
Test first; vinegar can dull soft finishes.
Should I neutralize vinegar after cleaning?
Rinsing with water is usually sufficient; a light baking soda solution can neutralize lingering acidity and odor if needed.
Rinse then optional baking soda if odor persists.
Are there safety concerns with vinegar and metal?
Vinegar is relatively safe, but avoid prolonged exposure on sensitive finishes, ensure good ventilation, and wear gloves. Do not mix with bleach.
Ventilate and wear gloves; avoid mixing with bleach.
Can I reuse the vinegar for multiple rust spots?
You can reuse if it remains clear and hasn't become saturated with rust particles. Replace if it becomes dark or cloudy.
You can reuse if it stays clear.
Watch Video
Quick Summary
- Test before full use
- White vinegar is safe for light rust
- Rinse and dry thoroughly to prevent re-rust
- Work in a ventilated area and wear gloves
- For deep rust, seek stronger methods or professional advice