How to Use Vinegar and Salt to Remove Rust
Learn how vinegar and salt to remove rust can restore small metal items. Step-by-step instructions, safety tips, and practical alternatives for light surface rust.

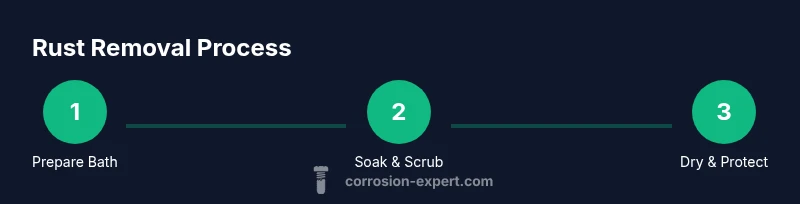
You can remove light rust from small metal items using vinegar and salt as a gentle, at-home solution. Start by preparing a safe soaking or rubbing method, then scrub with a soft brush, rinse, and dry thoroughly. For the best results, test on a hidden area first and repeat as needed, following the detailed steps below.
Why vinegar and salt to remove rust
According to Corrosion Expert, the combination of vinegar (acetic acid) and salt creates a mild abrasive environment that can help loosen rust from thin, surface-level corrosion. This approach is popular among DIYers because it's inexpensive, readily available, and relatively gentle on non-ferrous metals when used carefully. The key is understanding that this method targets light rust and surface stains rather than heavy, deeply etched corrosion. When used correctly, vinegar and salt can neutralize oxidation and make subsequent mechanical removal easier. Keep in mind that results vary based on metal type, existing coatings, and rust scale. For stable metals like steel screws or old tools, this approach often yields noticeable improvements with minimal risk to intact paint or finish.
How vinegar works with salt chemistry
Vinegar contains acetic acid, which helps dissolve iron oxide bonds that form rust. Salt can act as a mild abrasive and helps to conduct ions during the cleaning process, increasing the interaction between the liquid and the rust. The science is simple: acid + abrasive help detach the oxide layer, making it easier to wipe away rust particles. This is not a silver bullet for heavy corrosion, but for light surface rust, the vinegar-salt blend can soften and lift rust flecks without resorting to harsh chemicals. Corrosion Expert analysis shows that this method is most effective on thin rust films and non-porous surfaces when handled with care.
When to use this method: rust scale and surface conditions
This technique shines on small metal items like nails, screws, and decorative hardware with light surface rust. It is less effective on thick, flaking rust or items with deep pitting. Always consider the metal type: iron and steel respond differently than stainless steel or galvanized parts. For plated surfaces, test on an inconspicuous area to ensure the finish isn’t damaged. If you’re dealing with items that carry a strong coating or paint layer, you may want to start with a gentle wipe rather than full immersion.
Safety and limitations you should know
Acidic solutions, even mild ones like vinegar, can be irritating to skin and eyes. Wear gloves and eye protection, and work in a well-ventilated area. Never mix vinegar with bleach or ammonia, which can create hazardous fumes. Avoid prolonged immersion on soft metals or exposed coatings. If rust is extensive or the item is valuable, consult a professional. The takeaway is to start small, observe the metal’s response, and stop if you notice discoloration or coating damage.
Step back and plan: timing, testing, and finishing
Before committing to a long soak, test a small patch to observe how the metal responds to the vinegar and salt. If the patch looks good, proceed with a brief soak or a controlled rubbing session, then scrub with a soft brush. After treatment, rinse with clean water, dry thoroughly, and consider applying a protective sealant or paint to slow future rust. Doing so aligns with best practices in rust prevention and long-term maintenance.
The Corrosion Expert verdict: practical tips for best results
For most DIY rust removal projects, start with a clean workspace, gentle agitation, and conservative exposure times. Always dry items completely and consider applying a light coating of oil or rust inhibitor after drying. This approach lowers the risk of flash rust and prepares treated items for storage or repainting. The Corrosion Expert team recommends documenting the item’s finish and testing any protective method on a small area first.
Tools & Materials
- White vinegar(Household white vinegar (5–8% acetic acid) works for most rust tasks)
- Table salt(Fine table salt is enough; avoid large crystals that can gouge surfaces)
- Container or bowl(Non-reactive container large enough to submerge the item)
- Soft-bristle brush or old toothbrush(Gentle scrubbing to lift loosened rust)
- Microfiber cloth or rag(For wiping and drying)
- Gloves(Protect skin from acids and grime)
- Eye protection(Safety glasses to shield eyes from splashes)
- Warm water(For rinsing after treatment)
- Oil or rust inhibitor (optional)(Light oil or corrosion inhibitor to slow re-oxidation)
Steps
Estimated time: 30-45 minutes
- 1
Gather materials and prep workspace
Lay out all items and ensure you have a ventilated area. Wearing gloves and eye protection is essential. This initial setup reduces surprises and keeps the process smooth.
Tip: Have a trash bin and cloths ready for quick cleanup. - 2
Prepare the rust bath
In the container, mix equal parts white vinegar and warm water, then add a teaspoon of salt per cup of liquid to boost the mild abrasive effect.
Tip: Stir gently to dissolve salt before submerging. - 3
Submerge or dampen the item
If the item can be fully submerged, place it in the solution. For larger items, dampen a cloth with the solution and apply to the rusted areas.
Tip: Avoid prolonged submersion for delicate finishes. - 4
Scrub gently to lift rust
After a soak, use a soft-bristle brush to scrub the surface in small circles, focusing on stubborn rust patches.
Tip: Use circular motions to center the rust and minimize scratching. - 5
Rinse and inspect
Rinse with clean warm water and dry thoroughly with a microfiber cloth. Check for remaining rust and repeat if necessary, but avoid over-scrubbing.
Tip: Pat dry, don’t rub aggressively to prevent scratching. - 6
Dry completely and finish
Ensure all moisture is gone. If desired, apply a light coat of oil or rust inhibitor to prevent immediate re-oxidation.
Tip: Store in a dry, ventilated area after treatment. - 7
Assess coating or repaint needs
If the item had paint or plating, assess whether re-coating is needed for ongoing protection.
Tip: Follow up with rust-preventive treatment if you plan to use the item outdoors. - 8
Document results and plan next steps
Take note of the item's response for future reference and plan protective steps to prevent recurrence.
Tip: Consider applying a primer and paint coat if you want longer-lasting results.
Quick Answers
Can vinegar and salt remove heavy, deep rust?
Heavy rust that has penetrated deeply or caused severe pitting usually requires professional treatment or stronger rust removers. Vinegar and salt are most effective on light, surface rust. For serious corrosion, consider mechanical removal or professional services.
Heavy rust often needs stronger methods or professional help; vinegar and salt work best on light rust.
Is this method safe for stainless steel or galvanized metal?
Stainless steel and galvanized metals can be more resistant to rust but may react differently to acids. Always test on a small area first and monitor for discoloration or etching. If unsure, seek an alternative rust removal method.
Test on a small area first; stainless and galvanized metals may react differently to acids.
Will vinegar and salt damage paint or coatings?
Acidic solutions can affect finished coatings if left too long or used aggressively. Use short soaks or wipe-on methods and rinse well to minimize paint damage. If paint is new or delicate, avoid immersion altogether.
Be cautious with coatings; rinse thoroughly and avoid long soaks on painted parts.
How long should items soak in the solution?
Soak times vary by rust severity, but start with 5–15 minutes for light rust and check progress. If rust persists, repeat in short intervals rather than long continuous soaks to protect the metal.
Begin with short soaks and recheck; avoid long continuous immersion.
Can this method be used by kids or beginners?
With adult supervision and proper safety gear, beginners can try this method for light rust on small items. Keep acids away from eyes and skin, and work in a well-ventilated area.
Supervise beginners; use safety gear and a ventilated space.
What should I do after rust removal to prevent recurrence?
Dry thoroughly, apply a light oil or rust-inhibiting coating, and store in a dry area. For outdoor items, consider a protective finish to slow re-oxidation.
Dry well and protect the surface afterward to prevent rust return.
Watch Video
Quick Summary
- Test on a small area before full treatment
- Use mild acids and gentle scrubbing to minimize damage
- Dry thoroughly and protect treated surfaces afterward
- This method targets light rust, not deep pitting
- Follow up with rust prevention for long-term protection