Rust Remover Vinegar: A Practical DIY Rust Removal Guide
Learn how to safely remove rust using vinegar with a practical, step-by-step DIY approach. This guide covers prep, testing, scrubbing, drying, and prevention for metal surfaces.

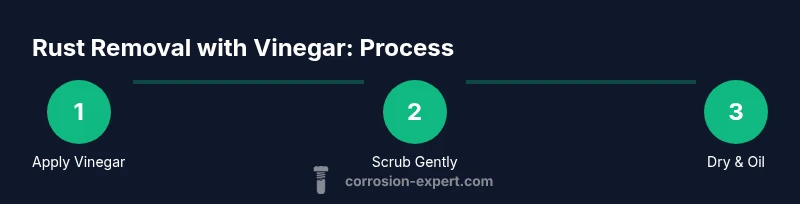
This guide shows you how to use rust remover vinegar to safely remove light to moderate rust from metal surfaces. You’ll learn a simple, low-cost method that relies on household vinegar, basic tools, and straightforward scrubbing. The steps cover prep, limited soaking, mechanical cleaning, drying, and a protective finish to slow future rust. Ideal for DIYers and homeowners dealing with rust on tools and hardware.
What makes rust remover vinegar effective
Vinegar is a mild acid that can dissolve the thin iron oxide layer that forms rust on many metal surfaces. When you apply plain white vinegar to a small rust spot, acetic acid interacts with the oxide, loosening bonds and allowing the rust to lift with gentle scrubbing. For many tools and hardware, this creates a safer, household-friendly alternative to harsher chemicals. According to Corrosion Expert, this approach is most effective for light surface rust and items with shallow pits rather than deep pitting.
Best results come from using household white vinegar (5% acetic acid) and avoiding long soaks on sensitive finishes. The rust remover vinegar method is compatible with steel, cast iron, and some steels, but it can etch aluminum, zinc-coated surfaces, or painted finishes if left soaking too long. The method is particularly suitable for projects where you want to remove rust without aggressive solvents, and it’s inexpensive enough to retry on multiple pieces.
Surface shape matters as well; curved or threaded parts benefit from coverage with a brush or cloth to ensure contact over rusted ridges. If you’re dealing with stubborn stains, lightly apply more vinegar and re-scrub after a short pause.
How to test vinegar rust removal safely
Before treating a visible rust area, perform a small patch test on a hidden corner or a sacrificial scrap of the same metal. Dampen a cotton swab with vinegar and apply to a 1-2 cm square. Wait 5-10 minutes and inspect for staining, discoloration, or surface etching. If the metal remains smooth and shows rust loosening (but no pitting or discoloration), you can proceed. This cautious approach reduces the risk of damage and aligns with guidance from Corrosion Expert.
What you should observe next is the key: rust that lifts away yields a clean edge rather than rough pits. For painted surfaces, test over a peeled area or a spare metal plate to see if the paint reacts or peels. Do not soak large areas without monitoring; long exposure can dull finishes. After the patch test, rinse the area with clean water and dry thoroughly before moving to the full treatment. If you notice any adverse effects, stop and switch to a milder method or use a dedicated rust remover designed for your metal type. Patch testing is a simple risk-management step that saves time and preserves the item’s value.
Step-by-step overview
The following steps outline a practical sequence to remove rust with vinegar while minimizing risk to sensitive metals and finishes. Start with protection and prep; then apply vinegar and mechanically lift rust; finally neutralize acidity, dry thoroughly, and apply a light oil to inhibit immediate re-oxidation. If you encounter stubborn rust, switch to a localized paste or repeat the treatment with adjusted contact time. Record results to refine your method for future projects. This overview aligns with best practices recommended by Corrosion Expert and helps DIYers scale up from small repairs to larger items.
Surface considerations by material
Different metals respond differently to vinegar. Steel and cast iron generally tolerate short to moderate exposure well, making vinegar a practical rust remover vinegar option for kitchen tools, wrenches, and garden implements. Aluminum and zinc-coated surfaces are more sensitive; prolonged contact can cause pitting, dulling, or coating damage. Painted finishes may blister or peel if left soaking. When in doubt, test first and limit exposure time. For stainless steel, expect slower results but less risk of surface damage if you keep the method light and monitor closely.
Augmenting vinegar methods and long-term prevention
Vinegar works best as a gentle starting point. For stubborn spots, combine with a light abrasive scrub using a nylon brush or a soft scrub pad. A baking soda paste can act as a mild abrasive finish after vinegar treatment, helping lift loosened rust without harsh chemicals. You can also use a pinch of salt to enhance abrasion slightly, then rinse and dry. Avoid mixing vinegar with bleach or ammonia, as it creates harmful fumes. After cleaning, consider applying a thin layer of mineral oil or a dedicated metal protectant to slow new rust formation.
Safety, disposal, and prevention
Always wear protective gloves and eye protection when handling vinegar and during scrubbing. Work in a well-ventilated area to avoid irritation from vapors. Do not immerse aluminum or galvanized surfaces for long periods; vinegar can corrode protective coatings. Rinse thoroughly with clean water and dry completely before applying oil or a sealant. Proper disposal is simple: dilute vinegar with water and pour down the drain, followed by a final rinse of the metal item.
Tools & Materials
- White vinegar (household, 5%)(Main rust-removing liquid; use non-flavored white vinegar)
- Gloves (nitrile or latex)(Protect hands from acidity and abrasion)
- Safety goggles(Protect eyes from splashes)
- Soft-bristle brush or old toothbrush(Scrub tight corners and ridges)
- Nylon scrub pad or non-scratch scouring pad(For stubborn rust without scratching)
- Cloth rags or paper towels(Wipe and dry surfaces)
- Baking soda(Optional paste for finishing scrub)
- Salt(Small amount to boost abrasion (optional))
- Mineral oil or light machine oil(Light coating after drying)
- Plastic tray or container(Catch drips and keep workspace clean)
- Drying rack or towels(Ensure thorough drying to prevent more rust)
Steps
Estimated time: 30-60 minutes
- 1
Prepare workspace and protect yourself
Clear the area and lay down towels or a tray to catch drips. Put on gloves and goggles to protect skin and eyes from vinegar splashes. If you’re cleaning multiple items, work in batches to maintain control over time and exposure.
Tip: Have rags ready to quickly wipe any spills; keep a bucket handy for rinsing tools. - 2
Apply vinegar to rusty areas
Dampen a cloth or brush with vinegar and apply it to the rusted surface. For intricate parts, submerge for brief periods or wrap rusted areas with a saturated cloth to ensure contact.
Tip: Keep exposure to a moderate level; do not completely submerge sensitive parts for long. - 3
Let it sit and loosen rust
Allow the vinegar to work for 5–15 minutes on light rust, or up to 30 minutes on stubborn spots. Check periodically; if rust is loosening, proceed to the next step. Do not exceed recommended times to avoid surface damage.
Tip: Shorter intervals make it easier to control the result; you can reapply if needed. - 4
Scrub away the lifted rust
Gently scrub with the brush or pad in a circular motion, focusing on ridges and pitted areas. Reapply vinegar as needed and continue until rust has detached. Rinse the tool with clean water to remove any loosened oxide.
Tip: Use light pressure to avoid scratching; let the material guide how much force is required. - 5
Rinse, dry, and neutralize acidity
Rinse thoroughly to remove vinegar residue. Dry completely with a clean cloth, then let air-dry for 10–15 minutes. A light oil coating afterward helps prevent immediate re-oxidation.
Tip: Drying completely is crucial; moisture is the primary driver of new rust. - 6
Evaluate and repeat if necessary
Inspect the cleaned area for remaining rust; repeat steps 2–5 if needed for stubborn spots. For large or critical parts, perform a final inspection under good lighting to confirm uniform finish.
Tip: Document what worked so you can adjust exposure time on future projects.
Quick Answers
Can vinegar remove heavy rust or deep pits?
Vinegar can address surface rust and light deposits, but heavy rust or deep pitting often requires stronger methods or professional treatment. Repeated gentle attempts may be needed, but deep corrosion may be irreversible on some items.
Vinegar works best on light rust; heavy rust may need stronger methods.
Is vinegar safe on all metal types?
Vinegar is generally safe for steel and cast iron in short exposures, but it can corrode aluminum, zinc-coated parts, or painted finishes with extended contact. Always patch test first.
Patch test first, especially on aluminum or painted surfaces.
Should I rinse after using vinegar for rust removal?
Yes. Rinse off vinegar completely, dry the surface, and apply a light oil or protective coating to prevent quick re-rust.
Rinse, dry well, and oil to prevent re-rusting.
Can I reuse the same vinegar for multiple parts?
You can reuse briefly, but efficiency drops as rust particles accumulate. For best results, replace with fresh vinegar after a couple of treatments to avoid contaminants.
You can reuse briefly, but fresh vinegar often works better.
What safety precautions are essential?
Wear gloves and goggles, work in a ventilated area, and keep acids away from skin, eyes, and prolonged exposure to sensitive finishes.
Wear gloves and goggles; work in a ventilated area.
Do I need to test pH or acidity before use?
For general at-home rust removal, patch testing suffices; you don’t need formal pH testing unless working with high-value parts or chemically sensitive finishes.
Patch testing is enough for most DIY projects.
Watch Video
Quick Summary
- Vinegar-based rust removal works best on light rust.
- Patch testing minimizes risk to finishes and coatings.
- Drying thoroughly prevents re-oxidation and future rust.