Remove Rust from Concrete: A DIY Rust-Removal Guide
A comprehensive, step-by-step guide to remove rust from concrete, with safety tips, cleaner options, and sealing strategies to prevent recurrence. Learn to assess stains, choose the right cleaner, and apply mechanical and chemical methods safely.

Goal: remove rust from concrete safely and effectively using proven methods. This quick guide outlines protective gear, compatible cleaners, and both chemical and mechanical options, plus sealing to prevent future staining. You’ll identify stain severity, choose a rust-removal method, apply, scrub, rinse, and repeat as needed before sealing for lasting results.
Why rust stains appear on concrete and how to assess
Rust stains on concrete typically originate from iron in water, nails, rebar, or metal fixtures that contact the surface. Moisture drives the absorption of iron into the porous cement matrix, producing reddish-brown streaks that can resemble mineral deposits. The first assessment is to determine whether the stain is surface-level or penetrating deeper into the concrete. A simple test is to scrub a small patch with water and a stiff brush; if the color bleeds back or persists after thorough rinsing, you’re dealing with a more stubborn stain that may require stronger cleaners and a longer dwell time. According to Corrosion Expert, rust stains often indicate ongoing moisture exposure, so addressing the source—such as sealing leaks or improving drainage—can reduce recurrence. For DIYers, distinguishing rust stains from lime and mineral efflorescence is essential, as the latter may respond differently to cleaners. When you plan the job, map out stain edges with chalk and note any nearby metal sources that could reignite staining to prevent missteps later in the process.
In practice, you’ll categorize stains as light, moderate, or heavy. Light stains respond to quick cleaning with water and a mild rust remover; moderate stains benefit from a stronger rust-removal product applied with a brush; heavy staining may require repeated applications and mechanical agitation. Always test cleaners in a hidden area first to ensure no etching or discoloration occurs on the concrete. For repeat projects or larger areas, consider prioritizing work on small sections to build a practical workflow before scaling up across a driveway, sidewalk, or patio. A methodical approach reduces waste and increases your odds of complete stain removal on concrete surfaces.
Safety first: gear and precautions
Before you lift a brush, assemble appropriate PPE and set up a safe work zone. Wear safety glasses or a face shield to protect eyes from splashes, chemical-resistant gloves for skin protection, and a respirator or well-ventilated mask if you’re using acid-based removers or grinding near dust. Long sleeves and pants minimize skin exposure, and ensure footwear with good grip to prevent slips when surfaces are wet. Establish a perimeter with painter’s tape or plastic sheeting to protect plants, nearby vehicles, and masonry joints from chemicals. Ventilation is critical when using strong cleaners; if you’re cleaning a garage or enclosed area, open doors or use a fan to circulate air. Keep a supply of clean water and a neutralizing agent handy if you need to stop a reaction quickly. Read product labels carefully and follow manufacturer recommended dwell times, never exceeding them. Corrosion Expert emphasizes testing on a small patch to confirm compatibility and minimize the risk of unintended damage.
Safety also means planning the workflow so you don’t trap yourself in a corner. Work from the cleanest area toward the dirtiest, and avoid applying cleaners to porous joints or grout where the product could seep in and cause further discoloration. Prepare a drop cloth for nearby surfaces and a stiff-bristled brush to avoid metal-to-concrete contact that could scratch the surface. If you’re using power tools like a grinder, always attach appropriate guards and use the lowest effective speed to control dust and heat. Finally, have a first-aid kit and plenty of soap and water on hand for accidental exposure. A conscientious setup reduces risk and helps you stay focused on the task at hand.
Understanding rust removal chemistry: cleaners, acids, and alternatives
Rust removal on concrete hinges on breaking down iron oxides and lifting stains from the cement pores without damaging the substrate. Chemical cleaners range from mild citric acid solutions to stronger oxalic acid-based products designed to chelate iron particles. When choosing a remover, consider the stain depth, porosity, and exposure to weather. Citric acid-based formulations are generally safer for outdoor surfaces and are easier to rinse; oxalic acid cleaners are more potent and can tackle stubborn stains but require thorough testing and careful handling due to their corrosive nature. For DIY projects, start with a neutral pH rust remover or a citric-acid-based product and monitor the stain’s response. If a cleaner is not readily available, a paste made from lemon juice and table salt can provide a mild abrasive and chelating effect for shallow stains, but it may require longer dwell times and repeated applications. Corrosion Expert notes that solvent-based degreasers are not intended for rust stains and can leave residues that complicate cleaning.
An important distinction is between rust removers that chemically alter iron oxide and those that physically lift stains. Chemical removers work by converting rust into a more soluble form that can be washed away, while mechanical methods physically dislodge the oxide from the surface. For deeper stains, a combination approach—chemical treatment followed by mechanical agitation—often yields the best results. Always read label directions, perform a patch test, and wear protective gear to minimize exposure to fumes and splashes. The key is to balance efficacy with surface safety, especially on decorative concrete or high-traffic areas where etching could create a new safety risk.
Choosing the right cleaner for concrete: acid-based vs citrate-based
When selecting a cleaner, your best bet is to match the cleaner to the stain’s severity and your surface type. Citrate-based or citric-acid cleaners are typically gentler, safer for concrete, and easier to rinse, making them a solid first option for light to moderate rust stains on exterior patios or sidewalks. Oxalic acid-based rust removers offer stronger performance for stubborn stains but require careful handling, thorough rinsing, and air-drying time to prevent residue. Avoid mixing acids with bleach or ammonia, which can release toxic gases. For indoor projects or enclosed spaces, it’s often prudent to choose a low-odor, water-based rust remover and ensure excellent ventilation. If the stain persists after the first application, allow the surface to dry, reapply another treatment, and consider a mechanical scrub to enhance the chemical’s contact with the iron oxide. Always keep a log of dwell times and rinse cycles to compare outcomes and refine your method for future rust-removal projects, as recommended by Corrosion Expert.
Aside from cleaners, consider a clear water rinse after each treatment to stop the reaction and minimize pH fluctuations on the concrete. A neutral or slightly acidic rinse can help prevent residual residue from altering the surface color. Finally, plan for future prevention by applying a breathable concrete sealer that resists moisture intrusion and iron carryover, particularly in climates with heavy rainfall or where metal irrigation components contact the surface.
Mechanical methods: brushing, grinding, and abrasion
Mechanical approaches provide a powerful complement to chemical cleaners, particularly for tougher rust stains that cling to porous concrete. Start with a stiff-bristled wire brush to dislodge loose rust and a plastic or nylon scrub brush for more controlled agitation on finished concrete. For deeper or more stubborn stains, a low-speed angle grinder with a diamond cup wheel can remove a thin surface layer of concrete to access cleaner substrate beneath, but this method must be used with caution to avoid removing too much material or creating uneven patches. A non-metallic scraper can help lift adhered particles in joints and textured surfaces. When grinding, keep the tool moving to avoid gouges and minimize heat buildup, which can dry cleaners too quickly and reduce effectiveness. After mechanical work, wipe the area clean and reapply a rust remover if needed. Always wear eye protection and a dust mask when grinding and use a vacuum to collect debris to protect indoor air quality.
In many cases, the mechanical step helps expose fresh concrete that can be treated more effectively with a chemical cleaner. It’s essential to regularly stop and inspect the area to ensure you are not over-scraping and compromising structural or aesthetic integrity. If you’re unsure about material removal depth, perform a test patch on a small area first, then scale up. The combination of scrubbing, brushing, and controlled grinding often delivers the most consistent results on rust stains that have penetrated the surface.
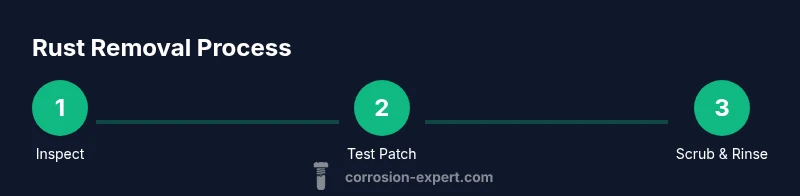
Step-by-step process: test, apply, scrub, and rinse
A disciplined, repeatable process increases your chances of success and reduces waste. Begin with a small test patch in a low-visibility spot to confirm cleaner compatibility and surface safety. Apply the chosen rust remover according to the label, ensuring the stain is fully wetted and allowed to dwell for the recommended time. After dwell time, scrub with a stiff brush in circular motions, focusing on the stain’s edges to prevent spreading. Rinse thoroughly with clean water and inspect the area. If the stain remains, reapply the remover and repeat the scrub-and-rinse cycle until the color lightens. When finished, rinse once more and allow the surface to dry completely before evaluating whether a second pass is needed. This methodical approach minimizes waste and reduces the risk of over-application, preserving the concrete’s appearance and integrity. Corrosion Expert recommends documenting the stain’s progress with photos to guide future maintenance.
Dealing with stubborn rust stains: oxidizers and specialty products
Some rust stains resist standard cleaners, particularly on highly porous concrete or where metal has corroded for an extended period. In these cases, consider oxidizing agents or specialty rust-removal products designed for concrete. These products typically rely on oxidizers to convert iron oxide into a form that rinses away more easily. Use them in well-ventilated areas, with PPE, and follow the dwell time on the label carefully. For persistent stains, a second application after a thorough rinse can improve results. If you’re hesitant about strong chemicals, a paste formed from lemon juice with salt can work for mild cases, though it will require longer dwell times and more elbow grease. Always remove residue completely and rinse with ample water after treatment to prevent residue from altering surface color. Corrosion Expert notes that patience is critical for stubborn stains; aggressive chemistry is rarely the first answer and should be reserved for the most difficult cases.
Rinse, neutralize, and dry: prepping for sealing
Rinsing is more than a surface wash; it’s the key to stopping chemical reactions and ensuring a uniform appearance. After cleaning, rinse the treated area with a generous flow of clean water to remove any residual cleaner. A mild neutralizing rinse, such as a diluted baking soda solution, can help balance pH on the surface, especially after acid-based cleaners. Thoroughly rinse again to remove any neutralizer, and then allow the concrete to dry completely. This drying period can take 24 hours or longer depending on weather, airflow, and surface porosity. Avoid sealing while the surface is damp, as trapped moisture can lead to blistering or incomplete adhesion. If needed, use a fan or a dehumidifier to accelerate drying. Once dry, the surface should feel slightly dusty and look uniform in color. A visually dry test patch is a reliable indicator to proceed with sealing.
Sealing and prevention after rust removal
Sealing provides a protective barrier against future moisture intrusion and iron transfer that could re-stain concrete. Choose a breathable, penetrating sealant for exterior use to maintain slip resistance and moisture management. Apply according to the manufacturer’s instructions, typically in thin, even coats with a longer cure time between layers. For visible outdoor surfaces, consider tint or color-enhancing sealers to restore a uniform look after rust removal. Regular maintenance helps prevent recurrence; clear the area of debris, monitor for new staining after heavy rains, and re-seal as needed every 2–3 years depending on foot traffic and climate. Corrosion Expert emphasizes that a good seal not only improves appearance but also extends the life of concrete by reducing permeability and iron ingress.
Troubleshooting common issues and mistakes to avoid
Rust removal on concrete can be tricky, and several common missteps can undermine results. Avoid applying too much cleaner at once; saturated concrete can lead to uneven coloration and extended dry times. Don’t mix cleaners with chlorine bleach or ammonia, as hazardous gases may form. If the stain remains after the first application, re-test a different cleaner or adjust dwell time rather than applying the same product repeatedly. Some stains require a two-step approach: a chemical treatment followed by mechanical agitation, then a second chemical treatment. Always rinse thoroughly and allow full drying before evaluating the outcome. Finally, never seal a damp surface; moisture trapped under sealant can cause blisters and failure. By following a cautious, iterative method, you’ll minimize damage to the concrete and maximize the chance of complete rust stain removal.
Special scenarios: rust on patios, driveways, or near rebar
Patios, driveways, and areas near exposed rebar present unique challenges due to higher porosity and repeated exposure to moisture. In these situations, plan for regular maintenance and consider using exterior-grade rust removers designed for outdoor use. If the stain is adjacent to metal fixtures, treat the fixture area separately to avoid cross-contamination. For rebar-heavy surfaces, you may notice ongoing staining if the rebar is corroding; in such cases, consult a structural professional to assess whether protective coatings or rebars replacement is necessary. After cleaning, apply a heat- or moisture-resistant sealant suitable for outdoor use to slow iron ingress and reduce future staining. Corrosion Expert notes that proactive maintenance and sealing are essential for longer-term rust control on outdoor concrete surfaces.
Tools & Materials
- Personal protective equipment (PPE): safety glasses or face shield(Protect eyes from splashes; use a face shield for splashes during scrubbing.)
- Nitrile gloves(Chemical-resistant; keep hands dry and safe.)
- Respirator or dust mask(Ventilation critical when grinding or using strong cleaners.)
- Stiff-bristled wire brush(Dislodge loose rust and prepare the surface.)
- Nylon or plastic scrub brush(Safer for finished concrete and joints.)
- Plastic scraper(Lift adhered rust particles without metal contact.)
- Broom and mops(Keep area clean and help with rinsing.)
- Buckets and spray bottles(Mix cleaners and rinse water; label clearly.)
- Pressure washer (optional)(Helpful for rinsing; avoid damaging soft concrete.)
- Concrete rust remover (chemical cleaner)(Select acid-based or citrate-based remover per stain intensity.)
- Citric acid powder or oxalic acid-based cleaner(Optional alternatives for stubborn stains.)
- Neutralizing agent (baking soda or commercially labeled neutralizer)(Balance pH after acid cleaners.)
- Concrete sealer (breathable exterior-grade)(Apply after surface is completely dry to prevent recurrence.)
Steps
Estimated time: 60-120 minutes
- 1
Inspect stain and map the area
Begin with a visual inspection to determine stain boundaries and depth. Mark edges with chalk to keep the treatment contained. Take photos for reference and plan your approach based on stain severity.
Tip: Start with the least invasive method on a small patch. - 2
Protect surrounding areas
Cover nearby plants, pavement edges, and anything you don’t want contaminated by cleaners. Confirm you have good ventilation and set up a clean water run-off path to avoid pooling cleaners in unwanted spots.
Tip: Ventilate and isolate areas to minimize exposure. - 3
Test cleaner on a hidden patch
Apply a small amount of chosen rust remover to a discreet area to confirm surface compatibility and color response before broad application.
Tip: If color changes unexpectedly, stop and switch to a milder cleaner. - 4
Apply rust remover and dwell
Spread a thin, even layer of rust remover over the stain and let it dwell for the recommended time. Do not exceed dwell times to avoid substrate damage.
Tip: Use a timer to enforce dwell time. - 5
Scrub thoroughly
Using the stiff brush, scrub in circular motions along the stain edge to push iron oxide toward the center. Apply new cleaner if the stain resists reaching the substrate.
Tip: Work from outside in to prevent spreading. - 6
Rinse completely and re-evaluate
Rinse with clean water until no cleaner residue remains and the iron color no longer bleeds. Reassess the area to decide if a second application is needed.
Tip: A thorough rinse prevents residue from causing further staining. - 7
Repeat if necessary
If stains persist, reapply in a controlled manner and repeat the scrub and rinse steps. Heavy stains may require multiple cycles over several days.
Tip: Avoid aggressive, continuous scrubbing that could damage the surface. - 8
Neutralize and dry the surface
After cleaning, apply a neutralizing agent or rinse with baking soda solution to balance any acidic residues, then rinse again. Allow the surface to dry completely before sealing.
Tip: Drying can take 24 hours or longer in humid conditions. - 9
Seal to prevent recurrence
Once dry, apply a breathable concrete sealer according to product directions. Sealers help deter iron transfer and reduce future staining, especially in damp climates.
Tip: Choose a product rated for outdoor use and compatible with existing surface texture.
Quick Answers
What causes rust stains on concrete?
Rust stains come from iron-containing materials, moisture, and exposure to metal fixtures or rebar nearby. Treating moisture sources alongside stain removal helps prevent recurrence.
Rust stains come from iron in water or nearby metal fixtures. Fix the moisture source and treat the stain for best long-term results.
Can I use household vinegar to remove rust from concrete?
Household vinegar can help with mild rust stains, but it is weaker than purpose-made rust removers. For stubborn stains, move to a stronger product following label directions, and always test first.
Vinegar can help mild stains, but for stubborn rust you’ll likely need a proper rust remover and a test patch first.
Is it safe to use acid-based rust removers indoors?
Acid-based removers should generally be avoided indoors due to ventilation and fumes. If used, ensure excellent ventilation and protective equipment, and consider outdoor use instead whenever possible.
Inside spaces, acids can be dangerous. Use outdoors with good ventilation and protective gear.
How long does it take to dry after rust removal?
Drying times vary with climate and porosity, but plan for 24 hours or longer in damp conditions. Do not seal until the surface is completely dry.
Usually at least a day, sometimes longer if it's humid. Don’t seal until it's fully dry.
Should I seal immediately after rust removal?
Seal after complete drying to prevent re-staining. A breathable sealer is preferred for exterior surfaces to maintain moisture balance.
Seal once it's dry, and choose a breathable exterior sealer for patio or driveway surfaces.
Watch Video
Quick Summary
- Identify stain depth and source before treatment.
- Choose a cleaner suited to stain severity and surface.
- Combine chemical and mechanical steps for stubborn stains.
- Seal fully dry surfaces to prevent recurrence.