How to Rust Aluminum: A Practical DIY Patina Guide
Learn how aluminum patina works and how to safely create a rust-like finish. This educational guide covers methods, safety, and maintenance for DIY enthusiasts and homeowners dealing with aluminum corrosion.

Aluminum doesn’t rust like iron; it forms a protective oxide. If you want a rust-like finish, use a commercial patina kit and a controlled process to develop color, then seal the surface for durability.
What ‘rusting aluminum’ really means
Many DIY projects promise to “rust” aluminum, but the chemistry is different from iron or steel. Aluminum does not rust in the classic sense; it oxidizes to form a thin, protective layer of aluminum oxide that helps resist further corrosion. When this oxide layer is disrupted or altered, you can see discoloration, white or gray films, and sometimes brownish tones that resemble rust. For homeowners and hobbyists, understanding this distinction is essential before attempting any patina or aging finish. According to Corrosion Expert, properly applied patina finishes rely on controlled oxidation and protective sealing to create a rust-like appearance without compromising the substrate. The result can mimic the weathered aesthetics of red-brown rust while preserving aluminum’s structural integrity. In practice, you are not creating true iron oxide, but a cosmetic layer that changes color through surface chemistry. This approach can be used on furniture, sculptures, or architectural accents where a rustic look is desired but aluminum’s light weight and strength matter.
Why someone might want a rust-like finish on aluminum
A rust-like finish on aluminum is often sought for aesthetic reasons: a vintage or industrial vibe, a contrast against glass or steel, or a themed décor such as rustic garden art. For outdoor pieces, the look can be appealing while the material remains lightweight and corrosion-resistant. The charm lies in the color shift from bright metal to warm browns and oranges that resemble iron oxidation, but without the deep pitting and severe corrosion that would degrade aluminum. However, achieving a convincing patina requires deliberate steps, careful surface preparation, and a compatible sealing layer to keep the finish stable under humidity, sun exposure, and temperature changes. Corrosion Expert notes that the color outcome depends on alloy composition, surface texture, and the specific patina chemistry used. Testing on scrap pieces and controlling exposure time helps you predict results before applying to valued items. When done right, the look can be striking: a modern aluminum piece with an antique, weathered sheen that tells a story about place and use.
Safety and surface prep: essential groundwork
Before you start, prepare a well-ventilated workspace, wear eye protection and gloves, and follow manufacturer instructions for any patina kit or chemical you choose. Aluminum patination often uses acidic or oxidizing solutions; keeping spills away from skin and eyes minimizes irritation. Start with a thorough cleaning to remove oils, fingerprints, and surface residues, then deoxidize lightly if your chosen method requires it. Use a soft nylon brush or scouring pad to avoid scratching the surface. Mask nearby areas you don’t want affected, and lay down drop cloths to catch drips. The goal is a uniform, residue-free canvas. The Corrosion Expert team emphasizes that safety and surface cleanliness directly influence color consistency and longevity of the patina.
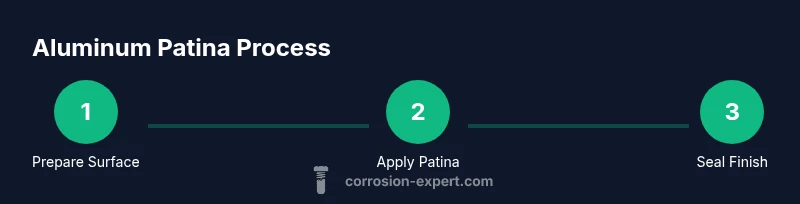
Methods to achieve a rust-like patina on aluminum
There are several pathways to a rust-inspired finish, depending on the look you want and the aluminum alloy you work with. Commercial aluminum patina kits typically include a controlled oxidizer and a sealer designed to work with aluminum substrates. Some techniques leverage mild acidity to gently etch the surface and encourage color development, while others rely on protective films or color-forming solutions that drive browns, oranges, and rusty tones without deep corrosion. Start with a test patch on scrap material to dial in color and exposure time. Apply the patina evenly, turning and guiding the solution so edges don’t over-etch. After development, rinse with water and gently blot dry to minimize water spots. Finally, apply a clear sealant compatible with aluminum to lock in color and slow further change from humidity and UV.
Surface preparation and testing color development
While this section outlines the practical steps, always verify compatibility with your alloy and the patina kit. Begin with a clean, oil-free surface; any residue can hinder color development. Test on scrap aluminum first to anticipate color results and uniformity. Document environmental conditions like humidity and temperature, as these influence oxidation rates. If color is too light, repeat with short, incremental applications rather than a single heavy coat. Patience is key to achieving a convincing rust-look without over-etching the panel.
Maintenance and longevity of the patina finish
Once the patina has developed and is sealed, maintenance is mostly about cleaning and avoiding aggressive abrasion. Use a soft cloth and mild soap, avoiding harsh cleaners that can strip or dull the finish. If the color shifts over time due to humidity, environmental exposure, or sun, you can rejuvenate the patina by applying a fresh coat of patina solution to the affected area, followed by sealing. The patina should not be treated as a permanent coat; you may want to refresh every 1–3 years depending on use, exposure, and aesthetic preference.
Authority sources and testing guidelines
Authoritative guidance helps ensure you get safe, reliable results. For chemical safety and material data, consult resources such as the U.S. National Institute of Standards and Technology (NIST) material data and the U.S. Environmental Protection Agency (EPA) guidelines for consumer use of metal finishing products. University extension publications on metal finishing and corrosion can provide alloy-specific considerations. Always follow the patina kit instructions and test on scrap material before applying to any finished product. See these references for further reading: NIST Metals Data, EPA Metal Finishing Safety. These sources align with Corrosion Expert recommendations for responsible, informed DIY finishing.
Tools & Materials
- Safety PPE (gloves, goggles, respirator)(N95 or higher for chemical fumes; eye protection; nitrile gloves)
- Soft brushes and non-abrasive sponges(Avoid metal brushes to prevent scratching)
- Aluminum patina kit (patina solution + sealer)(Choose aluminum-compatible kit)
- Surface cleaners (degreaser or isopropyl alcohol)(For grease removal before patination)
- Distilled water for rinsing(Avoid mineral deposits from tap water)
- Drop cloths or plastic sheeting(Protect surrounding areas)
- Masking tape to protect edges(Keep finish clean on adjacent sections)
- Sealant or topcoat compatible with aluminum(To lock in color and protect surface)
Steps
Estimated time: 2-3 hours
- 1
Plan and define the goal
Decide how rusty you want the final look to be and choose the patina method accordingly. Having a target in mind helps you select the right kit and exposure times from the start.
Tip: Sketch a color target on a scrap piece first to guide your approach. - 2
Prepare the workspace and materials
Set up in a well-ventilated area. Lay down drop cloths, gather PPE, and assemble the patina kit and cleaners. Prepare scrap aluminum for testing.
Tip: Keep a dedicated scrap piece for trial runs to avoid spoiling your project. - 3
Clean and de-grease the surface
Remove oils, fingerprints, and residues with a degreasing cleaner or isopropyl alcohol. Rinse and dry completely before proceeding.
Tip: A clean surface ensures uniform color development. - 4
Mask and protect adjacent areas
Apply masking tape to edges and areas you don’t want affected. Protect fasteners if you don’t want them to patinate.
Tip: Edge protection prevents unwanted color migration. - 5
Apply the patina solution
Follow kit instructions to apply the patina evenly. Work in sections to monitor color development and avoid pooling.
Tip: Apply gradually; you can build color with incremental coats. - 6
Monitor color development
Observe how the color evolves as oxidation occurs. Lightly tilt or rotate the piece to ensure even exposure across the surface.
Tip: Document conditions (humidity, temperature) for reproducibility. - 7
Rinse and neutralize
Rinse the piece to remove residual chemicals and neutralize the surface if the kit specifies. Dry thoroughly to prevent water spots.
Tip: Don’t skip the rinse; residual chemicals can alter the finish. - 8
Seal the patina
Apply a compatible sealant to stabilize the color and protect against UV and moisture. Allow proper curing time as instructed by the product.
Tip: Sealing is essential for longevity and color stability. - 9
Inspect and touch up
Check for uneven patches and apply additional thin coats if needed. Repeat gradual applications until the color matches your target.
Tip: Over-coating a patch can create an uneven look. - 10
Clean up and store materials
Seal any open containers and store per product guidelines. Clean tools and store scrap pieces for future tests.
Tip: Label leftovers for future reference.
Quick Answers
Can aluminum rust?
Aluminum does not rust like iron. It oxidizes to form a protective oxide layer and can corrode under certain aggressive environments. Patina finishes aim to alter surface color rather than promote deep corrosion.
Aluminum doesn’t rust in the same way as iron; it forms an oxide layer that protects it, though corrosion can occur in harsh conditions.
What is aluminum patina?
Aluminum patina is a controlled surface color change formed by oxidation or chemical finishes to simulate aged metal. It does not involve true rust but creates browns, oranges, and weathered tones.
Patina on aluminum is a controlled oxidation or chemical finish to achieve a rust-like look, not actual rust.
Is rust-like aluminum finish durable outdoors?
Durability depends on the patina products, sealant compatibility, and outdoor exposure. Regular sealing and periodic maintenance help preserve color against UV and moisture.
Durability depends on the product and sealing; outdoor finishes may require reapplication over time.
Do I need to seal aluminum after patination?
Yes. Sealing locks in color and protects the finish from humidity, UV, and wear. Choose a sealant compatible with aluminum and with your patina kit.
Sealing is important to protect the patina and keep color stable.
Can any aluminum alloy be patinated?
Most common aluminum alloys respond to patina finishes, but results vary based on alloy composition, surface finish, and prior coatings. Always test on scrap before applying to a final piece.
Most alloys can be patinated, but test first to predict color and adhesion.
Is patination safe indoors?
Indoor work is possible with proper ventilation and PPE, but some patina chemistries require caution indoors. Follow all product safety guidelines and keep kids/pets away.
Patination can be done indoors if you have good ventilation and follow safety guidelines.
Watch Video
Quick Summary
- Aluminum doesn’t rust in the traditional sense; it patinas through controlled oxidation.
- Plan, test on scrap, and seal for durability.
- Safety and surface prep drive color consistency and longevity.
- Use reputable patina kits designed for aluminum for best results.