Check Rust on Mac: Verify Installation (2026 Guide)
Learn how to check if Rust is installed on macOS, troubleshoot missing installations, and install Rust safely using rustup if it’s missing—ideal for beginners and seasoned users alike.

To confirm Rust is installed on macOS, open Terminal and run rustc --version and cargo --version. If both commands output version numbers, you’re set. If you see 'command not found', Rust is not installed or not on your PATH, and you should install with rustup. This quick check helps prevent build errors when starting Rust projects on a Mac.
Understanding the Rust Toolchain on macOS
On macOS, Rust development relies on a small set of core tools: rustc (the Rust compiler), cargo (the package manager and build system), and rustup (the toolchain installer and version manager). The recommended way to install and maintain these components is via rustup, which handles multiple toolchains (stable, beta, nightly) and keeps them up to date with minimal effort. When Rust is installed through rustup, your shell PATH should include the Cargo bin directory, typically at $HOME/.cargo/bin. If your PATH isn’t updated, commands like rustc or cargo may respond with command not found. This section explains how the pieces fit together and what to expect after a successful installation. It also highlights common macOS-specific nuances, such as the role of Zsh vs Bash shells and how macOS updates might affect environment settings.
Verifying Rust with Terminal Commands
The most reliable way to verify a Rust installation is to query the installed versions of core tools from the Terminal. Start by checking for the binaries in your PATH, then confirm the actual versions to ensure the toolchain is usable for projects. The key commands are:
- rustc --version
- cargo --version
- command -v rustc
If rustc and cargo return version strings, you’re ready to compile and build Rust projects. If the binaries aren’t found, you’ll see a shell message such as 'command not found' or an empty output from command -v rustc. In that case, rustup is likely not installed or the PATH is missing the Cargo bin path. After installation, you may need to restart your terminal or source your shell profile to refresh PATH settings.
Interpreting Command Outputs and Common Scenarios
Interpreting the results of the checks helps you determine the next steps quickly. Here are the typical scenarios:
- Both rustc and cargo show version numbers: Rust is installed and usable. You can start a new project with cargo new my_project and begin coding.
- rustc is missing but rustup is present: The toolchain manager is installed, but the path to the Rust binaries isn’t properly set. Run source $HOME/.cargo/env or add export PATH="$HOME/.cargo/bin:$PATH" to your shell config.
- Both commands fail with 'command not found': No Rust toolchain is installed, or PATH is not configured. Proceed to install Rust using rustup.
- Partial results with an error message: The installation may be incomplete or corrupted. Revisit the installation steps and consider a clean reinstall using rustup.
Remember, rustup manages multiple toolchains and provides a clean upgrade path. If you rely on nightly features or specific toolchain versions, rustup makes switching between them straightforward without manual binary management.
What to Do If Rust Isn't Found
If the verification step indicates Rust is not installed, follow these steps to bring your macOS environment to a productive state:
- Install Rust using rustup: curl --proto 'https' --tlsv1.2 -sSf https://sh.rustup.rs | sh
- Follow the onscreen prompts to choose the default toolchain (stable is recommended for most projects).
- After installation completes, reload your shell or run: source $HOME/.cargo/env
- Confirm installation again with: rustc --version and cargo --version
Using rustup ensures you can easily install additional toolchains and keep everything up to date. If you encounter permissions or network-related prompts, running the installer with an administrator account or ensuring your network allows TLS connections may help.
Best Practices for macOS Rust Development
Once Rust is installed, adopt best practices to streamline development and reduce future setup friction:
- Use rustup to manage toolchains: rustup update to fetch the latest stable release, and rustup default stable to set the default toolchain.
- Install helpful components: rustup component add rustfmt for code formatting and rustup component add clippy for lint checks. These tools help maintain code quality as your projects grow.
- Keep Cargo and the toolchain in sync: regularly run rustup update and cargo update to align dependencies with the latest ecosystem changes.
- Create isolated projects: use cargo new project_name to scaffold projects, ensuring clean start points and consistent structure.
- Consider a nightly toolchain for experimental features: rustup default nightly if you need bleeding-edge features, then switch back when stability is required.
- Maintain PATH reliability: ensure $HOME/.cargo/bin is in your PATH for shell sessions across reopens and scripts. If you use multiple shells, update all relevant config files (e.g., .bash_profile, .zshrc).
Authoritative sources
- Official Rust install guide: https://www.rust-lang.org/tools/install
- The Rust Book (stable): https://doc.rust-lang.org/stable/book/
- Apple Developer Documentation (macOS environment setup): https://developer.apple.com/documentation
Tools & Materials
- macOS computer with internet access(Any modern MacOS version compatible with Xcode CLT and Rust tooling)
- Terminal app(Built-in on macOS; used to run rustc, cargo, and rustup commands)
- Xcode Command Line Tools (optional but recommended)(Install with xcode-select --install if you plan to compile from source)
- curl(Used to download the rustup installer)
- Text editor (optional but helpful)(Examples: VS Code, Sublime Text, or Atom)
Steps
Estimated time: 5-15 minutes
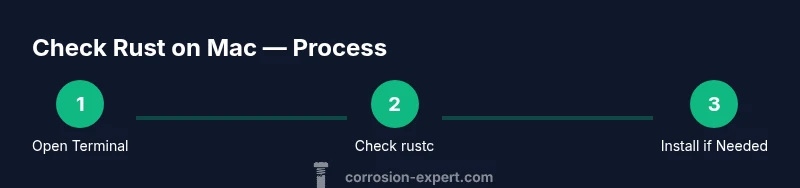
- 1
Open Terminal
Launch the Terminal app from Applications > Utilities or via Spotlight. A ready shell is required to run the verification commands and manage the Rust toolchain.
Tip: If Terminal isn’t visible, ensure your macOS user account has standard access and try Spotlight search for 'Terminal'. - 2
Check for rustc in PATH
Enter command -v rustc to see if the Rust compiler is accessible from your PATH. A path indicates rustc is installed and discoverable by the shell.
Tip: If nothing prints, the compiler isn’t on PATH and you should proceed to install Rust via rustup. - 3
Check the Rust compiler version
Run rustc --version to confirm the compiler is functional and to note the installed version for compatibility planning.
Tip: Pair this with cargo --version to confirm the full toolchain is present. - 4
Check cargo as well
Run cargo --version to verify Cargo, Rust’s package manager and build system, is installed alongside rustc.
Tip: Cargo is essential for project management and dependency resolution. - 5
Check rustup presence
Optionally run rustup show or rustup --version to determine if rustup is installed and managing toolchains.
Tip: If rustup isn’t found, use the official installer to set up the toolchain manager. - 6
Install Rust with rustup if missing
If rustc/cargo aren’t found, install Rust via rustup: curl --proto 'https' --tlsv1.2 -sSf https://sh.rustup.rs | sh and follow the prompts.
Tip: Choose the default toolchain (stable) and avoid elevated permissions unless necessary. - 7
Reload your shell environment
After installation, refresh your PATH by running source $HOME/.cargo/env or restarting the terminal.
Tip: A quick shell restart ensures the new PATH takes effect without logging out. - 8
Verify installation again
Run rustc --version and cargo --version to confirm a successful install and to verify the expected toolchain.
Tip: Document the installed versions for future reference and troubleshooting.
Quick Answers
What is rustup and why should I use it on macOS?
Rustup is the official Rust toolchain installer and version manager. It lets you install and switch between stable, beta, and nightly toolchains, keeping Rust up to date and isolated by project. It’s the recommended method for macOS users.
Rustup is the official installer and version manager for Rust. It makes keeping Rust up to date and switching between toolchains easy for Mac users.
Can I install Rust without rustup on macOS?
While you technically could download prebuilt binaries, using rustup is strongly recommended because it manages toolchains, updates, and dependencies in a single place, reducing conflicts and keeping projects portable across systems.
You could install binaries directly, but rustup is recommended because it manages toolchains and updates more reliably.
My terminal says command not found for rustc. What now?
This usually means rustup isn’t installed or the PATH doesn’t include the Cargo bin directory. Install rustup and ensure $HOME/.cargo/bin is in your PATH, then restart your terminal.
If rustc isn’t found, install rustup and update your PATH so it includes the Cargo bin directory.
Does installation differ for Apple Silicon and Intel Macs?
The installation method is the same for both architectures. Rustup handles architecture differences behind the scenes, so you’ll simply get the appropriate toolchain for your Mac.
No, the method is the same; rustup automatically provides the right toolchain for your Mac’s architecture.
How long does the installation usually take?
A typical Rust installation via rustup takes about a few minutes, depending on network speed and system performance. If you encounter delays, ensure a stable internet connection.
Most installations finish in a few minutes with a steady internet connection.
What should I do after installing Rust on macOS?
After installation, verify the setup, configure your editor, and consider adding rustfmt and Clippy to improve code quality. Create a new project with cargo new and compile a simple program to test.
Verify, set up an editor, and try a new project to test the setup.
Watch Video
Quick Summary
- Verify rustc and cargo presence with version checks.
- Use rustup to install and manage toolchains on macOS.
- Update PATH if rust binaries aren’t found initially.
- Restart the terminal to apply PATH changes.