How to Get Rust Off Metal: A DIY Rust Removal Guide
Learn proven steps to remove rust from metal surfaces, compare mechanical, chemical, and natural methods, and apply protective coatings to prevent future corrosion. A practical DIY guide for rust removal.

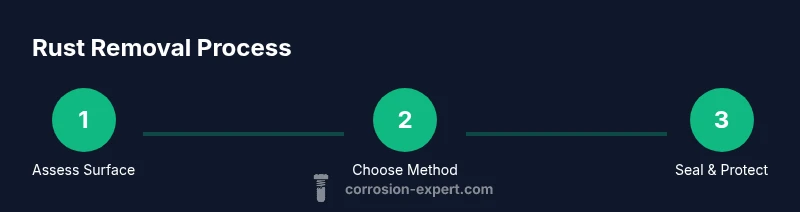
To remove rust from metal, start with a clean workspace and remove loose flakes with a stiff wire brush. Apply a rust remover or a natural acid solution (like vinegar) and let it dwell as directed. Scrub again, rinse thoroughly, and dry completely. Finally, seal the surface with primer and paint or a rust-inhibiting coating to prevent future corrosion.
Understanding Rust and Metal
Rust is iron oxide that forms when iron or steel is exposed to moisture and oxygen. On metal objects, rust can range from light, flaking surface rust to deep, pitted corrosion. Understanding where the rust comes from helps you choose the right approach and prevents reoccurrence. How to get rust off metal is a common DIY task, and the right technique depends on the extent of the damage, the type of metal, and how the item will be used after cleaning. According to Corrosion Expert, proactive rust control starts with quick assessment and proper preparation, because neglecting moisture, salts, or coatings can lead to faster re-rusting. By keeping expectations realistic and following a methodical process, you can restore appearance and function without compromising safety or structure. Most rust on everyday tools and household items forms where moisture and salts linger—think kitchen sinks, outdoor hardware, and garden tools. The goal is not to chase perfection but to stabilize the surface, remove the loose oxide, and prepare a clean base for protective coatings. Before you begin, consider whether the item will remain in service in humid environments or outdoors; this will influence your choice of rust treatment and sealant. The science behind rust is simple: iron plus oxygen plus water equals oxide; adding a rust inhibitor or barrier coating breaks that cycle.
Methods for Rust Removal
Rust removal methods fall into three broad categories: mechanical, chemical, and natural or hybrid approaches. Each has trade-offs in speed, cost, safety, and surface finish. Mechanical methods include hand-scrubbing with a wire brush, sanding with progressively finer grit, and light grinding. They are fast, inexpensive, and ideal for thicker, flaky rust on small parts, but they can scratch the base metal if not used carefully. Chemical rust removers typically use acids or chelating agents to convert or dissolve rust. They are effective on stubborn rust and unearthed pits but require proper ventilation, gloves, and eye protection. Natural or home-based methods use common acids like white vinegar or citric acid to soften rust; they are gentler and safer for DIY projects but take longer and may require repeated applications. For heavy rust or built-up corrosion, electrolysis can be used, where an electrical current and a bath of electrolyte reduce oxide to metal or loosen it from the surface. This method can work on larger items, but it requires equipment, safety discipline, and careful monitoring. Sandblasting or bead blasting is another option for large-scale or heavily corroded pieces, but it should be performed by someone with experience to avoid warping or pitting. The best approach is to assess the surface and choose a method that balances effectiveness with the risk to the base metal.
Tools and Materials You'll Need
Before you start, set up a clean, well-ventilated workspace and assemble the safety gear. Always wear eye protection, gloves, and a mask when using chemical rust removers or working with power tools. A stiff wire brush or steel wool helps remove loose rust; sandpaper or a sanding block allows finer finishing. Have a spray bottle of water or a bucket for rinsing, rags for cleanup, and a container to collect used rust remover. If you’re using vinegar or lemon juice, keep the item submerged long enough for contact but avoid prolonged exposure that could corrode surrounding parts. For painted or coated items, test a small area first to ensure the finish isn’t damaged. Keep a rust-inhibiting primer or metal sealant on hand to apply after cleaning. For tools, a small tray, wire brush, sandpaper sheets, a utility knife, and disposable gloves save time during cleanup. If working outdoors, consider shade and wind direction to avoid fumes blowing back toward you. Finally, have a sealable bag for disposable materials and a timer or clock to track dwell times on chemical treatments.
Step-by-Step Plan for Light Rust
Light rust, which forms a thin, flaky layer on surfaces, responds well to a gentle, staged approach. Start by cleaning the surface with soap and water, then dry completely. Use a stiff brush to remove loose oxide, working in small circular motions. If you’re using a natural acid like vinegar or citric acid, apply it generously and let it sit for 15–30 minutes, then scrub again and rinse thoroughly. For metal that carries a painted finish, protect the surrounding areas with tape to keep solvents from spreading. After washing, dry the piece completely, ideally with a heat source or a clean cloth, and inspect the area for any remaining spots. Repeat the process if necessary, finishing with a mild polish to smooth the surface and prepare for sealing.
Handling Heavy Rust and Pitting
Heavy rust and deep pits require more aggressive steps, and sometimes replacement is safer than restoration. For minor pitting, you can grind or sand the raised rust to reach clean metal, then treat with a rust converter to stabilize the surface. If pits are deep and perforate, fill with an appropriate epoxy or metal filler after removing rust and roughening the area. After filler cures, sand flush and clean before applying primer. When dealing with structural components or critical parts, consult a professional or consider replacing the piece. In some cases, electrochemical methods can be used to reduce iron oxide and remove corrosion from crevices, but this technique demands careful setup to avoid harming the metal or harming you. Always check for thinning, soft spots, or holes; if found, avoid continuing and consider replacement or professional repair. The goal is to reduce rust mass, not to hide it behind paint; compromised metal can fail unexpectedly under load or stress. Corrosion prevention after heavy rust removal should include applying a rust inhibitor and a durable topcoat.
Finishing Touches and Prevention
Once rust is removed, sealing the surface is essential to prevent recurrence. Start by choosing an appropriate rust converter, primer, and topcoat designed for the metal type (steel, iron, or galvanized metals). Clean the surface again to remove dust and oils. Apply a rust converter if any remaining oxide is present; these products transform rust into a stable compound ready for primer. After converter dries, apply a rust-inhibiting primer and allow it to cure fully. Then apply a topcoat suited to the environment—enamel, epoxy, or acrylic paint are common choices for indoor use; outdoor items may benefit from weather-resistant coatings or sealants. For bare metal, a clear sealant or wax can provide short-term protection, but paints offer longer durability. Regular maintenance is key: inspect vulnerable areas periodically, touch up chips quickly, and keep moisture away. When possible, store metal items indoors or cover outdoor pieces during rain seasons. For tools and hardware, maintain with light oil or corrosion-inhibiting sprays to extend life. If you used vinegar or lemon juice, ensure all residues are removed before coating. Finally, label and store your materials safely, and document the process so you can repeat it on future projects.
Common Mistakes to Avoid and Troubleshooting
Common mistakes can undo your hard work. Rushing the drying stage can trap moisture, leading to flash rust within hours. Skipping a test patch on delicate finishes may ruin the substrate. Using the wrong primer or topcoat for outdoor exposure will shorten durability. Never apply solvent-based coatings to damp surfaces. Also, never mix rust removers with bleach or ammonia; dangerous fumes can form. If rust returns after treatment, revisit moisture sources: a leaky roof, humidity, salt exposure, or poor ventilation are frequent culprits. For stubborn spots, reapply the chosen method with a slightly longer dwell time, but avoid overtreatment that could etch metal surfaces. If in doubt, start small and scale up. When finishing, always allow complete curing time for coatings; premature use can chip and fail. Finally, keep safety gear in good condition and dispose of chemical waste according to local regulations.
Tools & Materials
- Safety glasses(Impact-resistant; needed for all rust work)
- Work gloves(Chemical-resistant nitrile or leather)
- Dust mask or respirator(Protect from fumes and dust)
- Stiff wire brush(Remove loose rust; start here)
- Sandpaper (grits 60–320)(Coarse for rough rust; fine for finish)
- Steel wool(Fine rust removal and polishing)
- Old towels or rags(Drying and cleanup)
- Bucket or spray bottle(Rinse water or mist for cleaning)
- Vinegar or citric acid(Natural rust remover option)
- Commercial rust remover(Alternative to natural acids)
- Primer and topcoat (paint/epoxy)(Protective coating after rust removal)
- Sealant or wax (optional)(Temporary protection for bare metal)
Steps
Estimated time: 60-90 minutes plus drying time
- 1
Prepare workspace and safety gear
Set up a clean, ventilated area. Put on safety glasses, gloves, and a mask before handling rust removers or power tools. Have all tools within reach to minimize trips.
Tip: Double-check ventilation when using solvents. - 2
Inspect the rusted area
Survey the surface to distinguish light surface rust from deep pitting. Note edges, coatings, and any paint that may influence method choice.
Tip: Mark areas that look fragile or hollow. - 3
Choose your removal method
Select mechanical, chemical, or natural approaches based on rust extent and metal type. Start with the least aggressive method if the base metal is valuable.
Tip: Avoid mixing methods on the same spot. - 4
Protect surrounding areas
Mask off nearby finishes or parts that should remain untouched. Use drop cloths or tape to keep solvents from spreading.
Tip: Protect floors and containers to avoid spills. - 5
Apply rust removal treatment
Follow product instructions or natural acid dwell times. Apply evenly and avoid pooling in crevices.
Tip: Test on a small spot first. - 6
Scrub, rinse, and dry
Scrub with brush or steel wool as needed, rinse with clean water, and dry thoroughly to prevent new rust from forming.
Tip: Use a heat source or fans to speed drying. - 7
Prepare for protection
Lightly abrade the surface if it’s uneven. Remove all oils and dust before priming.
Tip: Wipe with mineral spirit for a final clean. - 8
Apply protective coating and test
Apply primer and topcoat according to product directions. Allow full cure time before handling or exposure to moisture.
Tip: Test coating on a small area first to gauge adhesion.
Quick Answers
What is the simplest way to remove light rust from metal?
For light rust, start with cleaning, then use a stiff brush to remove flakes. Apply a natural acid like vinegar or a commercial rust remover, rinse, dry, and seal with primer.
Start with cleaning and brushing, then treat with a natural acid or rust remover. Rinse, dry, and seal to prevent re-rust.
Can I use vinegar to remove rust on all metal types?
Vinegar works well on ferrous metals like iron and steel, but always test on a hidden area first, as prolonged exposure can damage some coatings or nonferrous metals.
Vinegar is good for iron and steel but test first on sensitive finishes.
How do I know if the rust is too deep to fix?
If rust has caused deep pits, thinning metal, or structural weakness, replacement or professional repair may be safer than trying to restore it.
If you see deep pits or structural damage, consider replacement or professional help.
What coating should I use after rust removal?
Choose a primer and topcoat suitable for the environment (indoor vs outdoor). For outdoor use, select weather-resistant coatings to extend life.
Use a proper primer and weather-resistant topcoat for outdoors.
Is rust removal safe on painted surfaces?
Yes, but be careful not to strip the underlying paint. Light mechanical work and testing on a small area are advised.
Be cautious not to chip or strip paint; test first.
Should I use heat to dry the metal after washing?
A gentle heat helps dry faster but avoid overheating sensitive coatings. Use a hair dryer or sun-drying where safe.
Use mild heat to dry faster, not excessive heat.
Watch Video
Quick Summary
- Safety first: wear PPE and ventilate the area.
- Choose method based on rust depth and metal type.
- Dry surfaces thoroughly before coating.
- Seal with a protective coating to prevent recurrence.