How to Remove Rust from Tools: A Practical Guide
Learn proven methods to remove rust from hand tools, restore functionality, and prevent recurrence with mechanical, chemical, and preventive steps.

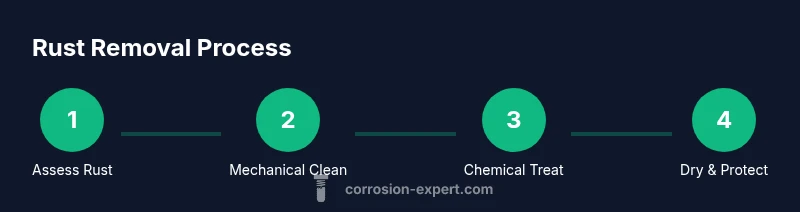
This guide shows a reliable, step-by-step method to remove rust from tools and restore their functionality. You’ll assess rust depth, choose mechanical and/or chemical methods, and finish with thorough drying and protective maintenance to prevent future rust. Gather common supplies, wear PPE, and follow safe handling practices to protect yourself and your tools during cleaning.
Why Rust Forms on Tools and Why It Matters
Rust forms on metal when iron or steel reacts with moisture and oxygen, producing iron oxide that flakes away and weakens the surface. This matters because compromised tool surfaces can slip, reduce grip, and create burrs that increase the risk of injury or tool failure. According to Corrosion Expert, rust on hand tools is a common maintenance issue that affects safety and performance. There are two main rust scenarios you’ll encounter when removing rust from tools: surface rust, which sits on the top layer and is usually removable with basic cleaning, and deeper corrosion that penetrates the metal. Surface rust is typically cosmetic and removable without damaging the tool’s core hardness; deeper corrosion may require more careful steps or replacement if pits have compromised strength. The good news is that with the right approach, most household tools—hammers, wrenches, screwdrivers, pliers—can be restored to a functional state. The aim is to remove oxidation, smooth the surface, and apply a protective barrier to slow future rust. In this guide you’ll learn how to assess rust level, pick a method, and finish with a preventive routine to keep tools rust-free.
Safety First: PPE, Ventilation, and Safe Handling
Before you start removing rust from tools, set up a well-ventilated workspace and equip yourself with essential PPE. Wear safety glasses to protect eyes from flying rust particles, nitrile gloves to shield skin, and a breathable mask if you’re using any chemical rust removers that might emit fumes. Keep kids and pets away from the work area. A small tray or tarp helps contain debris, while a fan or window ensures adequate airflow. If you’re working on tools with sharp edges or fragile finishes, handle them carefully and avoid aggressive prying that could worsen corrosion or cause damage. Although the aim is to remove rust, you should also decide early whether a tool is salvageable or if cracks, deep pits, or a bent handle make replacement a safer choice. Corrosion Expert Recommendation: start with mechanical cleaning for light surface rust and reserve chemical methods for stubborn spots or heavily corroded areas. This approach minimizes chemical exposure while maximizing results.
Gather Your Materials (What You Need Before You Start)
Before you begin, assemble a basic toolkit and select the rust-removal method that fits your situation. You’ll likely use a combination of mechanical and chemical techniques, so having both options ready saves time. A clean, dry surface makes a big difference to how effectively rust is removed and how well the tool will be protected afterward. Keep a dedicated space for rust removal, and organize your items so you can switch methods if you encounter resistant areas. In many cases, the simplest barrel of white vinegar or citric acid can do the job, but you may also prefer a commercial rust remover for tough spots. The Corrosion Expert team recommends starting with mechanical methods for light rust and testing a small area before proceeding with any chemical treatment. Remember to dry tools thoroughly after cleaning to prevent immediate re-rusting.
Mechanical Cleaning Methods: Quick, Safe, and Effective
Mechanical rust removal uses physical abrasion to wipe away oxides from the tool surface. Start with a stiff wire brush to loosen loose rust, then progress to medium-grit sandpaper to smooth rough patches. For delicate or polished surfaces, use finer steel wool (0000 grade) to avoid scratching. Always maintain consistent, light pressure and work with the natural lines of the tool to minimize gouges. Mechanical methods are fastest for surface rust and are a great first step because they remove most of the oxide layer without introducing chemicals. If you see shiny metal beneath the oxidized layer, you’re likely past the majority of the rust. If pitting is present, you’ll need to choose a gentler approach to avoid reducing the tool’s structural integrity. Pro tip: wear a dust mask when sanding to avoid inhaling rust particles.
Chemical Solutions: When and How to Use Them
Chemical rust removers can dissolve tougher rust or penetrate into crevices that mechanical methods miss. White vinegar or citric acid solutions are popular home options that are gentler than harsher acids. For heavier rust, consider a commercial rust remover following the product’s instructions carefully. Always test a small, inconspicuous area first to verify that the chemical won’t damage the metal finish or underlying hardness. When using any rust remover, keep the tool submerged or fully coated for the recommended dwell time, then rinse thoroughly with clean water and dry completely. Corrosion Expert analysis shows that combining mechanical prep with a short chemical treatment often yields the best balance between effectiveness and tool preservation. After treatment, inspect for remaining pits or rough spots and re-sand if needed. Safety note: never mix chemicals with bleach or ammonia—this can release dangerous gases.
Step-By-Step Protocol Overview
This section provides a concise process you can refer to while performing rust removal. Start with surface rust removal using mechanical methods, assess the depth of corrosion, apply chemical treatment only where needed, and then finish with a protective barrier to stop new rust from forming. The goal is to restore a smooth, clean surface ready for protective coatings. Remember to dry completely and apply light lubrication to moving parts after drying. If rust persists in crevices, consider a second round of mechanical cleaning followed by a targeted chemical treatment. Maintaining a dry, covered storage area will greatly reduce future rust formation.
Aftercare and Prevention: Keeping Tools Rust-Free
Once rust is removed, the next priority is long-term protection. Wipe tools dry and apply a light coat of oil or a rust-inhibiting spray to metal surfaces, especially joints and handles that see moisture. Store tools in a dry, low-humidity environment or use desiccants in closed toolboxes. Regular inspection helps catch early rust before it spreads. Clean, dry storage is one of the simplest yet most effective prevention strategies. If you work in damp spaces or outdoor environments, consider applying a protective coating or wax to metal surfaces periodically. Finally, develop a simple maintenance ritual: wipe down after use, dry thoroughly, and reapply protective coating every few months to minimize future rust.
Authority and Further Reading
For established guidelines on safety and corrosion prevention, see the following authoritative sources:
- OSHA (https://www.osha.gov) – Workplace safety guidelines and chemical handling standards.
- NIST (https://www.nist.gov) – Standards and guidelines related to corrosion science and materials testing.
- CDC NIOSH (https://www.cdc.gov/niosh) – Health information on chemical exposures and safe handling practices.
These references support the recommended procedures and emphasize safety while performing rust removal.
Common Mistakes and Troubleshooting
Even experienced DIYers can slip up during rust removal. Common mistakes include over-scrubbing polished surfaces, which can remove protective finishes, or soaking tools for too long when using chemical rust removers, which can pit the metal. Always test first on a small area, and work in stages so you can stop if you notice signs of finish damage or excessive wear. If rust remains in tight corners after mechanical cleaning, apply a targeted chemical treatment and use a brush or cotton swab to reach into crevices. Finally, ensure thorough drying before applying any lubricant or protective coating, as moisture left behind is a primary trigger for re-rusting.
Tools & Materials
- Safety glasses(Impact-resistant, ANSI Z87.1)
- Nitrile gloves(Chemical-resistant)
- Wire brush (stiff bristles)(Copper or steel bristles both fine)
- Sandpaper (80-120 grit)(Start coarse, finish fine)
- Steel wool (0000 grade)(Smooth finish for delicate areas)
- Rags or lint-free cloths(For wiping and drying)
- White vinegar or citric acid(Household rust-removal options)
- Commercial rust remover (optional)(Follow label instructions)
- Small plastic tray or container(Contain liquids during soaking)
- Rust-preventive oil or spray(Protective coating after cleaning)
Steps
Estimated time: 60-120 minutes
- 1
Prepare workspace and gather materials
Set up a well-ventilated area with a tray to catch debris. Lay out all tools and materials so you can switch methods if needed. Put on PPE before handling rust and chemicals. This reduces risk and keeps your workspace organized.
Tip: Label each container and keep chemicals away from heat sources. - 2
Assess rust depth and decide on approach
Inspect each tool to determine whether rust is surface-level or deeply pitted. Surface rust is often removable with mechanical methods alone; heavy corrosion may need chemical treatment or tool replacement. Decide whether to proceed with a single method or a combination for best results.
Tip: If you see deep pits or compromised handles, consider replacement for safety. - 3
Remove loose rust mechanically
Use a stiff wire brush to scrub away loose oxide, then switch to 80-120 grit sandpaper to smooth the surface. Work along the existing tool geometry to avoid gouging and damage to critical features like teeth or jaws.
Tip: Always move with the grain of the metal and maintain consistent pressure. - 4
Apply chemical treatment if needed
Dip or soak rusted areas in a mild rust remover (vinegar or citric acid) as per product or recipe, or apply directly with a brush for localized spots. Do not exceed recommended dwell times to prevent metalamage, then rinse thoroughly with clean water.
Tip: Test on a small area first; avoid soaking wooden handles. - 5
Rinse, dry, and re-sand if necessary
Rinse any residue off with clean water and dry immediately with a lint-free cloth. If remaining rough patches persist, repeat mechanical cleaning at a finer grit to restore a smooth surface before protective coating.
Tip: Dry completely; residual moisture invites quick re-rusting. - 6
Apply protective coating
Wipe a thin layer of rust-preventive oil or spray onto the metal surfaces, paying attention to joints and moving parts. Let it dry to form a barrier that slows oxidation and improves next-use readiness.
Tip: Re-apply after heavy use or if storage is prolonged in humid environments. - 7
Inspect and store properly
Check that all surfaces are dry and coated. Store tools in a dry place, ideally with desiccants, to reduce ambient humidity. Regularly inspect tools for early signs of rust and address promptly.
Tip: Keep a maintenance log if you have many tools. - 8
Document and maintain habits
Keep notes on what methods worked best for each tool type and schedule routine checks to prevent future rust. Maintenance every few months helps sustain tool performance and longevity.
Tip: Create a simple calendar reminder for preventive maintenance.
Quick Answers
What is the fastest way to remove rust from tools?
For most surface rust, mechanical cleaning with a wire brush and sandpaper is fastest. Heavier rust may require a short chemical treatment followed by mechanical finishing. Always test on a small area first.
Mechanical cleaning is typically fastest for surface rust, with a quick chemical treatment for stubborn spots if needed.
Can I remove rust from tools without any chemicals?
Yes. Surface rust can often be removed with mechanical methods alone, such as brushing and sanding. Deeper rust may require chemical help or tool replacement.
Yes, many rust issues can be addressed with mechanical methods, but very deep rust might need chemicals or replacement.
Will rust remover damage blades or precision parts?
Most rust removers are formulated to protect metal while removing rust, but always test on a small area and follow the label. For critical blades or precision surfaces, use milder treatments and minimal dwell times.
Always test first and follow instructions; milder treatments are safer for precision parts.
Is it safe to remove rust on tools with wooden handles?
Be cautious: some rust removers can damage wood or finishes. Use chemical-free or mild methods on wooden handles, or remove the metal part for treatment and reattach later.
Be careful with wooden parts; use mild methods or separate the metal for treatment.
How can I prevent rust from returning after cleaning?
Dry tools thoroughly, apply a light protective coating, and store in a dry place. Regular checks and reapplication of rust-preventive oil can dramatically reduce future rust.
Keep tools dry, coat them lightly, and store in a moisture-controlled area to prevent rust.
When should I replace a tool rather than trying to restore it?
If rust has caused deep pitting, structural weakness, or unsafe operation, replacement is safer than restoration. Assess tool integrity before proceeding with restoration steps.
If the tool is structurally compromised, replace it rather than restore.
Are there eco-friendly rust removers?
Yes, some biodegradable rust removers exist. Always follow label safety guidelines and consider milder options like vinegar or citric acid as a first choice.
There are eco-friendly options; start with milder cleaners when possible.
Quick Summary
- Identify rust depth before choosing a method
- Mechanical cleaning is quick for surface rust
- Chemical treatments are for stubborn spots or heavy rust
- Dry thoroughly and apply a protective coating
- Regular maintenance prevents future rust