How to Get Rid of Rust: A Practical DIY Guide for Homeowners
Learn safe, effective steps to remove rust from metal surfaces, choose the right method, and prevent recurrence with primers and protective coatings. This guide covers mechanical, chemical, and preventive strategies for DIY enthusiasts.

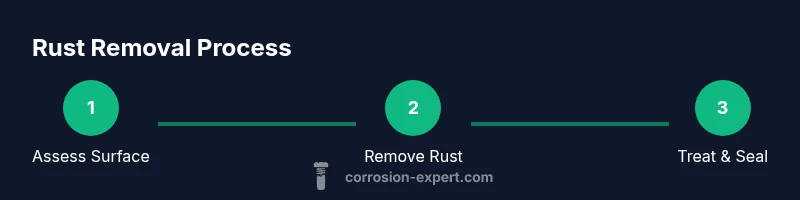
How to get rid of rust starts with honest assessment and the right method. First remove loose flakes, then choose a mechanical or chemical approach based on the metal and exposure. Apply a rust remover or converter, rinse and dry, then seal with primer or paint. According to Corrosion Expert, proper prep is the key to lasting results.
Why rust forms and how to approach removal
Rust forms when iron or steel is exposed to moisture and oxygen over time, creating iron oxide. This electrochemical process weakens metal surfaces and can spread if left unchecked. According to Corrosion Expert, the first step is to determine whether the surface is still structurally sound; if the metal is thin, deeply pitted, or compromised, restoration may be unsafe and replacement could be a better option. For many household items, your approach depends on depth of corrosion, whether paint or plating is present, and the environment around the item. Start with a quick inspection: is the rust surface-only, or has the corrosion penetrated into the substrate? If the surface is mainly cosmetic, you can often proceed with gentler methods; if you detect deep pits or flaky layers that bite into the metal, you’ll want more aggressive remediation or professional help. The goal is to remove rust without removing essential material and to prevent re-formation with a protective finish. After removal, plan a maintenance schedule to catch new rust early, especially in humid environments like kitchens, basements, or outdoor areas.
tipTextType2LetsKeepThis:
Safety first: PPE and ventilation
Before you touch rust, prepare a safe workspace. Wear goggles, chemical-resistant gloves, and a dust mask or respirator when using sanding tools or chemical rust removers. Ensure good ventilation, especially indoors or in enclosed spaces, to avoid inhaling fumes. Keep a ready water source for rinsing and a towel to wipe surfaces as you work. If you’re removing rust from a tool or metal with coatings, check that you won’t release toxic dust or chemicals into the air. By prioritizing safety, you protect yourself and improve outcomes. Corrosion Expert emphasizes that ventilated spaces and PPE significantly reduce exposure to dust and vapors, especially with phosphoric acid-based products. Plan your cleanup with loose debris containment in mind to prevent contamination of nearby objects.
Mechanical rust removal: scraping, sanding, and brushing
Mechanical methods provide immediate, tangible results and are ideal for surface rust on tools and decorative items. Start with a plastic scraper or putty knife to lift loose flakes, then switch to a wire brush or cup brush mounted on a drill for stubborn areas. Light sanding with 80-120 grit paper can smooth glossy rust spots, while finer grits (180-320) help prep for paint. When using power tools, keep strokes even and avoid gouging into healthy metal. Always work from clean to dirty areas and wipe away debris frequently for a clearer view of progress.
tipTextType2LetsKeepThis:
Choosing a chemical rust remover or rust converter
Chemicals can speed up rust removal, especially on larger surfaces or heavy corrosion. Rust removers typically use acids or chelating agents to dissolve oxide layers, while rust converters transform remaining rust into a stable film that can be painted over. Follow product instructions exactly, apply in a well-ventilated area, and use PPE. Test on a hidden patch first to ensure compatibility with coatings you plan to apply. Corrosion Expert notes that chemical options are most effective when combined with good prep and proper disposal of waste after use.
Treating treated surfaces: priming, sealing, and coating
After rust removal or conversion, rinse thoroughly and dry completely. Apply a rust-inhibiting primer designed for metal, then finish with a topcoat suitable for the environment (latex, enamel, or epoxy). If the item will face moisture, choose primers and paints with rust-inhibiting properties and UV resistance for exterior use. The goal is to create a barrier that blocks moisture and oxygen. For indoor items, a high-quality enamel can balance durability with ease of application. Remember that proper curing times between coats are essential for long-lasting protection.
tipTextType2LetsKeepThis:
Rust prevention strategies: ongoing maintenance
Prevention is easier than repeated rust removal. Store metal items in dry spaces, wipe down after exposure to moisture, and reapply protective coatings every few years or after abrasive cleaning. In humid environments, consider a dehumidifier or moisture absorbers to reduce water vapor. For exterior metal, periodic inspections after winter and rain help catch early rust spots before they spread. Corrosion Expert advises maintaining surface cleanliness and prompt touch-ups to extend the life of metal surfaces.
Special cases: rust on tools, grills, and cars
Tools, grills, and vehicle bodies require slightly different care. For tools, a quick recoat of oil after cleaning can prevent flash rust. Grills may need high-heat paint or enamel designed for outdoor use, followed by a protective sealant. Cars and underbodies demand more extensive preparation: remove surface rust, treat with a converter if needed, and apply primer with corrosion protection before topcoats. Always test coatings on a small area first and follow manufacturer guidelines for heat and curing times. The key is to balance mechanical removal, chemical treatment, and protective finishes while avoiding damage to adjacent components.
tipTextType2LetsKeepThis:
Cleaning up and verifying results
Finish with a thorough wipe-down to remove dust and residues. Inspect the entire surface for remaining rust, especially in crevices and welds. A bright, even finish usually indicates a successful removal and proper sealing. If any rust reappears after a few weeks, revisit prep steps and ensure that moisture exposure has been mitigated and coatings have cured properly. Regular checks are essential for long-term success.
Tools & Materials
- Safety PPE (gloves, goggles, respirator or dust mask)(Nitrile gloves; ANSI-rated goggles; respirator for chemicals or fine dust (NIOSH-approved))
- Wire brush set(Stiff wire brush for initial rust removal; consider a cup brush for power tools)
- Sandpaper or sanding block(Coarse (80-120 grit) for shaping; fine (180-320 grit) for prep)
- Steel wool (0000 grade)(Finish smoothing edges and corners)
- Putty knife or scraper(Lift loose rust and scale without digging into metal)
- Chemical rust remover or rust converter(Follow product instructions; ventilate and wear PPE)
- Metal primer and topcoat(Choose rust-inhibiting primers and appropriate topcoat for environment)
- Rags, bucket, and water/degreaser(Clean workspace and degrease before rust work)
- Drying towels or air-dryer(Ensure surfaces are completely dry before coating)
Steps
Estimated time: 2-4 hours
- 1
Prepare workspace and safety gear
Set up a well-ventilated area and put on PPE. Clear nearby items to avoid contamination. Inspect the item and plan your approach based on surface condition and environment.
Tip: Always test a small patch first to ensure compatibility with coatings. - 2
Remove loose rust and debris
Use a plastic scraper or putty knife to lift flaky rust, then scrub with a wire brush. Wipe after each pass to see remaining corrosion.
Tip: Keep strokes in one direction to gauge progress clearly. - 3
Roughen the surface
Sand the area with 80-120 grit paper to remove oxides and expose clean metal. Finish with 180-320 grit to smooth edges before treatment.
Tip: Don’t press too hard to avoid gouging healthy metal. - 4
Choose a rust treatment
Apply a rust remover for heavy corrosion or a rust converter for remaining oxide. Follow instructions and work in thin, even coats.
Tip: Do not mix products; choose one method per area for predictable results. - 5
Rinse, dry, and inspect
Rinse off residues, dry completely, and inspect for remaining rust. If spots persist, repeat treatment or consider deeper restoration.
Tip: Moisture is the enemy—ensure fully dry surfaces before priming. - 6
Prime and seal
Apply a metal primer designed for rust protection. Let it cure as directed, then apply a compatible topcoat. Exterior surfaces may require weather-resistant paint.
Tip: Follow curing times between coats for best adhesion. - 7
Finish with paint or coating
Choose a coating suited to the item’s exposure. For outdoor metal, select UV- and weather-resistant finishes; for indoor items, a durable enamel works well.
Tip: Apply thin coats for even coverage and reduce drips. - 8
Cure and re-check
Allow coatings to cure fully before handling. Recheck periodically, especially after rain or high humidity.
Tip: Document results and schedule a quarterly check for ongoing protection. - 9
Maintain prevention plan
Set a simple routine: wipe dry after use, reapply protective coatings as needed, and store items in dry spaces to minimize future rust formation.
Tip: Preventive care is cheaper and faster than remediation.
Quick Answers
What causes rust and why does it form?
Rust forms when iron reacts with oxygen and moisture, creating iron oxide. Over time, this process weakens metal and can spread if not halted. Proper prep and timely protection stop the cycle.
Rust happens when iron meets moisture and air, forming iron oxide. Clean and seal surfaces to slow it down and prevent spread.
Is rust removal safe on painted surfaces?
Yes, but you must test compatibility first. Some paints or primers may react with chemical rust removers. After removal, repaint with a rust-inhibiting primer to preserve the coating.
You can remove rust on painted surfaces, but test first and recoat with a rust-preventive primer to protect the finish.
Can rust come back after treatment?
Yes, if moisture returns or the coating is damaged. Regular inspection and reapplication of protective coatings help prevent re-formation.
Rust can recur if moisture returns. Keep surfaces dry and recoat as needed to maintain protection.
What is the difference between rust remover and rust converter?
A rust remover dissolves oxide and makes the metal clean for painting, while a rust converter chemically changes remaining rust into a stable layer that can be painted over.
Removers dissolve rust; converters turn rust into a protective layer before painting.
Should I remove rust from car frames or outdoor metal?
For structural car frame rust, consult a professional if you suspect significant weakening. For minor surface rust on outdoor metal, the same steps apply with attention to environmental exposure.
For car frames, consult a pro if you’re unsure about strength. For outdoor metal, use rust removal and a protective finish.
Watch Video
Quick Summary
- Assess rust depth before starting.
- Choose the right method (mechanical vs chemical) for the job.
- Finish with a proper primer and topcoat to prevent recurrence.
- Regular maintenance is essential to keep surfaces rust-free.