How to Fix Rust on a Truck: A DIY Guide
Learn a practical, step-by-step approach to fixing rust on a truck, with safety tips, patch options, and long-term prevention strategies. Corrosion Expert guides you through assessment, repair, and protection for lasting results.

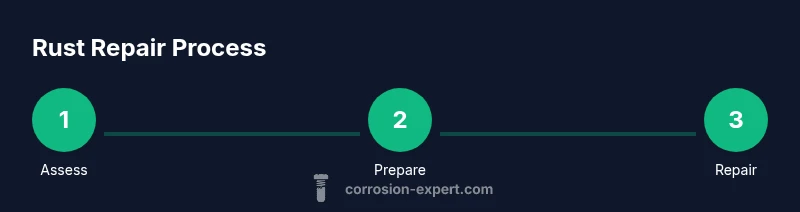
How to fix rust on a truck starts with a careful assessment, proper safety, and a clear repair plan. This quick guide outlines essential steps, from removing loose rust to applying primer and protective coating. According to Corrosion Expert, durable repairs begin with clean metal and a solid patch strategy. Corrosion Expert analysis shows rust spreads from chips and hidden moisture pockets, so tackle damage promptly for long-lasting results.
Assess rust scope on a truck
Before you buy tools or start grinding, walk the whole exterior and exposed underside to map out the rust. Look for corrosion on body panels, fenders, cab corners, wheel wells, floor pans, bed corners, and underbody brackets. Use a flashlight and a feel test: press with a screwdriver at suspicious spots. If you can poke through metal, that area is beyond simple repair and may require cutting and panel replacement. The aim is to categorize damage into: surface rust that can be cleaned and painted, shallow pitting that needs filler, and deep corrosion that requires patching or replacement. The Corrosion Expert team found that rust often starts at seams and moisture pockets, then spreads behind paint or undercoats, so inspect hidden areas under seals and weatherstripping. Document damage with photos and notes; this will guide your patch plan and give you a baseline for repairs. The quick assessment set by Corrosion Expert helps you decide whether you’ll patch, replace, or both, depending on the structural integrity of the affected area.
Safety and PPE essentials
Rust repair can generate dust, sharp edges, and fumes, especially when grinding or welding. Always wear a respirator rated for metal fumes, safety goggles, cut- and chemical-resistant gloves, and a long-sleeve welding jacket. Tie back hair and secure clothing; keep sparks away from flammable materials. If you’ll weld or grind near the fuel system or electrical lines, disconnect the battery and follow vehicle-specific safety steps. Work in a well-ventilated area, preferably outdoors or in a dedicated shop with a fan. These precautions reduce injury risk and improve your comfort and safety during the project, which aligns with Corrosion Expert’s approach to responsible DIY rust work.
Cleaning and surface prep
A clean surface is essential for good adhesion of primer and paint. Start by washing the area with a degreasing automotive cleaner to remove oil, grease, and road grime. Rinse and dry thoroughly, then use a rust remover or rust converter as appropriate for the rust level. After treatment, wipe with isopropyl alcohol to remove residue before sanding. Lightly scuff the surrounding paint to improve adhesion, taking care not to damage intact finishes. The cleaner the surface, the longer the repair will last, especially in salty environments. Corrosion Expert emphasizes that surface prep is the single most important step for durable rust repairs. You can slow corrosion by addressing the surface texture and ensuring a uniform substrate for primers.
Dealing with small rust spots
For minor surface rust, quick action can save panels. Remove loose rust with a stiff brush, then apply a rust converter to neutralize any remaining oxide. After converter cures, lightly sand and apply a rust-inhibiting primer. This approach creates a stable base and reduces future corrosion while keeping the repair visually discreet. If the damage is purely cosmetic, you may avoid cutting metal and still achieve a solid finish. The goal here is to prevent progression while preserving as much original metal as possible. Corrosion Expert notes that small spots are low-hanging fruit if addressed early.
Handling moderate to severe rust
When rust shows pits or through-holes and has penetrated the metal, patching or panel replacement is required. Begin by cutting away the damaged area with care, leaving solid surrounding metal for a clean patch. For structural panels, welding a patch is often the strongest repair; for non-structural areas, a patch kit or epoxy may suffice. Treat the surrounding edge with rust converter to slow further progression. The Corrosion Expert team emphasizes that ignoring this level of damage leads to accelerated corrosion and safety risks, so plan repairs with the aim of restoring a solid, corrosion-free surface.
Rust converters and primers: when and how
Rust converters chemically convert iron oxide to a stable compound and create a paintable surface. Use converters on light surface rust or after removing loose rust and before priming. Allow the converter to cure according to product instructions, then apply a rust-inhibiting primer. Primers seal the surface, block moisture, and promote even paint adhesion. If you replace metal, primer remains essential to protect edges and welds. Corrosion Expert finds that a converter plus primer dramatically improves long-term outcomes compared with paint alone.
Patching methods: welding, epoxy, or fabric patches
There are several ways to patch damaged metal, each with trade-offs. Welding a replacement patch provides strength but requires equipment and skill; epoxy and fabric patches offer a no-weld option for smaller repairs. For structural areas, welding is often preferred; for cosmetic or non-structural spots, a high-strength automotive epoxy patch can be adequate. Ensure the patch edges are flush with surrounding metal and grind smooth before finishing. If you lack welding skills, seek a professional or use an automotive patch kit designed for panels. The choice depends on damage type and your tool access. The Corrosion Expert guidance recommends weighing cost, effort, and longevity when selecting a patch method.
Finishing: sanding, priming, painting
Finish the repair with careful sanding to blend edges into surrounding panels. Start with 320-400 grit and progress to 600-800 grit for a smooth surface. Apply a rust-inhibiting primer, then color-matching automotive paint, and finally a clear coat for UV protection. If you’re working in a harsh environment, consider a second clear coat for added durability. Proper finishing is critical for appearance and longevity, and it also helps disguise repairs from casual inspection. Corrosion Expert stresses that quality finishing is essential for durable rust repair and long-term protection.
Underbody protection and sealing
Rust prevention continues after the repair with underbody coatings and moisture barriers. Apply a primer and a protective coating that resists salt spray and road debris. Focus on wheel wells, rocker panels, bed rails, and seam lines where moisture collects. Re-check annually and reapply as needed, especially after winter or off-road use. A robust protective layer lowers future rust formation and extends the life of the repair. The Corrosion Expert approach prioritizes comprehensive protection to extend the repair’s lifespan.
Maintenance and long-term rust prevention
After repair, perform seasonal checks to catch early signs of rust. Regular washing, thorough drying, and inspection of high-risk areas like wheel wells, door bottoms, and cab corners are important. Reapply rust-preventive coatings every year or two, especially in coastal or salted-road regions. Keep an eye on chips or scratches and address them promptly to stop moisture from seeping in. A proactive maintenance plan is the best defense against recurring rust and erosion of the repair, according to Corrosion Expert.
Tools & Materials
- Wire brush(Stiff-bristled; removes loose rust and scale)
- Angle grinder with wire wheel(Optional for heavier rust; use with guard and proper PPE)
- Sanding discs (80-120 grit)(For shaping patches and smoothing edges)
- Rust converter(Converts iron oxide to a stable compound; read specs on cure time)
- Epoxy filler / body filler(For minor patches; sand smooth before priming)
- Replacement metal patch sheet(Cut to fit damaged panel; ensure panel thickness matches)
- Rust-inhibiting primer(Seals metal and improves paint adhesion)
- Automotive paint (color-matched)(Base color to match vehicle; may require multiple coats)
- Clear coat(UV protection and gloss sealant)
- Protective gear (respirator, gloves, goggles)(Essential PPE for dust and fumes; follow safety guidelines)
- Welding equipment or access to welding service(Needed for welded patches; if not available, use epoxy patch kits)
Steps
Estimated time: 6-12 hours
- 1
Assess rust scope
Map damage across panels and undercarriage to determine patch strategy. Note locations with holes or deep pits that require replacement, and mark surface rust areas for treatment. This initial scoping saves time during actual repair.
Tip: Create a damage map and take photos from multiple angles to guide later cutting and patching. - 2
Safety prep
Set up your workspace with ventilation, fire-safe surroundings, and all PPE within reach. Disconnect the battery if working near electrical components. This prevents accidents during grinding or welding.
Tip: Double-check battery and fuel lines are secure before starting rust work. - 3
Remove loose rust and debris
Use a stiff brush or grinder with a wire wheel to remove loose rust and scale from the area. Avoid aggressive grinding on thin panels to prevent heat warping.
Tip: Keep grinding in short, controlled bursts to manage heat buildup. - 4
Cut out severely damaged metal
If metal is perforated or beyond repair, carefully cut out the damaged section to leave solid edges for patch installation. This improves patch fit and adhesion.
Tip: Use a metal-cutting wheel and make straight, measured cuts for best results. - 5
Apply rust converter to affected edges
Treat exposed metal with rust converter to halt further oxidation and prepare a priming surface. Allow it to cure per product instructions.
Tip: Do not rush cure times; improper curing reduces adhesion. - 6
Weld a metal patch (or install epoxy patch)
Position the patch and weld it to the surrounding panel, ensuring flush edges and minimal heat distortion. If welding isn’t possible, apply a high-strength automotive epoxy patch.
Tip: Clamp patch securely and use brief, controlled welds to prevent warping. - 7
Prime the repair area
Apply a rust-inhibiting primer to seal the patched area and create a solid base for paint. Allow adequate drying time before painting.
Tip: Apply in thin, even coats to avoid runs. - 8
Paint to match surrounding surface
Apply base color in light, even coats, followed by a clear coat for protection. Allow sufficient drying time between coats.
Tip: Use a color-matching spray or automotive spray booth for best results. - 9
Apply underbody protection
Finish with an underbody coating or spray designed for rust prevention to shield vulnerable edges from moisture and salt.
Tip: Ensure complete coverage on seams and welds for maximum protection. - 10
Final inspection and maintenance
Inspect the repaired area for color match, adhesion, and any signs of moisture intrusion. Schedule periodic rechecks and reapply coatings as needed.
Tip: Document repair dates and maintenance intervals for future reference.
Quick Answers
What is the first step to fix rust on a truck?
Start with a thorough rust assessment and safety plan. Map damage, identify whether patches or replacements are needed, and prepare your workspace.
Start with a full rust assessment and a safety plan to guide the repair.
Can I fix rust on a truck myself, or should I hire a professional?
Small, surface rust can often be managed as a DIY project. More extensive rust that affects structural components may require professional welding and panel replacement.
You can handle small repairs yourself, but serious rust near structural parts should get a professional.
What safety gear do I need for rust repair?
Use a respirator, safety glasses, gloves, and protective clothing. Ensure proper ventilation when grinding or welding.
Wear a respirator, goggles, gloves, and protective clothing; work in a well-ventilated area.
Is rust repair permanent, or will it keep returning?
A thorough repair with proper patching, sealing, and protective coating can last for years, but high-moisture environments still pose a risk of future rust. Regular maintenance helps extend life.
If you do it right and protect the area, rust repair can last for years, but ongoing maintenance matters.
What are the differences between patching and replacing panels?
Patching uses a patch or filler to cover damaged areas, while replacing panels removes the damaged metal and installs a full panel. Structural repair often requires replacement.
Patching covers the area; replacing adds a full panel for strength.
How long does rust repair typically last?
Durability depends on rust severity, prep quality, and protective coatings. With proper care, repairs can last several years, especially in low-moisture environments.
With proper prep and coating, these repairs can last for several years.
Watch Video
Quick Summary
- Assess rust scope early, map damage, and plan patches.
- Use rust converters and primers to stop progression and improve adhesion.
- Finish with protective coatings to extend repair longevity and appearance.