How to Get Rid Rust on a Car: A DIY Guide for DIYers
Learn a practical, step-by-step approach to remove rust from your car, assess damage, apply rust converters, prime, paint, and protect against future corrosion with tips from Corrosion Expert.

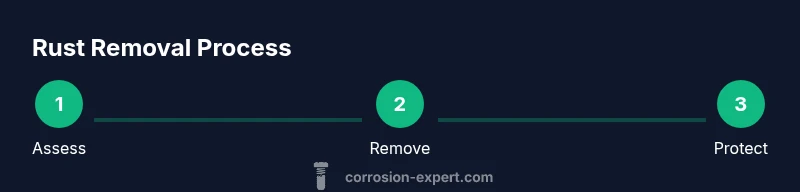
To get rid of rust on a car, start with a thorough assessment of the affected areas, then remove loose rust and clean the surface. Use mechanical tools for shallow rust, apply a rust converter or rust remover, prime the area, and finish with paint or protective coating. Safety gear is essential throughout.
What is rust on a car and why it matters
Rust on a vehicle is more than cosmetic; it can compromise structural integrity and reduce resale value. There are several forms you may encounter: surface rust, which sits on top of the coating and is mainly cosmetic; scale rust, which starts to peel at the edges of metal; and penetrative rust, which pits the metal and can reach structural members. Moisture, road salt, and temperature swings accelerate rust formation, especially in areas like wheel wells, undercarriage pinch welds, and behind plastic trim. The good news is that with early detection and consistent maintenance, you can slow or stop rust progression and extend the life of your car. According to Corrosion Expert, addressing rust promptly is the most cost-effective route over time, especially on non-structural areas where DIY methods are viable.
Rust progression and what it means for repairs
Rust begins with oxidation, typically in the presence of moisture and salt. If you catch surface rust early, you can often restore the finish with basic tools and paints. When rust penetrates deeper, it may require more aggressive treatment or panel replacement. For DIY enthusiasts, the key is honest assessment: is the rust confined to non-structural areas or has it compromised the frame or rails? If the latter, professional evaluation is advised. Corrosion Expert Analysis, 2026 emphasizes that timely interventions delay costly repairs and preserve vehicle safety.
Safety and workspace readiness
Before you begin any rust removal project, prepare a clean, well-ventilated workspace and gather PPE: safety goggles, gloves, a dusk mask or respirator if you’re sanding, and long sleeves to protect skin. Lay down drop cloths or old towels to catch dust, and keep a fire extinguisher nearby in case of sparks when using power tools. Remove surrounding trim or hardware only after supporting the area to prevent damage. Working in a ventilated area minimizes inhalation of dust and fumes from rust removers or paints.
How rust removal fits into the overall car care plan
Rust treatment is a multi-step process: remove existing rust, protect the metal with a rust converter or primer, and finish with durable paint or a protective coating. In many situations, you’ll gain the best results by combining mechanical removal for surface rust with chemical or converter treatments for areas where rust has started to bite into the metal. After finishing, you should inspect the area periodically and reapply protective coatings as needed. The Corrosion Expert team recommends a maintenance schedule that includes annual underbody washes and periodic cavity wax applications to curb future rust.
Maintenance and prevention strategies
Prevention is simpler and cheaper than repair. Regular washing, especially after winter salt exposure, helps prevent new rust from forming. Apply a rust-inhibiting primer and topcoat on cleaned metal, then use protective waxes or sealants for exposed panels. Consider applying a rust converter to areas with light corrosion and rechecking monthly during bad weather seasons. Properly sealed joints and cavities reduce moisture buildup, which is essential for long-term rust control.
Tools & Materials
- Safety goggles(Impact-resistant; fits over glasses)
- Work gloves(Chemical-resistant preferred)
- Dust mask or respirator(NIOSH approved; consider organic vapor mask for solvents)
- Wire brush (hand or wire wheel)(Sturdy handle; use on flat surfaces first)
- Sandpaper (60-120 grit)(For initial rust removal and smoothing edges)
- Angle grinder with wire wheel or sanding disk(Optional for larger areas; requires care)
- Rust remover gel or liquid(Read label for dwell time and safety)
- Rust converter (phosphate-based)(Converts rust to a stable layer)
- Primer (etching or self-etch)(Promotes adhesion on bare metal)
- Paint (color to match car)(Durable enamel or urethane recommended)
- Clear coat or protective topcoat(UV protection and sheen)
- Masking tape and paper/plastic sheeting(Protect surrounding areas)
- Rags and solvent(Clean surfaces and remove residues)
- Underbody/wheel-well wax or sealant(Extra protection for exposed areas)
Steps
Estimated time: 4-6 hours
- 1
Assess area and safety prep
Inspect the rusted area to determine depth and location. Put on safety gear, move any removable parts, and protect the surrounding finish. Decide whether this patch is DIY-friendly or if professional help is warranted for structural sections.
Tip: Take photos at each stage to track progress and for future touch-ups. - 2
Remove loose rust and clean surface
Use a wire brush or grinder with a fine wheel to knock away loose rust and scale. Wipe the area with solvent to remove dust, grease, and rust residues. The goal is a clean, dry metal surface for treatment.
Tip: Work slowly in small patches to avoid gouging the metal. - 3
Choose removal method for remaining rust
If rust is light, mechanical abrasion plus rust remover can suffice. For more stubborn spots or tight corners, apply a rust converter or gel, following the product’s dwell time. Always test on a small area first.
Tip: Follow dwell time precisely; rushing can leave residues that hinder paint adhesion. - 4
Treat and prime bare metal
Apply rust converter to convert remaining rust to a stable layer, then wipe and let cure. Apply a high-adhesion primer designed for bare metal to ensure good paint adhesion and corrosion resistance.
Tip: Primer must be fully dry before painting to avoid trapping solvents. - 5
Paint and protect
Seal the area with color-matched paint in multiple light coats, allowing adequate drying time between coats. Finish with a clear coat for UV protection and durability. Reassemble any removed trim only after paint is fully cured.
Tip: Avoid heavy coats that drip; several thin coats give the best finish. - 6
Cure, inspect, and maintain
Let the paint cure completely as per product instructions. Inspect after rain or car washing for new rust spots and reapply coating as needed. Establish a biannual undercarriage wash and cavity wax schedule to prevent recurrence.
Tip: Set a reminder to recheck and reseal vulnerable areas every season.
Quick Answers
What are the different types of rust on a car and how do I identify them?
Common types are surface rust, scale rust, and penetrative rust. Surface rust sits on the paint and can be sanded off; scale rust shows peeling edges; penetrative rust creates pits and can threaten metal integrity. Identify by sanding a small area and inspecting for texture changes and depth.
Types of rust include surface rust, scale rust, and penetrative rust. Inspect by gently sanding to feel for depth and texture, then plan your repair approach.
Can I remove rust at home or should I hire a pro?
Small, non-structural rust patches are typically doable at home with basic tools. If rust affects structural components, frame rails, or reaches deep pits, seek professional evaluation. Safety and long-term durability are the deciding factors.
DIY is fine for small patches, but structural rust should be handled by a professional.
What safety gear should I start with?
Wear safety goggles, gloves, and a respirator or dust mask when sanding or using chemicals. Work in a well-ventilated area and keep a fire extinguisher handy when using power tools and solvents.
Goggles, gloves, respirator, and good ventilation are essential for rust removal.
How long does a typical DIY rust repair take?
A small patch repair can take a few hours, while larger areas or multiple spots may take a full day. Allow drying times between coats and plan for curing before exposure to moisture.
Most small fixes take a few hours; larger repairs may require a full day.
Will rust converters stop rust permanently?
Rust converters chemically stabilize the rust and create a paint-friendly surface. They slow progression but do not restore structural metal. Always follow with primer and paint for best long-term protection.
Converters stabilize rust but don’t restore metal—finish with primer and paint.
Is aggressive media blasting necessary?
For heavy rust or curved sections, media blasting can yield a cleaner surface. For small patches, sanding and brushing are often sufficient and gentler on adjacent panels.
Blasting is powerful for heavy rust, but sanding works for smaller areas.
How can I prevent rust after repairs?
Seal with primer and topcoat, apply wax or sealant to exposed areas, and perform regular undercarriage washes. Address chips and scratches promptly to prevent moisture ingress.
Protect with primer, paint, and regular undercarriage washes to prevent recurrence.
Quick Summary
- Assess rust depth before starting.
- Use proper PPE and work in a ventilated space.
- Mechanical removal works for surface rust; converters and primers handle remaining areas.
- Finish with primer, paint, and topcoat for durability.
- Implement regular maintenance to prevent recurrence.