What to Do When Stainless Steel Rust
Learn practical, safe steps to identify, remove, and prevent rust on stainless steel surfaces. This comprehensive guide covers light staining, deeper rust, passivation restoration, and proactive prevention for DIY enthusiasts.

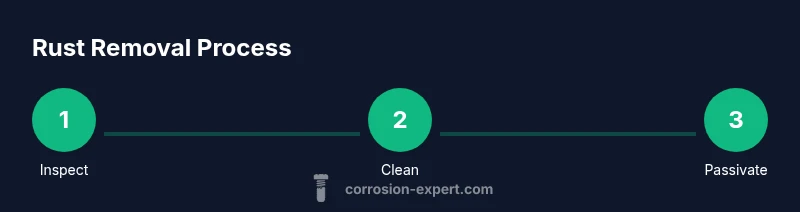
This guide helps you identify, remove, and prevent rust on stainless steel. You’ll learn to distinguish surface staining from deeper corrosion, safely scrub affected areas, and restore the passivation layer. Follow practical steps for light rust, then know when to seek professional help for extensive damage. This approach minimizes scratching and preserves shine.
Understanding the problem: what to do when stainless steel rust
Stainless steel is designed to resist corrosion, but rust can appear when the protective passivation layer is damaged by activity or environment. This is not always a sign of a failing material, but a signal that cleaning and restoration may be needed. If you're wondering what to do when stainless steel rust, the goal is to remove the oxidized layer, re-establish the passive film, and prevent recurrence. According to Corrosion Expert, most rust on stainless steel starts with minor scratches or exposure to chlorides that disrupt the chromium oxide film. The good news is that many cases are reversible with careful steps that protect the surface, prevent further moisture contact, and recondition the metal so it stays shiny and durable.
Causes of rust on stainless steel
Rust on stainless steel occurs when the chromium oxide protective layer is compromised. Chloride exposure from salt, cleaners, or coastal air can corrode the surface, especially where scratches or dents have removed the protective shield. Moisture retention on joints, seams, or cooking areas increases the chance of oxidation. Mechanical wear from everyday use can expose fresh metal, inviting rust if the surface isn’t properly passivated. Corrosion Expert analysis shows that improper cleaning routines and prolonged moisture exposure are common contributors.
Assessing the damage: stains vs rust, depth, and pits
Not all discoloration is true rust. Surface staining may be removable with gentle cleaning, while actual rust penetrates the metal’s surface and can create pits. Inspect areas with a bright light, feel for roughness, and look for small reddish-brown specks that adhere to grooves. If you can wipe away the color and the area returns to a uniform shine, you’re likely dealing with staining rather than severe corrosion. For any sign of deep pitting, you should proceed with caution and consider professional assessment.
Gentle cleaning methods for light rust and staining
Begin with non-abrasive methods to protect the passivation layer. Create a paste from baking soda and water, apply it to the affected area, and scrub with a soft nylon pad using gentle, circular motions. For light rust or mineral stains, a wipe with white vinegar or lemon juice can help loosen deposits before rinsing. Always finish with a thorough rinse using clean water and dry immediately with a microfiber cloth to prevent new moisture from forming. Avoid steel wool or metal brushes, which can scratch the surface and worsen corrosion.
Deeper rust and restoring surface passivation
If rust is more persistent or has created subtle pits, switch to a milder rust-removal approach that preserves the stainless surface. Apply a citric acid solution or a rust-removal product formulated for stainless steel, following the product’s directions. After treating, rinse thoroughly and re-passivate the surface where possible by applying a light coat of an approved passivation agent or citric-acid rinse. This helps restore the chromium oxide layer and reduces the likelihood of re-rusting in the near term.
Prevention and maintenance to avoid future rust
Prevention is easier than repair. Keep stainless steel surfaces dry after use, wipe up spills promptly, and store items in low-humidity areas when possible. Use pH-neutral, non-chlorine cleaners and avoid harsh acids or bleach that can erode protective films. Regularly buff surfaces with a clean microfiber cloth to remove oils and fingerprints, then re-wipe with a dry cloth. Consider periodic re-passivation if your environment is highly saline or damp, especially in coastal homes or bathrooms.
When to seek professional help or replace
If you notice widespread rust, deep pits, or surface roughness that does not respond to routine cleaning, a professional assessment is warranted. In some cases, rust indicates damage beyond simple restoration, and replacement of the affected component may be the most reliable option. The Corrosion Expert Team’s verdict is that regular maintenance and proper cleaning dramatically extend stainless steel life, but ongoing exposure to harsh environments may require proactive measures and expert guidance.
Tools & Materials
- Protective gloves(Nitrile or rubber gloves; avoid latex if sensitivities exist)
- Soft microfiber cloths(For wiping and buffing; keep dry between steps)
- Plastic scraper(Prevents scratching during rust removal)
- Nylon scrub pad(Non-abrasive; avoid steel wool)
- Baking soda(Make a paste with water for gentle cleaning)
- White vinegar(Loosens rust deposits; rinse well afterward)
- Mild dish soap(Ph-neutral cleaner for routine cleaning)
- Citric acid powder(Optional passivation boost; use per directions)
- Water (distilled if possible)(Rinse repeatedly to avoid mineral deposits)
- Drying towel or rack(Ensure complete drying after cleaning)
Steps
Estimated time: 60-90 minutes
- 1
Prepare and protect area
Put on gloves and lay down a protective mat or towel. Ventilate the space and cover nearby surfaces to guard against splashes. This initial setup reduces risk and keeps the process tidy.
Tip: Use masking tape to protect adjacent finishes and keep tools within arm’s reach. - 2
Inspect and distinguish stains from rust
Carefully examine the affected area under good light. If discoloration wipes away with gentle cleaning, it’s likely staining; true rust will resist removal and may feel rough as you probe with a finger.
Tip: Document the area with a quick photo for reference before you start scrubbing. - 3
Remove loose rust with a plastic scraper
Gently lift loose flakes with a plastic scraper, working from the outside edges toward the center. Don’t press hard enough to gouge the metal; the goal is to remove surface debris without deep scratching.
Tip: Keep the blade almost flat to avoid gouging the surface. - 4
Apply baking soda paste and scrub
Mix baking soda with a small amount of water to form a thick paste. Apply to the rust spots and scrub with a nylon pad in light, circular motions. Rinse and repeat as needed, then dry.
Tip: Do not use abrasive pads; persistent rust may require a milder approach. - 5
Rinse, dry, and re-evaluate
Rinse the area thoroughly with clean water, then dry completely with a microfiber cloth. Re-inspect to see if rust reappears; if so, consider a vinegar treatment or passivation step.
Tip: Dry surfaces thoroughly to prevent new moisture from initiating oxidation. - 6
Treat with mild acid if needed
For more stubborn spots, apply a small amount of white vinegar on a cloth or a citric acid solution as directed. Let sit briefly, then rinse completely and dry. Avoid prolonged soaking.
Tip: Never leave acidic solutions on stainless steel longer than recommended. - 7
Re-passivate the surface
After cleaning and drying, re-establish the passive chromium oxide layer using a passivation product or a citric acid rinse as appropriate. Rinse thoroughly and dry to completion.
Tip: Follow product instructions precisely to avoid overuse or under-treatment. - 8
Prevent future rust and monitor
Implement a routine: wipe dry after use, avoid abrasive cleaners, and periodically re-passivate in high-humidity areas. Set a reminder to inspect and maintain stainless steel surfaces monthly.
Tip: Keep moisture sources away from vulnerable joints and seams.
Quick Answers
What causes rust on stainless steel?
Rust forms when the protective passivation layer is damaged, and exposure to chlorides or moisture accelerates oxidation. Mechanical wear and improper cleaners can contribute as well.
Rust happens when the protective layer is damaged and moisture or salt accelerate oxidation.
Can rust on stainless steel be repaired without replacing parts?
Light rust and staining can often be cleaned and re-passivated; deeper pits may require replacing the affected component or professional assessment.
Yes, many rust issues can be fixed without replacement if caught early.
Is vinegar safe to use on stainless steel rust?
White vinegar can help loosen rust and deposits, but it should be rinsed off promptly and not left to sit for long periods on sensitive finishes.
Vinegar can help, but rinse thoroughly and don’t soak.
How can I prevent stainless steel from rusting in a humid kitchen?
Keep surfaces dry after use, wipe spills promptly, avoid chlorine-based cleaners, and perform periodic passivation in damp environments.
Keep it dry and clean, and re-passivate as needed.
Does saltwater cause rust on stainless steel?
Salt increases corrosion risk; wash off salt residues promptly and dry surfaces; consider extra passivation in coastal areas.
Yes, salt makes rust more likely; rinse and dry well.
When should I call a professional for rust on stainless steel?
If rust is extensive, pits are deep, or cleaning doesn’t restore appearance, seek professional assessment to determine replacement or specialized restoration.
If you see deep pits or persistent rust, get a pro.
Watch Video
Quick Summary
- Identify rust early to prevent pits.
- Use gentle cleaning first before aggressive methods.
- Restore passivation after rust cleaning.
- Maintain surfaces with proper drying and routine care.