Rust Repair Cars: A DIY Guide to Fixing Vehicle Rust
Learn proven rust repair techniques for cars—from inspection to coating—with a step-by-step approach, safety tips, and prevention strategies for DIYers.

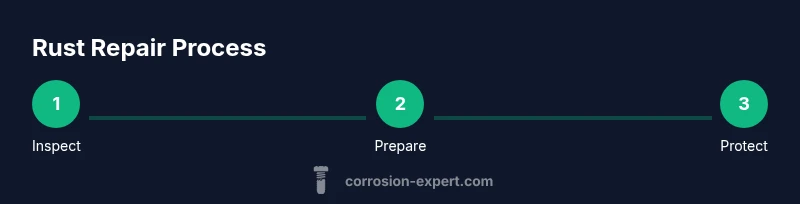
You will learn how to repair rust on cars, including inspection, removal, surface prep, and protective coatings. This guide covers the tools you need, a safe, step-by-step process, and common pitfalls to avoid. With proper safety gear and patience, DIY rust repair cars can restore metal integrity and prevent further damage.
What makes car rust issues unique and why repair matters
Car rust is a predictable, progression-based problem that starts with tiny spots and can spread if left unchecked. For DIY enthusiasts, understanding how rust forms in automotive environments helps you decide when a repair is feasible and when replacement is necessary. In most cars, rust begins at seams, joints, and protected cavities where moisture and road salt accumulate. Common trouble spots include rocker panels, wheel arches, floor pans, and the underbody. Surface rust sits on the surface, while penetrating rust eats into the metal and can weaken structural members over time.
Early detection, thorough surface preparation, and durable coatings are essential to a durable rust repair cars outcome. According to Corrosion Expert, taking action early saves time and protects safety and resale value. The team emphasizes that structural integrity should guide repairs; cosmetic fixes alone often fail in the long run. Many rust issues are approachable by a capable DIYer, but more serious corrosion—especially perforation or holes in load-bearing areas—merits professional input. By understanding rust types and their typical locations, you can plan a repair that restores strength and longevity to your vehicle. This article outlines inspection steps, tool recommendations, safe procedures, and lasting coatings that reduce future corrosion risk.
Assessing damage and planning the repair
Accurate assessment before any repair saves time and money. Begin by locating all affected areas, including hidden pockets behind bumper covers, under carpeting, and along the undercarriage. Use a bright flashlight, a magnet to test for metal thickness, and a probing tool to feel for softness or scale. If an area is spongy or soft, you may be near structural corrosion that requires more than cosmetic work. For structural components such as frame rails, mounting points, or suspension anchors, decide whether restoration is feasible or if panel replacement is more reliable. In cases of deep penetration or perforation, professional input is prudent to ensure the repair does not compromise safety. Corrosion Expert analysis shows that repairs focused on removing corrosion, protecting bare metal, and sealing joints tend to yield durable results when performed in a clean, controlled environment.
Next, rate the damage using a practical scale: Stage 1 for light surface rust with intact metal, Stage 2 for moderate thinning, and Stage 3 for deep penetration or perforation. Your plan should match the stage, prioritize structural areas, and set realistic expectations for time and costs. If you find rust in hard-to-reach places, consider using access tools or removing interior panels for a complete view. Finally, document the locations you plan to treat and photograph the condition for future reference and potential insurance or resale discussions.
Types of rust and common trouble spots on vehicles
Rust on cars appears in several forms, each demanding a different repair approach. Surface rust is a superficial problem that often responds well to cleaning, rust converter, and paint. Scale rust shows flaking areas where metal has begun to thin, requiring more aggressive prep. Penetrating rust penetrates deeper and can compromise metal thickness, sometimes perforating panels. Typical trouble spots include rocker panels, trailing edges of doors, wheel wells, floor pans, undercarriage braces, and frame rail junctions. In older vehicles or cars exposed to winter road salt, hidden rust can lurk behind rust-prone seams and inside cavities behind trim. A thorough inspection—inside, outside, and underneath—helps ensure you address all affected areas and avoid surprises later in the project.
Tools and materials you’ll need for rust repair cars
A solid toolkit makes rust repair cars projects safer and more predictable. Essential PPE includes a respirator (NIOSH-approved), safety glasses, and gloves. Gather degreaser, rust removal brushes, and a wire wheel or drill-mounted wire brush for surface prep. Have abrasive discs or sanding sheets in coarse to fine grits, plus an angle grinder or drill with appropriate attachments if needed. Keep a rust converter on hand to neutralize residual rust and an epoxy primer to seal bare metal. For finishing, you’ll want automotive-grade filler (optional), body filler knives, masking tape, paper or plastic drop cloths, and an automotive primer and topcoat system. Finally, sealants and undercoating help protect joints and undersides. The goal is a clean, dry surface ready for primer and paint, with proper ventilation and waste disposal in mind.
Rust removal methods: mechanical vs chemical
Rust can be removed mechanically, chemically, or with a combination of both. Mechanical removal uses wire brushes, flap wheels, sanding discs, and grinders to physically remove rust down to sound metal; watch heat buildup to avoid warping thin panels. Chemical methods rely on rust converters that chemically convert iron oxide to a stable layer, then primers that seal the surface. Chemical methods are slower but can reach into pores and seams where abrasion cannot. For best results, use mechanical prep to remove loose material, then apply a rust converter to treat remaining rust areas, and finally proceed with priming. Always work in a well-ventilated area and follow product instructions for dwell times and safety precautions. Avoid over-sanding delicate areas and test fit before applying coatings to ensure good adhesion.
Surface preparation and priming for a lasting repair
After rust removal, thoroughly clean the surface to remove dust, grease, and oils. If any rust remains, apply a rust converter to neutralize it and protect the metal while you prepare the surface for coating. Lightly scuff the area with 320- or 400-grit sandpaper to promote adhesion, then apply an etch primer or epoxy primer according to the manufacturer’s instructions. Focus on creating a uniform, clean base that is free of oil and dust; uneven surfaces can trap moisture and lead to future rust. Allow primers to cure fully before applying filler to smooth any imperfections, and then re-prime as needed before color coats. In seams and joints, apply a seam sealer after metal finishing to prevent moisture intrusion.
Finishing and protecting: paint, sealants, and prevention
Coating the repaired area with automotive paint requires a proper sequence: primer, base color, and clear coat. Use an epoxy primer for excellent adhesion and corrosion resistance, followed by a color-matched base coat and a clear protective layer. In critical joints, use seam sealer to block moisture ingress; recoat as recommended by the product guidelines. For underside or exposed areas, apply an undercoating or rust-preventive coating to slow future corrosion and provide a moisture barrier. Regular maintenance is essential: wash the car and thoroughly dry it to limit salt residue, inspect repair areas after winter or heavy rain, and address any new rust promptly to extend the repair’s life.
Prevention and maintenance after repair
Prevention is the best defense for rust repair cars projects. Keep your vehicle clean and dry, especially in winter climates where road salt is common. Regularly inspect seams, joints, and underbody guards for signs of moisture buildup or corrosion. Apply protective coatings after washing, and consider annual or semi-annual reapplication of rust-preventive products in vulnerable areas. Park indoors when possible, or use a breathable car cover to reduce humidity buildup in garage environments. A proactive approach—combined with a quality repair—greatly extends the life of body panels and preserves vehicle value. The aim is to create a durable, ongoing barrier against moisture and salt exposure.
Authoritative sources and safety reminders
For further learning and safety considerations, consult authoritative resources before doing rust repair cars work:
- OSHA: Respiratory protection and safety guidelines (https://www.osha.gov/respiratory-protection)
- NIST: Corrosion topics and testing standards (https://www.nist.gov/topics/corrosion)
- NACE International: Corrosion standards and best practices (https://www.nace.org)
The Corrosion Expert team recommends following all safety guidelines, using proper PPE, and working in a well-ventilated space. When in doubt, seek professional opinion for structural rust or areas near critical load paths.
Tools & Materials
- Respirator (NIOSH-approved)(P100-rated for dust and chemical fumes)
- Safety glasses(Goggles or side shields)
- Work gloves(Break-in pair with good grip)
- Degreaser/solvent(Cleans oil and grease from metal)
- Wire brush or wire wheel(Coarse brush for initial rust removal)
- Sanding discs (coarse to fine)(60-120 grit for metal prep)
- Angle grinder or drill with grinder bits(Heavy rust areas and weld prep)
- Rust converter(Converts remaining rust to a stable layer)
- Epoxy automotive primer(Promotes adhesion and corrosion resistance)
- Body filler (optional)(For smoothing pits after rust removal)
- Masking tape and drop cloths(Protect surrounding areas)
- Automotive enamel or urethane primer/topcoat(Finish with color and clear coat)
- Seam sealer(Seal joints to prevent moisture ingress)
- Undercoating spray (optional)(Additional moisture barrier for underside)
Steps
Estimated time: 3-6 hours
- 1
Inspect and secure the work area
Survey all rust zones, set up ventilation, and remove loose debris. Ensure car is stable with wheel chocks and the parking brake. Identify safety hazards before starting work.
Tip: Wear PPE and keep a clean, organized workspace. - 2
Remove loose rust and debris
Use a wire brush and, if needed, a grinder with a guarded wheel to knock away surface rust. Avoid excessive grinding to prevent thinning the metal.
Tip: Work in gentle passes and keep a consistent angle. - 3
Degrease the area
Apply degreaser to remove oils and residues that hinder adhesion. Wipe clean and allow to dry completely before proceeding.
Tip: Heat may accelerate drying, but avoid overheating the metal. - 4
Apply rust converter
Coat affected zones with rust converter to neutralize remaining rust. Allow the converter to cure as per the manufacturer’s timing before moving on.
Tip: Do not rush the cure time; adhesion depends on it. - 5
Roughen and prime the surface
Lightly sand the area to create a mechanical key for primer. Apply epoxy primer in thin, even coats and let each layer dry fully.
Tip: Keep coats uniform to avoid runs. - 6
Fill and sand (if needed)
If pits exist, apply body filler, shape flush with surrounding metal, and sand smooth. Clean dust before priming again.
Tip: Do not overfill; leave a clean feather edge. - 7
Seam sealing and final prep
Apply seam sealer along joints to block moisture intrusion. Re-sand the area lightly for a good paint bond.
Tip: Use masking to protect adjacent panels. - 8
Paint and protect
Apply base coat + clear coat (or epoxy topcoat) per product instructions. Finish with undercoating on underbody if desired and cure in a dust-free area.
Tip: Avoid thick coats; multiple thin coats yield better finish. - 9
Inspect and cure
Inspect the finished repair for adhesion and uniform color. Allow adequate curing time and perform a light check for moisture ingress after rain.
Tip: Document the repair with photos for future reference.
Quick Answers
What is the best rust repair method?
The best method depends on damage. Surface rust can often be addressed with cleaning and coating, while deep or perforated rust may require removal, priming, and possibly panel replacement. For critical load-bearing areas, professional evaluation is advised.
The best method depends on the damage. Surface rust might be fixed with cleaning and coating, but deep rust may need replacement or professional help.
Is rust repair safe to do at home?
Yes, with proper PPE, ventilation, and adherence to product instructions. Avoid working on critical structural components without professional guidance if you suspect significant corrosion.
Yes, if you wear PPE and follow safety guidelines. If it involves structural parts, consider a pro.
Can rust be removed completely?
Many cases allow near-complete removal of surface rust, but hidden or penetrating rust might persist. Use rust converters and primer to stabilize remaining areas before painting, and monitor for reoccurrence.
Surface rust can often be removed, but some areas may still have hidden rust. Stabilize and seal what remains.
How long does rust repair take?
Time varies with damage. Small spots may take a few hours; larger areas or multiple panels can span a full day or more, especially if curing times are required between steps.
It depends on the extent—some repairs take a few hours, others a day or more.
Should you prime after rust repair?
Yes. Priming protects bare metal, improves adhesion, and helps block moisture that promotes new rust. Use the recommended primer before painting.
Yes. Priming is essential to seal the surface and prevent more rust.
When should you replace a panel instead of repairing?
If rust has perforated or compromised structural integrity, or if repair would be unsafe or unreliable, replacing the panel is the prudent choice.
If the damage is structural or perforated, replacement is usually the safer option.
Watch Video
Quick Summary
- Inspect thoroughly to catch hidden rust
- Match repair approach to damage level
- Prepare and seal bare metal before coating
- Finish with proper paint and protective sealants
- Maintain repairs with regular inspections