What to Do About Rust on a Car: A DIY Guide
Learn how to identify rust on your vehicle, assess severity, and perform safe, durable repairs. This step-by-step guide covers tools, pro tips, and prevention strategies to keep your car rust-free.

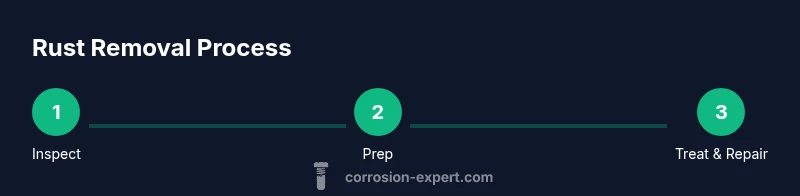
To address rust on a car, start with a quick severity check, then clean, treat, and protect the area. Use proper PPE, assess safety, and decide between DIY repair or professional help based on rust extent. This guide covers steps, tools, and best practices for lasting results.
What rust is and how it forms on cars
If you're asking what to do about rust on car, understanding rust types helps decide the best action. Rust is iron oxide that begins when metal is exposed to moisture and oxygen. There are several forms you may encounter on a vehicle:
- Surface rust: thin, flaky coating on the top layer.
- Scale rust: more aggressive and can detach large patches.
- Penetrating or pitting rust: small pits that allow moisture to reach deeper metal.
- Underbody or frame rust: more serious and may compromise safety.
According to Corrosion Expert, early detection and timely treatment dramatically improve outcomes. The good news is that many rust problems can be halted with basic steps, provided you separate cosmetic fixes from structural repairs. Consistent maintenance and protective coatings also reduce future rust formation.
How to assess rust severity safely
Assessing rust accurately determines the right fix and helps you avoid over- or under-repair. Start by inspecting visible panels, the undercarriage, and seams for flaky edges, bubbling paint, or dark stains that indicate moisture exposure. Gently tap suspect areas with a plastic tool to listen for changes in sound—a hollow or crumbling feel suggests deeper corrosion. If you see rust eating into the metal beyond surface level, plan for more involved repair. Always consider safety: rust on load-bearing sections, structural members, or near seams that carry weight should prompt professional evaluation. Corrosion Expert's guidance emphasizes stopping progression early, since untreated rust can worsen with road salt, humidity, and temperature swings.
Preparing your workspace and safety gear
Before you touch any rust, set up a clean, well-ventilated workspace and gather the right safety gear. Work on a flat, stable surface with the vehicle securely parked and the parking brake engaged. Wear protective eyewear, gloves, and a dust mask or respirator when sanding or grinding. If you’ll be working near fuel lines or electrical components, disconnect the battery and avoid open flames or sparks. Keep a dedicated cleanup area and use disposable rags to minimize contamination. Corrosion Expert recommends establishing a drop cloth and masking off adjacent paint to prevent overspray.
Cleaning and removing light surface rust
Starting with light surface rust is often a straightforward DIY job. Begin by washing the area with soap and water to remove dirt, oils, and contaminants. Degrease with a metal-safe degreaser and rinse thoroughly. Use a wire brush or green-scouring pad to remove loose rust, then wipe with a clean cloth. For stubborn spots, apply a rust remover product according to the label and allow it to work for the recommended time. After treating, rinse again and dry completely to prevent new moisture from starting the cycle again. This lays a clean foundation for any subsequent treatment or repainting.
Using rust converters and primers
When surface rust remains after brushing, a rust converter can transform the iron oxide into a stable compound, creating a suitable surface for primer. Follow the product instructions precisely, typically applying in a well-ventilated area and allowing adequate cure time. After converter dries, apply an etching primer to promote adhesion on bare metal. Primer helps ensure the final paint seals micro-pits and prevents moisture from returning. For best results, work in small sections and avoid rushing the curing stages. Corrosion Expert notes that proper curing is critical to long-term protection.
Repairing deeper rust and damaged panels
Deeper rust requires more than surface treatment. If you detect rust that has eaten through the metal or compromised structural areas, you may need panel replacement or professional repair. Small dents or pits can sometimes be filled with specialized automotive body filler after proper rust stabilization and priming. Sand smooth after curing and inspect for evenness. If there’s doubt about structural integrity or airbag/critical components, lean toward professional repair. The goal is to restore strength and prevent continued rust ingress.
Painting and sealing rust-prone areas
Cosmetic repairs demand an appropriate paint system. After priming, apply color-matched base coat in thin, even layers, allowing each layer to dry per the manufacturer’s guidance. Finish with a clear coat to seal the surface and improve UV resistance. Pay attention to color match and texture to maintain resale value and aesthetic appeal. A well-sealed surface resists moisture ingress and slows future rust formation. Always follow the paint system’s recoat windows and curing times for best durability.
Rust prevention strategies for the long term
Prevention is easier and cheaper than repeated repairs. Regular washing to remove road salt, especially in winter, reduces corrosion risk. Apply protective undercoating or wax specifically designed for automotive use, focusing on wheel wells, frame rails, and rocker panels where splash height produces chronic moisture exposure. Repair chips and scratches promptly to prevent moisture from seeping behind the paint. Consider rust-inhibiting primers in vulnerable areas and reapply protective coatings on a routine schedule. A planned maintenance routine dramatically lowers rust incidence over the vehicle’s life.
When to involve a professional
If you notice rust on critical structural components like the frame, subframe, suspension mounts, or load-bearing areas, seek a professional evaluation. Extensive rust that has eaten through metal, compromised welds, or reached hidden cavities may require specialized tools and process. A professional can assess safety implications and determine the most effective course, including panel replacement, welded patches, or frame work. Early consultation can save time and money by preventing spread.
Real-world scenarios and quick case studies
In many DIY scenarios, homeowners have successfully tackled light surface rust on fenders or doors with careful sanding, rust converter, primer, and paint. Another favorable case involved routine winter maintenance, where prompt attention to small chips prevented larger rust issues on the rocker panels. Less favorable cases involve long-standing exposure in coastal areas, where moisture and salt combination accelerates corrosion. In those situations, a staged approach—stabilize, repair, and seal—often yields the most durable result while minimizing risk to structural components.
Maintenance checklist for a rust-free car
Create a simple, repeatable routine to keep rust at bay: clean the car regularly, especially after salty or muddy conditions; inspect undercarriage and wheel arches every season; touch up chips promptly; reapply protective coatings as recommended by the coating manufacturer; and store in a dry, sheltered environment whenever possible. Keeping notes on when you treated areas helps you track progress and plan future maintenance. Consistency is the secret to long-term rust resistance.
Tools & Materials
- Safety goggles(Protect eyes from debris and chemicals)
- Gloves (nitrile or work)(Prevent skin contact with cleaners and solvents)
- Dust mask or respirator(Prevent inhalation of dust and fumes)
- Degreaser or soap(Remove oils before rust work)
- Wire brush(Loosen and remove loose rust)
- Sandpaper set (80, 120, 220 grit)(Prepare bare metal and blend edges)
- Rust converter(Stabilize remaining rust as a base for primer)
- Etching primer(Improve paint adhesion on bare metal)
- Automotive paint (base coat, color matched)(Finish with a seamless color match)
- Clear coat(Seal the paint and add UV protection)
- Masking tape and paper(Protect adjacent areas from overspray)
- Body filler (optional for small dents)(Smooths minor deformations before priming)
- Filler putty (optional)(Fill deeper pits after rust stabilization)
- Paint thinner/cleaner(Clean brushes and wipe surfaces)
- Rags and microfiber cloths(Dry, clean, and wipe surfaces)
Steps
Estimated time: 4-8 hours
- 1
Inspect rust area
Identify affected panels and estimate severity. Note whether rust is surface-only or penetrating deeper. Mark areas with tape for reference and plan your approach.
Tip: Document findings with photos to guide repairs. - 2
Prepare workspace and PPE
Set up a clean, ventilated workspace. Put on safety goggles, gloves, and a respirator. Shield nearby paint to prevent overspray.
Tip: Work outdoors or in a well-ventilated garage for fumes. - 3
Disconnect battery (if near electrical)
To avoid short circuits, disconnect the negative battery cable if you’ll work near wiring or electronic components.
Tip: Never bypass safety systems while working on a car. - 4
Clean the area
Wash with degreaser to remove oil and grime. Rinse and dry thoroughly before proceeding.
Tip: A clean surface ensures better adhesion for primers. - 5
Remove loose rust
Use a wire brush to knock off flaky rust and reveal solid metal underneath. Wipe away dust after brushing.
Tip: Avoid aggressive grinding that could gouge metal. - 6
Sand to bare metal
Sanding exposes fresh metal for reliable adhesion. Start with 80–120 grit and finish with 220 grit.
Tip: Feather edges to blend with surrounding paint. - 7
Apply rust converter
Coat the affected area as directed by the product. Allow it to cure; this stabilizes remaining rust.
Tip: Do not rush curing times; premature priming cancels the benefit. - 8
Prime and fill (if needed)
Apply etching primer on bare metal. If pits remain, use filler to smooth the surface after proper curing.
Tip: A thin, even layer is better than a thick coat. - 9
Apply base coat
Spray multiple light coats for color accuracy. Let each layer dry per manufacturer guidance.
Tip: Maintain a consistent distance for even coverage. - 10
Seal with clear coat
Finish with a clear coat for UV resistance and gloss. Allow curing before handling.
Tip: Avoid applying in high humidity to prevent blushing. - 11
Reassemble and inspect
Reattach any removed parts, check for touch-ups, and test for adhesion and color consistency.
Tip: Check for drips or sags and correct quickly. - 12
Apply rust protection and monitor
Add underbody sealant or rust-protective coating in vulnerable areas. Plan periodic inspections and touch-ups.
Tip: Set a reminder to recheck every 6–12 months.
Quick Answers
What is the difference between surface rust and deep rust on a car?
Surface rust only affects the outer layer and is usually fixable with sanding and repainting. Deep rust penetrates the metal and can require filler, panel replacement, or professional welding. Start with careful assessment to decide the best course of action.
Surface rust is cosmetic and fixable at home; deep rust may need professional repair and welding.
Can I fix rust without repainting the car?
Small patches can be repaired and resealed without a full repaint, but color-matching and clear coating improve durability and appearance. Large areas generally require repainting for long-term protection.
Yes for tiny spots, but larger areas usually need repainting for lasting results.
Is rust on the undercarriage dangerous to drive with?
Undercarriage rust can compromise structural integrity if severe. If you notice flaking metal or holes, stop driving the vehicle and seek a professional evaluation.
Severe undercarriage rust can be dangerous; have it inspected by a pro.
How long does a rust converter last?
Rust converters stabilize the rust and provide a base for primer, but their durability depends on subsequent painting and environmental exposure. Reapply protective coatings per manufacturer guidance after some years.
Converters help stabilize rust, but long-term protection still relies on proper priming and painting.
Should I attempt rust repair myself or hire a pro?
For small, cosmetic rust, a DIY approach can work. For extensive rust, hidden areas, or structural rust, professional repair is safer and more reliable.
DIY can handle small spots; seek a pro for large or structural rust.
What are common mistakes beginners make when treating rust on cars?
Rushing curing times, skipping rust stabilization, using mismatched primers, and failing to protect surrounding areas are common mistakes. Taking time and following product instructions reduces rework.
Common mistakes include skipping cure times and not protecting nearby paint.
Watch Video
Quick Summary
- Assess rust early to simplify repairs.
- Differentiate surface rust from structural rust before acting.
- Use proper safety gear and ventilation at all times.
- Follow curing times to maximize adhesion and durability.
- Prevent future rust with routine cleaning and protective coatings.