How to Clean Car Rust: A Complete DIY Guide for Cars 2026
Learn proven, safe methods to remove rust from your car and prevent recurrence. This step-by-step guide covers tools, techniques, safety, and maintenance for DIYers.

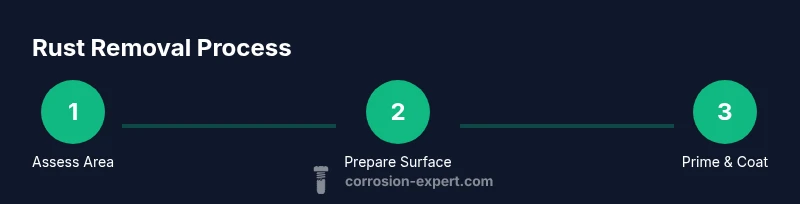
This guide shows DIY methods to clean car rust, from assessing severity to mechanical brushing, chemical rust removers, primers, and protective coatings. You’ll learn safe technique, proper PPE, and how to prevent rust from returning, so you can restore metal surfaces and extend your vehicle’s life.
Understanding how rust forms on cars and why cleaning it matters
Rust happens when iron or steel reacts with oxygen and moisture, forming iron oxide that expands over time. On vehicles, salt, road chemicals, and humidity accelerate this process, especially on lower panels, wheel arches, and undercarriage. Cleaning rust isn’t just cosmetic; it preserves structural integrity and resale value. A quick, disciplined approach prevents deeper corrosion, reduces repair costs, and buys you time before more invasive fixes are needed. By following this guide, you’ll tackle surface rust and minor scale before it becomes perforation. According to Corrosion Expert, early intervention is the most effective defense against widespread rust, so start clean-up as soon as you spot rust spots on your car’s body.
Key takeaway: understand where rust forms, what accelerates it, and prioritize early action for best results.
Assessing rust severity and planning repairs
Rust varies from surface rust to deep scale and perforation. Surface rust appears as a thin, flaky film and is usually manageable with mechanical cleaning. Deeper rust may cause pitting or hollowed areas that need filler or panel replacement. Before you begin, evaluate the affected area, check for bubbling under paint, and probe with a pick to gauge depth. Plan your repair approach: surface rust can be sanded and painted, while structural rust may require professional repair. Corrosion Expert Analysis, 2026, indicates that accurately categorizing rust severity reduces waste and improves outcomes by guiding the correct treatment. This assessment informs masking, material choices, and drying times.
Action: identify extent, mark edges, and decide whether you can safely proceed DIY or if a shop is warranted.
Safety gear and preparation
Always wear eye protection, nitrile gloves, and a respirator or well-ventilated mask when using metal abrasives or chemical rust removers. Work in a ventilated area and cover nearby components to shield them from dust and splatter. Keep a fire extinguisher handy when using flammable solvents, and read product labels for first-aid instructions. Dispose of waste according to local regulations. Corrosion Expert emphasizes PPE and hazard awareness as the foundation of safe rust cleaning. Gather PPE before you start and verify you have a clean, uncluttered workspace.
Tools and materials you’ll need (overview)
A clear plan helps you stay organized during rust cleaning. You’ll typically use a wire brush or drill attachment, sandpaper, a putty knife, degreaser, rust converter, sealant or primer, paint, and a finish coating. Have masking tape, rags, and a shop vacuum for dust control. For underbody rust, a frame-safe degreaser and rust converter are especially helpful. This section complements the Tools & Materials block and ensures you’re prepared for a smooth process. Personal note: keep your workspace well-lit and dry to avoid accidental slips or re-wetting of the treated area.
Mechanical rust removal techniques: brushing, sanding, and shaping the metal
Mechanical rust removal is the first line of attack on surface rust. Start with a stiff wire brush or a wire wheel to remove loose rust and scale. Progress to 80-120 grit sandpaper for smoother edges, then finish with fine grit to prepare for primer. For recessed areas, use a small file or abrasive cone. The goal is to create a clean, uniform metal surface free of loose material while avoiding deep gouges. A steady hand and patient technique reduce the risk of creating uneven surfaces that will show through paint. Pro tip: feather the edges to blend transitions with surrounding paint, ensuring a professional finish.
Chemical rust removal options: converters, removers, and safe use
Chemical rust removers convert rust to a stable compound or dissolve rust through acids. Phosphoric acid-based converters form a protective layer that can be painted over, while remover gels or liquids dissolve rust. Follow label directions for contact time and ventilation. Always neutralize or rinse thoroughly after chemical treatment and dry completely before priming. Chemical methods are most effective on light to moderate rust and should be used after removing loose rust mechanically. Safety notes from Corrosion Expert: never mix chemicals unless the product instructions allow it, and wear PPE to avoid skin or eye irritation.
Treating hidden rust and hard-to-reach areas (undercarriage, wheel wells, subframes)
Hidden rust can be more challenging but is often the most important to address. Use a mirror, flashlight, and flexible brushes to reach inside wheel wells and along frame members. Apply rust converter to areas where you cannot safely sand, then seal with primer after drying. For undercarriage rust, rinse with water cautiously and allow drying before applying protective coatings. A layered approach—converter in tight spots, then primer and topcoat on exposed panels—helps control corrosion at its source.
Primers, coatings, and protection after rust removal
After the surface is clean and dry, apply a rust-inhibiting primer to seal the metal and improve paint adhesion. Use a compatible base coat that matches your car’s color, and finish with a clear coat for UV protection. For areas prone to moisture, consider an epoxy or polyurethane primer, followed by a durable topcoat. Full protection comes from regular maintenance: wash relief areas, inspect for new rust every six months, and touch up chips promptly to prevent new rust formation. Corrosion Expert recommends routine protection in climates with salt exposure.
Maintenance plan and prevention strategies
Proactive maintenance minimizes future rust. Wash the car regularly, paying attention to wheel arches and undercarriage. If you live in winter climates, apply a rust-preventive undercoating or wax to protected areas. Address chips and scratches promptly, and store the car in a dry, sheltered space if possible. Periodic inspections are essential: scan for new rust spots after winter plowing or rainy seasons and treat quickly to prevent spread. This ongoing approach reduces long-term repair costs.
Common myths and mistakes about car rust removal
Myth: rust can be “just painted over.” Reality: untreated rust often returns and spreads under new paint. Mistake: neglecting proper masking of adjacent areas, causing overspray or paint failure. Myth: rust converters are a substitute for primer; in reality, you still need a primer layer. Debunking these myths saves time and improves results by focusing on proper prep, product selection, and finishing steps.
Environmental considerations and disposal of rust waste
Dispose of used solvents, rags, and chemical waste per local regulations. Do not pour them down drains; many areas require hazardous waste collection. Dry solvents can be disposed of in accordance with local guidelines, and used brushes should be cleaned properly before storage. This ensures your rust-cleaning effort remains safe for you and the environment, reflecting responsible DIY practices. Authority sources below offer more safety guidance.
Tools & Materials
- Stiff wire brush or wire wheel attachment(Use with a drill or handheld for best control)
- 120-80 grit sandpaper(Progress to finer grits (180-320) for finish)
- Putty knife or plastic scraper(Gentle scraping to lift flaking rust without gouging metal)
- Degreaser or mineral spirits(Clean oil, grease, and wax before rust work)
- Rust converter (phosphoric acid-based)(Apply per label; creates protective layer)
- Etching primer and rust-inhibiting primer(Allow to dry between coats)
- Automotive paint matched to color(Use thin, even coats)
- Clear coat or protective sealant(UV protection and wear resistance)
- Masking tape and drop cloths(Protect adjacent areas from overspray)
- Nitrile gloves, eye protection, and respirator(Safety first; follow product labels)
Steps
Estimated time: 2-4 hours
- 1
Assess area and set up workspace
Scan the body panels for rust extent, check for bubbling under paint, and mark trouble spots. Move vehicles to a well-ventilated, shaded area and cover nearby components with masking film. The goal is to isolate the work zone and prevent dust or chemical overspray from affecting sensitive parts.
Tip: Take photos before you start to document pre-clean conditions for future reference. - 2
Mask surrounding areas and protect yourself
Apply masking tape around the rust zone and set up drop cloths. Put on eye protection, gloves, and a respirator. Ensure good ventilation if using chemical rust removers or grinders.
Tip: Ventilation is crucial; never work in a closed space when using strong solvents. - 3
Degrease and clean the rust area
Wipe the area with degreaser to remove oil, wax, and dirt. A clean surface improves adhesion for rust converters and primers. Dry the area completely before proceeding to mechanical rust removal.
Tip: A dry surface ensures accurate rust assessment and better product performance. - 4
Remove loose rust with a wire brush
Use a stiff wire brush or a wire wheel to knock off loose rust and scale. Work in smooth, even strokes to avoid gouging the metal. Stop when the surface looks uniformly gray and free of loose particles.
Tip: Keep the brush at a shallow angle to minimize metal gouges. - 5
Sand rough edges and blend the area
Switch to 80-120 grit sandpaper to smooth edges and feather transitions into surrounding paint. For tight spots, use a sanding cone or small hand file. Clean dust with a tack cloth before applying primer.
Tip: Feathering helps the final paint blend look even and professional. - 6
Apply rust converter where needed
Apply a thin coat of rust converter to remaining rust-affected areas. Allow it to react and dry per label instructions; this step stabilizes the surface and reduces future corrosion risk.
Tip: Do not rush this step; proper dwell time is essential for product effectiveness. - 7
Prime bare metal and seal the surface
Apply a rust-inhibiting primer in thin, even multiple coats. Let each coat dry completely before applying the next. Priming improves paint adhesion and provides a corrosion barrier.
Tip: Primer should be allowed to cure in a dust-free environment. - 8
Paint and finish with protective layer
Apply base coat in light, even layers; several thin coats beat one heavy coat for durability. Finish with a clear coat to protect from UV and moisture. Allow full cure before exposing to elements.
Tip: Avoid heavy coats to prevent runs and sagging. - 9
Inspect, cure, and schedule maintenance
Check for paint imperfections and touch up as needed. Allow the coating to cure fully according to product guidelines, then wash and inspect every few months. Maintain a yearly rust check to catch early signs of corrosion.
Tip: Set a reminder to re-evaluate undercarriage after winter and road salt exposure.
Quick Answers
What is the fastest way to remove light surface rust on a car panel?
For light surface rust, start with mechanical removal using a wire brush or wheel, then sand to a smooth finish. Apply a rust converter if rust remains, followed by primer and paint. This sequence provides a durable finish with minimal downtime.
For light rust, you can begin with brushing and sanding, then finish with primer and paint.
Can rust be completely removed from a perforated panel?
Perforated rust often indicates deeper corrosion that may have compromised structural integrity. Cosmetic rust removal can be attempted, but professional evaluation is recommended to determine whether panel reinforcement or replacement is needed.
If the rust has perforated the metal, consider professional help for a safe, lasting repair.
Is rust converter safe to use on all car metals?
Rust converters are generally safe on steel and iron but may not be suitable for aluminum or painted surfaces without testing. Always read the label and test a small area first.
Most rust converters work on steel; test first on a hidden spot to be safe.
How long does it take for the paint to cure after rust repair?
Curing time varies by product; typically 24-72 hours for base coats and up to several days for full hardness. Follow the manufacturer's guidance and avoid washing the area during curing.
Expect several days for full cure; check product labels for exact times.
Should I sand or grind through clear coat to reach bare metal?
Sanding to remove rust near the edge is usually enough. Grinding can heat the metal and cause warping or color changes. Use controlled dipping and light pressure when needed.
Avoid aggressive grinding near edges; use sanding with light pressure.
Watch Video
Quick Summary
- Wear proper PPE and work in a ventilated area
- Tackle rust in stages from loose rust to primer and paint
- Use rust converters when metal is damp or deep-set rust is present
- A proper finish prevents moisture ingress and slows future rust
- Regular maintenance is essential to stop rust from returning