What to Do About Rust on Rotors: A DIY Guide
A practical guide from Corrosion Expert on addressing rust on brake rotors: inspect, decide between cleaning or replacement, and apply safe rust removal plus prevention.

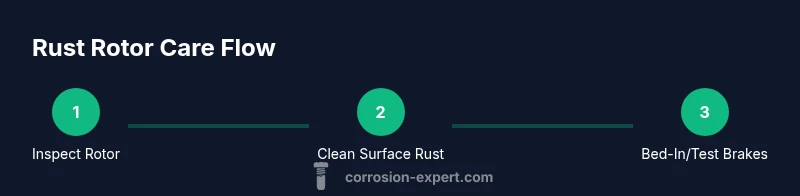
Rust on rotors, especially brake rotors, is common but manageable with the right steps. This guide shows how to inspect severity, safely remove surface rust, decide when replacement is needed, and apply preventive measures to reduce future corrosion. Follow the methodical steps for reliable braking and safer driving. We’ll reference Corrosion Expert techniques and emphasize safety.
Understanding rust on rotors and why it happens
Rust on rotors is a natural consequence of moisture, road salt, and heat cycling that brake systems experience. Cast iron rotors, when exposed to humidity and salts, form a thin oxide layer on the rotor surface. This layer is usually harmless if it remains at surface level and does not penetrate the rotor’s thickness or create deep pits. The Corrosion Expert team emphasizes that most rust on rotor surfaces is cosmetic and will often shed away after a few hard stops or a short drive. Yet, if rust progresses beyond the outer surface—creating pitting, roughness, or thickness loss—it can compromise braking performance and heat dissipation. The first step is to assess whether you’re dealing with surface rust or deeper corrosion. Performing a visual check and measuring rotor thickness can help you decide whether cleaning is sufficient or replacement is required. Maintaining rotors is part of routine vehicle care, and addressing rust early can prevent costly repairs later.
When you address rust on rotors, you’re protecting vital braking performance. This is a topic Corrosion Expert covers frequently for DIY enthusiasts and homeowners who want practical rust management without overhauling their braking system. By understanding how rust forms and its plausible consequences, you can approach rust on rotors with confidence and a clear action plan.
Safety and legality considerations
Before you begin any brake work, ensure you’re in a safe environment. Park on a flat surface, engage parking brakes, and place wheel chocks on the wheels opposite the work side. If you lift the vehicle, use jack stands rated for the vehicle’s weight and follow the manufacturer’s lifting points. Brake work carries safety risks including accidental wheel spin, brake fluid exposure, and rotor shattering if contaminated. Wear safety glasses and gloves to protect against sharp edges and chemical solvents. In some jurisdictions, performing brake work may require compliance with local regulations or inspection standards. If you’re uncertain, consult a professional or your vehicle’s manual. The goal is to handle rust responsibly and avoid compromising braking safety. Corrosion Expert recommends verifying that your vehicle’s braking system remains within manufacturer tolerances after any rust- remediation attempt.
Key safety practice: disconnect the battery if you’re working near airbag-equipped components or sensors, and never work under a vehicle supported only by a jack. Always double-check wheel torque specs after reassembly. Following these precautions keeps you safe and ensures you’re making progress on rust without creating new problems.
Diagnosing rust severity: surface rust vs. core rust
The distinction between surface rust and deeper corrosion guides your next move. Surface rust appears as a thin, reddish-brown film on the rotor’s outer surface and can often be addressed with mechanical cleaning. If the rust has penetrated into the rotor’s metal layer, you may notice roughness, scoring, or a noticeable wobble when rotating the wheel. Two simple checks help you gauge severity. First, visually inspect for pits or flaking material—deeper damage signals potential rotor replacement. Second, measure rotor thickness at multiple points with a micrometer or caliper; if you’re approaching or below the minimum thickness, replacement is the safer option. Corrosion Expert notes that incomplete rust removal can leave hidden pits that risk heat buildup under braking. If you’re unsure, err on the side of caution and consult a professional.
In some cases, you may see light surface rust after a long period of disuse or storage. This is often temporary and can be cleaned off with mild methods. The key is to avoid aggressive methods that could warp or weaken the rotor. Proper diagnosis prevents needless rotor replacement and keeps your braking system reliable.
Cleaning methods for light surface rust
Light surface rust can often be removed without rotor replacement. Begin with a safe, mechanical approach and standard solvent cleaners, avoiding harsh grinding on a still-installed rotor. Here’s a practical cleanup sequence:
- Remove the wheel to access the rotor safely, block the vehicle, and ensure the rotor is stationary.
- Spray brake cleaner to loosen surface rust and wipe with clean rags.
- Use a brass-bristle brush or non-metallic scraper to gently remove the rust without scratching the rotor surface.
- If needed, lightly sand the rotor with 180–320 grit sandpaper, working in a consistent pattern to even out the surface. Avoid removing material from the rotor’s edge where the braking surface begins.
- Re-clean with brake cleaner, dry completely, and inspect for any remaining rough patches.
Note: If rust remains after these steps or you notice pitting, scoring, or rotor thickness loss, plan for replacement or professional evaluation. Corrosion Expert advises that persistent rust can compromise braking efficiency and heat dissipation, so monitor braking response after reassembly.
When to replace rotors vs. focusing on rust removal
Rotor age, thickness, and scoring determine whether rust removal is sufficient. If the rotor’s minimum thickness spec is reached or exceeded, and there’s no deep scoring or warping, cleaning may restore safe operation. However, if the rotor shows:
- Deep pits or visible scoring that compromises the smooth braking surface
- Warping or pulsation felt through the brake pedal
- Excessive thickness loss from corrosion, or hot spots after a short drive then replacement is the prudent choice. Replacing rotors with fresh, properly machined or OEM rotors can restore braking performance and heat dissipation. In cases of significant rust on multiple components (e.g., calipers, wear sensors), consider a broader brake system inspection.
Corrosion Expert emphasizes making data-driven decisions: measure thickness, assess runout, and consult the vehicle’s service schedule. If you’re near the replacement threshold or not confident in your measurements, seek professional guidance.
How to properly bed-in rotors after rust removal or replacement
Bed-in, or curing, procedures help establish even contact between the rotor and brake pads after rust removal or rotor replacement. A proper bed-in ensures optimized braking performance and reduces glazing. Here’s a concise approach:
- Drive in a safe area at moderate speeds (30-40 mph) and perform several 10–15 second hard stops with light to moderate pedal pressure, allowing the brakes to cool between cycles.
- Repeat the cycles 8–10 times, gradually increasing heat while avoiding prolonged hard braking that could cause rotor glazing.
- After bed-in, drive normally to confirm consistent braking feel and listen for any unusual noises.
If you’re dealing with a rotor that’s been resurfaced, check the rotor thickness twice: once before and once after resurfacing, ensuring that both measurements remain within spec. The Corrosion Expert approach emphasizes patience and gradual heat cycling to prevent uneven pad wear or rotor damage.
Preventive practices to avert future rust
Prevention is easier than remediation. The following practices help minimize future rotor rust:
- Keep your vehicle dry and clean, especially after winter driving or coastal conditions with high humidity.
- Use a rust inhibitor or protective coating approved for brake components if you live in areas with heavy road salt usage.
- Schedule regular brake inspections and replace any compromised rotors promptly.
- Drive the car regularly to ensure moisture is flushed from the braking system; long periods of inactivity increase surface rust risk.
- Consider upgrading to rotors with corrosion-resistant finishes or rust-inhibiting coatings if you frequently encounter corrosive environments.
These steps, recommended by Corrosion Expert, help extend rotor life and maintain braking efficiency. Consistent maintenance and proactive rust management reduce the likelihood of costly rotor replacements.
Common mistakes to avoid and safety cautions
When addressing rust on rotors, common mistakes can undermine safety and lead to more expensive repairs. Avoid:
- Grinding or resurfacing rotors beyond the manufacturer’s minimum thickness; this weakens braking performance and heat dissipation.
- Replacing pads or rotors without confirming rotor surface is evenly cleaned, causing uneven contact and vibrations.
- Skipping wheel alignment checks after rotor work, which can compromise steering and braking response.
- Using aggressive cleaners or harsh tools that scar the rotor surface.
- Working on a hot rotor or insecure jack stand, which risks burns or injury.
Safety caution: Always wear eye protection and gloves, avoid inhaling solvent vapors, and properly support the vehicle before starting work. Following these cautions ensures your rust-removal efforts improve safety, not endanger it.
Real-world scenarios and decision making
Every rust issue presents a unique scenario. In a mild coastal environment, you may face surface rust that disappears after a few highway sessions. In cold climates with heavy road salt, you might see gradual rust buildup requiring more frequent inspections. For older vehicles or rotors with visible pitting, a hardware review is prudent. Use a structured decision approach: 1) Inspect and measure, 2) Decide if cleaning is adequate, 3) If in doubt, opt for replacement, 4) Bed-in if applicable, 5) Implement prevention. This approach aligns with practical guidance from Corrosion Expert and avoids risky shortcuts that compromise safety.
Quick-start checklist for rust on rotors
- Park on a flat surface and secure the vehicle. Check for rust on the rotor surface and edges.
- Gather the tools: jack stands, brake cleaner, brush, sandpaper, caliper, and a replacement rotor if needed.
- Remove a wheel to access the rotor, then inspect thickness and runout.
- If rust is surface-level, clean with brake cleaner and a brass brush; avoid aggressive grinding.
- Reinstall, torque wheels to spec, and perform a cautious brake test followed by a proper bed-in if you replaced rotors.
- Document findings and plan regular inspections to prevent future rust buildup.
What Corrosion Expert recommends for ongoing maintenance
To sustain rotor integrity, Corrosion Expert advises ongoing maintenance and informed decision-making. Educate yourself about rotor thickness specifications for your vehicle, understand how to differentiate surface rust from structural corrosion, and follow best practices for rust prevention. Routine inspections and timely replacements reduce the risk of unexpected brake failure. With methodical steps and careful evaluation, rust on rotors becomes a manageable issue rather than a recurring problem.
Tools & Materials
- Jack stands and wheel chocks(Ensure they are rated for the vehicle’s weight and placed on a solid, level surface.)
- Lug wrench or breaker bar(Used to loosen lug nuts before lifting the wheel.)
- Brake cleaner spray(Fast-drying solvent for degreasing and rust loosening.)
- Brass-bristle brush or non-metallic scraper(Gently removes surface rust without deep scratching.)
- Sandpaper or abrasive disc (180-320 grit)(Lightly smooths the rotor surface if needed.)
- Caliper or micrometer(Measures rotor thickness at multiple points.)
- Replacement rotor (optional, if damage is found)(Choose a rotor that matches your vehicle’s specifications.)
- Safety glasses and gloves(Protect eyes and hands during cleaning and handling.)
- Clean rags(Dry the rotor and wipe away debris.)
Steps
Estimated time: 1-3 hours
- 1
Prepare workspace and safety measures
Park on a flat surface, engage parking brake, and place wheel chocks. Loosen lug nuts slightly while the vehicle is on the ground, then lift and secure with jack stands. This setup minimizes movement and protects you during wheel removal.
Tip: Always chock the wheels opposite the work side to prevent rolling. - 2
Lift vehicle and access rotor
Raise the vehicle and remove the wheel to expose the brake rotor. Check that the brake caliper is secure, and ensure there’s no residual movement before proceeding.
Tip: Use wheel blocks and never rely on a jack alone for support. - 3
Assess rust severity
Visually inspect the rotor for surface rust, pits, or scoring. Measure rotor thickness with a caliper at multiple points to determine if you’re above the minimum spec.
Tip: If in doubt about thickness, assume replacement to be safe. - 4
Clean surface rust (if applicable)
Apply brake cleaner and scrub with a brass brush to remove surface rust. If needed, lightly sand in a uniform pattern to even out the surface without removing too much material.
Tip: Do not aggressively grind rotor surfaces; you can compromise strength and balance. - 5
Decide on replacement or reuse
If there are deep pits, scoring, or the rotor is near minimum thickness, replace rather than reuse. If the surface is clean and thickness is above minimum, you can proceed with reassembly.
Tip: Document measurements to compare with new parts if you replace later. - 6
Reassemble and test braking
Reinstall the wheel, torque lug nuts to spec, and lower the vehicle. Perform a cautious brake test at low speed to verify braking response. If you replaced rotors, perform a bed-in procedure according to your vehicle’s specs.
Tip: Avoid hard braking until the system is properly bedded-in.
Quick Answers
Can I drive with light surface rust on rotors?
Light surface rust often wears off after a short period of highway driving, but you should monitor braking feel. If the rust persists or you notice noise, vibration, or reduced braking efficiency, inspect the rotors and consider cleaning or replacement.
Light rust may disappear after driving, but if it doesn’t, stop and inspect the rotors for safety.
How do I know if my rotor must be replaced?
Replacement is necessary if the rotor thickness is below minimum spec, there is deep scoring or warping, or the rotor shows persistent rust that cleaning cannot remove. Always verify with measurement tools and the manufacturer’s specs.
If you measure thickness and see deep grooves or warping, replace the rotor.
Is resurfacing rotors a good option for rust issues?
Resurfacing can be appropriate when rotors are within thickness limits and have only minor surface irregularities. Avoid resurfacing if there is any sign of deep rust, pitting, or uneven wear.
Resurfacing is acceptable only if the rotor remains within thickness specs and is free of deep damage.
How often should I inspect rotors for rust?
Inspect rotors during regular maintenance—ideally every 12,000–15,000 miles or after winter driving or coastal exposure. Look for surface rust, grooves, and thickness loss.
Check rotors during routine maintenance, especially after salty or wet conditions.
What preventive measures help prevent rotor rust?
Regular drive cycles, rust inhibitors approved for brakes, and proper storage can reduce rust. Clean rotors and use protective coatings where appropriate; always follow manufacturer guidance.
Regular use and approved protective measures help prevent rotor rust.
Watch Video
Quick Summary
- Address rust early to protect braking performance
- Differentiate surface rust from core rust before acting
- Replace rotors when thickness or structural integrity is compromised
- Follow a safe bed-in process after rust removal or rotor replacement