Rust in Peace: DIY Rust Removal and Prevention Guide
Learn practical, DIY-friendly rust removal and prevention. This Corrosion Expert guide covers quick fixes, long-term protection, safety tips, and a maintenance routine for metal to achieve rust in peace.

Goal: remove rust and maintain metal surfaces so they stay rust-free. You’ll identify rust types, gather essential tools, and select safe removal methods. This guide walks you through cleaning, sealing, and protecting metal so your projects achieve rust in peace and long-lasting durability.
What 'rust in peace' means for DIYers
For DIY enthusiasts and homeowners, the phrase rust in peace captures the goal of not just removing visible rust, but preventing it from returning. It’s a mindset that blends practical technique with long-term maintenance. When you apply this idea, you treat rust as a solvable problem rather than an inevitable nuisance. The Corrosion Expert team notes that early detection and consistent protection are the most reliable paths to durable metal surfaces. By embracing rust in peace, you’ll plan a routine that includes cleaning, coating, and regular inspection to extend the life of everyday items—from tools to outdoor railings. Remember: persistence beats neglect, and prevention is cheaper than repeated rust removal.
How rust forms and why prevention matters
Rust happens when iron or steel surfaces are exposed to moisture and oxygen, often in the presence of salts or acids. Environmental factors like humidity, rain, and condensation speed up oxidation, creating flaky surface rust or deeper corrosion. Prevention works by keeping moisture away, choosing breathable coatings, and applying protective finishes that resist water ingress. For homeowners, routine checks after wet weather and reapplying protective coatings every few years can dramatically slow rust progression. Corrosion forms differently depending on the alloy and exposure, so tailor your approach: thin surfaces may need frequent touch-ups, while thicker structures benefit from durable primers and sealants. Understanding the basics helps you act before widespread damage occurs, achieving rust in peace over time.
Quick-start rust removal methods
Starting with the simplest method often yields the best results for light surface rust. Mechanical options include a wire brush, steel wool, or sanding with 120–220 grit to remove loose corrosion. For more stubborn rust, commercial rust removers or a vinegar/lemon juice soak can help dissolve oxides; always follow product safety guidelines. After removing rust, neutralize the surface with a baking soda paste and rinse thoroughly before drying. Finally, apply a primer and protective coating to seal the metal. The goal is to reach a clean, dry surface that can hold a protective finish, bringing you closer to rust in peace on your project.
Long-term prevention strategies and maintenance
Prevention relies on proactive protection: choose rust-inhibiting primers, corrosion-resistant paints, or clear sealants designed for metal. For high-humidity areas, consider vapor barriers and protective coatings with UV stability. Regular maintenance is key—inspect annually, touch up chips or scratches quickly, and reapply protective coats as needed. Store items in dry, ventilated spaces and wipe down metal surfaces after exposure to moisture. Implementing these steps consistently reduces future rust formation and helps you sustain the rust-in-peace mentality across your home projects.
Common myths and mistakes to avoid
A common myth is that rust is only cosmetic. In reality, corrosion can compromise structural integrity if left unchecked. Another mistake is skipping surface prep—without thorough cleaning and drying, coatings won’t adhere properly. Don’t rely on paints alone for high-wear areas; pair paint with a rust inhibitor or corrosion-resistant primer. Finally, avoid over-saturation with harsh chemicals; always use ventilation, protective gear, and follow label directions to protect yourself while achieving durable results.
Tools & Materials
- Safety goggles(Protect eyes from rust particles and chemicals)
- Chemical-resistant gloves(Avoid skin contact with solvents and rust removers)
- Respirator or well-ventilated area(Use for solvent-based products)
- Wire brush (steel)(Remove loose rust surfaces)
- Steel wool (0000 grade)(Finish smoothing after brushing)
- Sandpaper (grits 120-220)(Prep surface for primer)
- Plastic or metal putty knife(Scrape loose rust without scratching base)
- Commercial rust remover or white vinegar(Chemical or natural rust dissolution)
- Baking soda(Make a paste to neutralize acids)
- Clean rags and a damp cloth(Drying and wiping surfaces)
- Primer for metal(Promotes coating adhesion and corrosion resistance)
- Metal paint or clear sealant(Protect final finish from moisture)
- Drop cloths or newspapers(Protect surrounding areas)
Steps
Estimated time: 60-90 minutes
- 1
Inspect the rusted area
Identify the rust type and extent. Check for flaking paint, pitting, or deep corrosion that may require professional help. Document areas that need cleaning and sealing, and plan your workspace accordingly.
Tip: Take a photo before you start to track progress and reference future maintenance. - 2
Protect yourself and area
Set up in a well-ventilated space. Lay down drop cloths and wear PPE. Remove any nearby items to prevent contamination and prepare a workstation with easy access to water for rinsing.
Tip: Ventilation is critical when using solvents or rust removers. - 3
Remove surface rust mechanically
Use a wire brush or 0000-grade steel wool to scrub the rust off until the surface looks uniform. Avoid sanding too aggressively on delicate surfaces to prevent further damage.
Tip: Always scrub with the grain when possible to reduce surface scratches. - 4
Apply rust dissolver or natural alternative
If using a commercial rust remover, follow the label directions and time recommendations. For natural options, soak in vinegar or lemon juice for 30–60 minutes and wipe away residue.
Tip: Test a small area first to ensure no adverse reaction with the substrate. - 5
Neutralize and dry the surface
Rinse off residues and dry completely. Use a baking soda paste on acidic residues to neutralize, then rinse again and dry thoroughly to prevent flash rust.
Tip: Moisture is your enemy—drying should be thorough and rapid. - 6
Prime and seal
Apply a metal primer to promote adhesion, followed by a protective paint or clear sealant. Allow adequate cure time per product instructions and avoid exposure to moisture until fully cured.
Tip: Choose a product with built-in rust inhibition for added protection.
Quick Answers
Is vinegar a safe rust remover for home use?
Vinegar can dissolve light rust on non-porous surfaces. It is safer than strong acids but may require longer soaking and extra scrubbing. Always test first and avoid using on sensitive materials.
Vinegar can help with light rust, but test first and be patient with soaking and scrubbing.
Can rust be fully removed from metal surfaces?
Light surface rust can often be removed with mechanical or chemical methods. Deeper rust may require professional treatment or replacement of the affected part.
Light rust is usually removable; deeper rust might need extra help.
What is the best way to prevent rust after cleaning?
Apply a metal primer followed by a protective coating or sealant. Keep surfaces dry, store items in a ventilated area, and perform periodic maintenance.
Prime, seal, and keep things dry to prevent rust from returning.
Is sanding the rust always recommended?
Sanding helps when rust is deep or rough, but overly aggressive sanding can damage the metal. Use gradual grits and inspect the substrate regularly.
Sanding is helpful for deep rust but don’t oversand; progress gradually.
How long does a rust-preventive coating last?
Longevity depends on surface, environment, and coating type. Reapply according to manufacturer guidance and inspect for wear annually.
Coating durability varies, but annual checks help you decide when to reapply.
Watch Video
Quick Summary
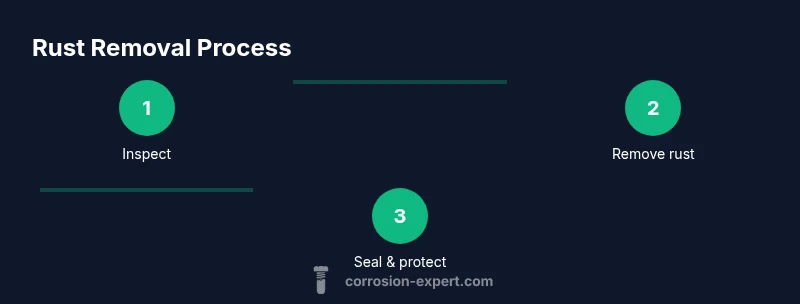
- Inspect rust promptly and plan steps before starting.
- Choose safe, effective rust removal methods appropriate for the surface.
- Seal and protect to prevent future corrosion.
- Maintain a routine to keep metal surfaces rust-free.