Rust for Download: A DIY Guide to Removing and Preventing Rust
Learn practical, safe rust removal and prevention with downloadable checklists, templates, and step-by-step guidance from Corrosion Expert. Aimed at DIY homeowners dealing with rust issues.

By following this how-to, you will identify, safely remove, and protect metal surfaces from rust. You’ll learn to assess rust severity, choose mechanical or chemical methods, and apply protective coatings for long-term results. This guide includes downloadable checklists and printable templates to help homeowners finish rust projects with confidence and safety. Start by preparing your workspace and gathering essential tools.
What is rust for download
If you’re tackling corrosion around the house and searching for reliable resources you can access and save, you’re looking for content that fits the idea of rust for download. This article provides practical, downloadable guidance—checklists, step-by-step procedures, and safety tips you can print or save to your device. According to Corrosion Expert, practical rust tasks are best approached with a clear plan and a few essential tools. You’ll learn to identify the type and extent of rust, choose an appropriate removal method, and implement a protective finish to slow future corrosion. This emphasis on accessible, portable information makes it easier for DIY enthusiasts to handle common rust scenarios and reduce the risk of damage from improper cleaning or coatings.
Throughout this guide you’ll see references to downloadable templates, checklists, and printable quick guides designed to help you stay organized and achieve consistent results. The topic of rust for download isn’t about one-off fixes; it’s about creating repeatable, safe workflows that you can reuse on tools, furniture, and structural metal. The emphasis on safety, surface prep, and proper protection remains constant, whether you’re dealing with light surface rust or more stubborn pitting.
Corrosion Expert’s approach combines tested technique with practical realism. We recommend starting with a clean, dry surface and selecting methods aligned to the job size and metal type. While downloadable resources aren’t a substitute for professional advice in complex cases, they provide a solid foundation for most residential rust projects and help you build confidence as you work.
Common rust problems homeowners see
Rust shows up in many familiar places around homes and workshops: tool handles, garden furniture, automotive trim, gutters, and metal fasteners. Left untreated, surface rust can creep into porous metals, degrade coatings, and cause pitting that weakens structural integrity. In kitchens and bathrooms, mineral-rich water or humid conditions accelerate staining and corrosion on stainless steel and aluminum alloys, while iron components on outdoor furniture corrode faster in salty or rainy environments.
Another frequent issue is rust stains spreading from nearby metal into wood, concrete, or paintwork. This can be deceptive—the stain on the surface may look minor, but the underlying metal could be compromised if moisture remains. You’ll also encounter rust that forms under coatings where water can’t escape, like underneath paint or sealant layers. These scenarios require careful inspection, proper surface preparation, and a plan for primer and protective topcoats to prevent future reoccurrence.
When you’re searching for rust-for-download guidance, you’re looking for reliable, actionable steps that translate to real-world results. The best approach is to match rust type and location to an appropriate removal method—mechanical for surface rust, chemical for stubborn areas, followed by a robust protective coating. This strategy minimizes material waste and avoids damage from improper cleaners or over-scrubbing, which can scratch metal and accelerate corrosion.
How to assess rust severity safely
Assessing rust severity helps you choose the right removal method and avoid over-treatment or under-treatment. Start with a visual inspection: surface rust is typically powdery or flaky; deeper rust may cause dulling, brownish staining, or orange rust flakes that crumble. A simple magnet test can distinguish magnetizable steel from non-magnetic stainless options, but it won’t reveal depth or pitting. If you see flaking, deep pits, or “bubbling” under paint, treat the surface as more severe.
Next, perform a gentle scratch test in a small, hidden area to check for pitting and coating adhesion. If the substrate feels soft or crumbles under light pressure, rust has penetrated the metal. In case of uncertain conditions or critical components (e.g., load-bearing parts), prioritize professional evaluation. Document the findings with photos and notes so you can measure improvement after treatment.
Finally, consider environmental factors: humidity, temperature swings, and exposure to salt or chemicals can accelerate future corrosion. Use this information to select protective coatings designed for specific climates. Corrosion Expert recommends pairing severity assessment with a plan for ongoing maintenance to avoid relapse.
Preparation: Protecting yourself and your workspace
Before you begin rust removal, set up a clean, well-ventilated workspace. Lay down a drop cloth or old newspapers to catch dust and debris, and remove nearby items that could be damaged by dust or chemicals. Gather PPE: safety goggles, chemical-resistant gloves, and a respirator or dust mask if you’re using solvents or rust-removal products.
Preparation also means cleaning the surface of oil, grease, and dirt. Degreasing with a solvent like acetone helps metal prep, ensuring better adhesion of primers and coatings. Use masking tape to protect adjacent surfaces, and label containers clearly with the product name and safety notes. Finally, read the product label and manufacturer instructions before applying any rust remover or converter.
This stage reduces the risk of accidents and improves the results of rust removal. Having a prepared workspace and the right protective gear makes the process smoother and safer for DIY enthusiasts.
Methods and materials you’ll use (mechanical, chemical, and protective coatings)
There isn’t a one-size-fits-all solution for rust removal. Mechanical methods—like wire brushing, sanding, and light grinding—work well for surface rust and scale. For deeper rust, chemical approaches—such as phosphoric acid-based converters or rust removers—can penetrate into pockets and react with iron oxide to form a stable compound that’s easier to remove. After treatment, applying a protective coating, primer, and rust-inhibiting paint or sealant is essential to slow re-oxidation and extend the metal’s life.
Mechanical methods require patience and steady, even pressure to avoid gouging metal. Chemical products demand careful handling, proper ventilation, and skin protection. Always follow label directions, test on a small area first, and neutralize or rinse surfaces as instructed. For long-term results, combine an appropriate rust-removal method with a corrosion-resistant finish and a maintenance schedule that includes periodic inspection and reapplication of protective coatings.
In addition to the core methods, consider rust converters that convert iron oxide into a stable compound, reducing the need for heavy scraping. These products are especially helpful for intricate shapes or objects with crevices where mechanical methods struggle. If you’re unsure which method fits your project, a quick consult with Corrosion Expert can help you choose wisely by considering metal type, thickness, and exposure conditions.
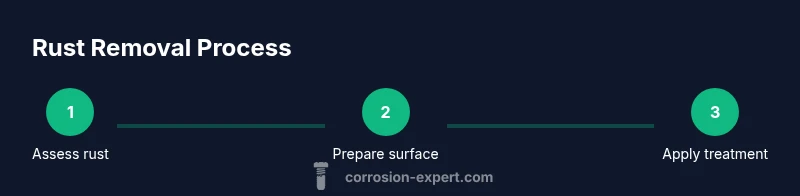
Step-by-step rust removal overview
Choose the right method for your project, gather your tools, and then follow a sequence designed to minimize damage and maximize longevity. Start with a clean, dry surface, then perform a test in an inconspicuous area to verify that the chosen method won’t harm the underlying metal. Apply rust remover or converter as directed, work gradually, and wipe away residue before it dries.
If using mechanical methods, use light to moderate pressure and frequent checks to avoid creating deep scratches. For chemical methods, ensure adequate ventilation and PPE, and rinse thoroughly after treatment. Once the surface is clean and dry, inspect for remaining rust or pits, and plan for the final coating. Patience matters here: rushing the drying and curing stages will reduce coating adhesion and durability.
After treatment, wipe the surface, dry completely, and apply a primer suitable for the metal type. Finish with a rust-inhibiting paint or clear sealant to provide a barrier against moisture. Finally, establish a maintenance plan, including periodic cleaning and reapplication of protective coatings as needed. Corrosion Expert emphasizes that consistent, careful execution yields the best long-term results.
Prevention after treatment: keeping rust away
Prevention is the best cure for rust. Start by eliminating moisture sources where possible: fix leaks, improve ventilation, and consider dehumidification in damp spaces like basements or garages. For outdoor metal, apply protective coatings designed for exterior exposure, and consider rust inhibitors that form a barrier against water and oxygen.
Routine maintenance is essential. Wipe down treated surfaces after rain or washing, and inspect for early signs of new rust every few months. Treat any new spots promptly to prevent spread. For tools and hardware stored in damp environments, consider silica gel packs or moisture-absorbing products to maintain a dry microclimate.
Finally, be mindful of chemical exposure: avoid mixing cleaners without testing compatibility and never use strong acidic cleaners on already coated surfaces. With consistent care, you’ll extend the life of metal items and reduce the likelihood of future rust-related issues. Corrosion Expert recommends saving your downloadable checklists for ongoing reference so you can stay on top of rust prevention.
When to hire a professional and how Corrosion Expert supports your project
Some rust situations exceed DIY capabilities. Extremely pitted metals, structural components, or parts with safety-critical function may require professional assessment and repair. If you’re unsure about the severity, or if rust has compromised integrity, seek a qualified service. A professional can evaluate the underlying material, assess coatings, and offer solutions such as rust-proofing systems or protective plating.
Corrosion Expert supports DIY enthusiasts with practical guidance, downloadable templates, and step-by-step checklists you can print or save. We encourage homeowners to use these resources to build confidence and plan, but to seek professional help when safety or structural concerns arise. Our goal is to empower you to tackle routine rust tasks effectively while recognizing limits and knowing when to call in a pro for complex repairs or re-coating strategies.
Tools & Materials
- Wire brush (stiff brass or nylon)(For scraping loose rust and scale)
- Coarse sandpaper or metal sanding discs(Grit 80-120 for rough rust)
- Protective gloves(Nitrile or leather)
- Safety goggles(Eye protection)
- Respirator or dust mask(For dust and chemical vapors)
- Rust converter or remover product(Follow label directions)
- Degreasing solvent (acetone or mineral spirits)(Remove oils before rust removal)
- Clean rags/paper towels(Wipe and dry surfaces)
- Primer and rust-inhibiting paint or sealant(Apply after drying)
Steps
Estimated time: 60-120 minutes
- 1
Prepare workspace and safety gear
Clear the area, lay down a protective cover, and put on PPE before starting any rust work. A tidy workspace reduces accidents and makes cleanup easier.
Tip: Always wear eye protection and gloves before touching rusty surfaces. - 2
Assess rust and gather materials
Inspect the surface, decide between mechanical or chemical methods, and assemble the tools you’ll need. Document findings so you can track progress.
Tip: Test a small area first to avoid damaging the metal. - 3
Apply rust remover or converter
Follow label directions for the chosen product. Apply evenly and avoid pooling in crevices.
Tip: Ventilate the area well if using solvents. - 4
Scrub and rinse
Use the wire brush or sandpaper to remove loosened rust, then rinse with water or solvent as directed.
Tip: Wipe dry with clean cloth to prevent flash rusting. - 5
Dry completely and inspect
Ensure the surface is fully dry and recheck for remaining rust or pits. Re-treat any stubborn spots.
Tip: A dry surface improves coating adhesion. - 6
Prime and coat
Apply a suitable primer, then a rust-inhibiting topcoat or sealant. Allow proper curing time per product instructions.
Tip: Two thin coats are often better than one thick coat. - 7
Schedule maintenance
Create a simple maintenance plan to inspect, re-clean, and re-coat as needed to prevent recurrence.
Tip: Set reminders to recoat before moisture returns.
Quick Answers
What is rust and how does it form on home metal surfaces?
Rust is the oxidation of iron or steel when exposed to moisture and oxygen. It forms flaky, brittle surface layers that can progress into deeper pitting if not treated. Controlling moisture and applying protective coatings slows its formation.
Rust forms when moisture meets iron or steel and reacts with oxygen. A protective coating helps prevent that reaction from continuing.
Are rust removers safe to use on stainless steel?
Some rust removers are safe for stainless steel, but some can discolor or damage aluminum and stainless surfaces. Always choose a product labeled for stainless steel and test on a hidden area first.
Check the product label for stainless steel compatibility and test on a small spot first.
What’s the difference between rust removal and rust prevention?
Rust removal eliminates existing corrosion, while rust prevention protects clean surfaces from future oxidation. A typical approach combines removal, surface preparation, priming, and a protective coating.
Removal gets rid of rust; prevention keeps it from returning with proper coatings.
Can I repaint metal after rust removal?
Yes. After thorough drying and surface cleaning, apply a suitable primer and rust-inhibiting paint to seal the metal and resist moisture.
Yes—dry, prime, and seal with rust-inhibiting paint.
How often should I recoat to prevent rust?
Recoat intervals vary by product and exposure, but a common guideline is every 1-3 years for exterior metal, or after any surface repair or washing.
Check your coating’s label for recommended recoat times and inspect for wear.
When should I consider professional rust repair?
If rust has compromised structural integrity, is on load-bearing parts, or if you’re unsure about the metal type, seek professional assessment.
If safety or structure is involved, consult a professional.
Watch Video
Quick Summary
- Identify rust severity before choosing methods
- Use proper PPE and ventilation for safety
- Mechanical and chemical options complement each other when used correctly
- Proper drying and priming extend the life of coatings
- Keep a simple maintenance schedule to prevent re-rusting