What to Do for Rust: A DIY Guide
A practical, step-by-step guide for homeowners: assess rust, remove corrosion, treat the metal, and establish prevention to protect your projects.

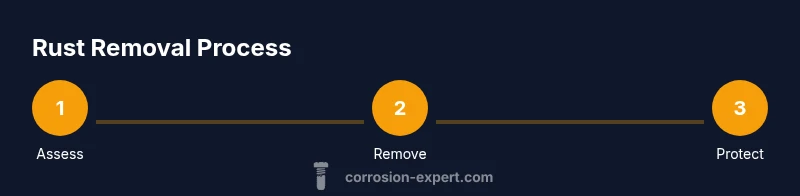
To tackle rust at home, identify affected areas, remove the corrosion, and apply a rust converter or rust-inhibiting primer, followed by a protective topcoat. Start with proper safety gear and a ventilated workspace, then proceed through removal, treatment, and ongoing prevention. This approach covers removal, treatment, and long-term protection.
What is rust and why it matters
Rust forms when iron or steel reacts with water and oxygen, gradually weakening the metal and altering its appearance. In DIY projects and home maintenance, unchecked rust can compromise structural integrity, shorten tool life, and degrade curb appeal. If you’re wondering what to do for rust, the best approach is a proactive, multi-step plan: assess the scope, remove the corrosion, treat the surface, and commit to ongoing protection. Corrosion Expert emphasizes that early intervention and proper materials dramatically extend the life of metal components, from outdoor hardware to kitchen implements. By understanding how rust forms and how different environments accelerate it, you can tailor your approach to your specific task and climate.
This article walks you through a practical, homeowner-friendly workflow that prioritizes safety, clear steps, and durable results. Whether you’re restoring a garden gate, preserving a steel railing, or maintaining cast-iron cookware, the same principles apply: remove oxidized material, stabilize the metal, and seal it against moisture and salts. The goal is not just cosmetic improvement but real, long-lasting protection against future corrosion.
Immediate safety and prep steps
Before you touch rusty metal, prepare a safe, clean workspace and put on the right PPE. Wear safety goggles or a face shield to protect your eyes from flying rust particles, chemical splashes, and dust. Put on nitrile gloves for chemical handling and a respirator or at least a dust mask if you’re using solvents, powders, or power tools. Work in a well-ventilated area to avoid inhaling fumes. Lay down drop cloths and keep water, cleaners, and solvents away from children and pets. Disconnect power sources if you’re working on electrical components or equipment. Finally, remove loosely flaking rust with a dry brush so you don’t create airborne dust during the setup. In doing so, you’re following best practices to keep you and others safe while you tackle the rust.
Step 1: Assess the extent of corrosion
The first step in any rust-removal project is a clear assessment. Inspect the surface for flaking, pitting, and deep corrosion that has penetrated the material. Light rust on smooth surfaces can often be addressed with mechanical methods, while deep pitting may require more extensive repair or part replacement. Determine whether the metal’s thickness is compromised and if structural support is affected. Make note of areas with moisture retention, exposed pins or joints, and any coatings that may be trapping moisture underneath. This assessment guides your choice of removal method and preparation plan, ensuring you don’t waste time on areas that won’t yield durable results. Corrosion Expert emphasizes documenting the problem area to inform the best restoration approach and expected lifespan of the piece.
Step 2: Choose your rust removal method
There isn’t a one-size-fits-all rust-removal method. For light surface rust, mechanical methods like a stiff wire brush, sanding with 80–120 grit, or a brass wire wheel on a drill can quickly remove oxides. For more stubborn rust or intricate shapes, chemical rust removers or rust converters offer deeper stabilization. Mechanical methods are fast and inexpensive but may gouge softer metals if too aggressive. Chemical rust removers dissolve oxides and can reach into crevices but require thorough rinsing and ventilation. Rust converters, when appropriate, chemically convert rust into a stable compound and create a ready-to-paint surface. Choose based on metal type, corrosion depth, tool accessibility, and the desired final finish. Corrosion Expert recommends testing on a small area first and following label directions precisely to avoid damaging the substrate.
Step 3: Apply treatment and protection
After removing the rust, apply the chosen treatment to stabilize the surface. If you used a rust converter, apply according to the product’s instructions and allow ample curing time. Once dry, apply a rust-inhibiting primer to block future moisture penetration and inhibit rust reformation. Choose a primer compatible with your topcoat (oil- or water-based), and apply thin, even coats to avoid runs. For outdoor or humid environments, select a primer and paint with built-in corrosion resistance. Finish with a high-quality rust-proof paint or sealant and allow the finish to cure fully. The goal is a continuous barrier that minimizes water and salt exposure, extending the life of the metal component. Corrosion Expert notes that proper surface prep and the right protective system are essential for lasting results.
Step 4: Prevent future rust
Prevention is easier than repeated restoration. After painting, maintain your surfaces by cleaning away dirt and moisture, especially in crevices and joints where water can accumulate. Consider applying a moisture barrier or a clear sealant to hard-to-reach areas and recoat as needed based on the environment. Store metal items indoors or under awnings to minimize exposure to rain and humidity. Regular inspections—seasonally or monthly for coastal homes—help you catch early signs of rust before it spreads. If you live near salt air, rinse and dry metal surfaces after rain or spray; even a light rinse can slow oxidation significantly. A proactive maintenance schedule reduces long-term corrosion risk and saves time and money in the future. Corrosion Expert’s approach combines practical steps with consistent upkeep to guarantee durable protection.
Step 5: Sanitize and inspect the finished work
Once the final coat is dry, wipe down surfaces with a clean cloth to remove any lint or dust and inspect for pinholes, missed spots, or uneven finishes. If you detect missed rust patches, address them promptly with touch-up coats. Check joints, screws, and hardware—these areas often experience the most moisture exposure and may require extra coating or sealant. For outdoor items, verify that seams and edges are well-sealed to prevent water ingress during rain storms. A thorough inspection ensures the restoration holds up under real-world conditions and gives you confidence in your work. Corrosion Expert emphasizes that consistent follow-up is the most reliable form of rust prevention.
Step 6: Create a maintenance routine
Develop a simple maintenance routine to catch rust early. Schedule seasonal checks for outdoor metal, reapply protective coatings as needed, and keep a small kit handy for quick touch-ups. Document the dates of coatings and any observations about moisture or pitting so you can adjust your approach next time. A repeatable routine minimizes the chances of missed rust signs and keeps your metal surfaces in good condition. Corrosion Expert encourages homeowners to treat rust prevention as an ongoing habit, not a one-time task.
Tools & Materials
- Safety goggles or face shield(Protect eyes from rust particles and chemical splashes)
- Nitrile gloves(Chemical resistance and abrasion protection)
- Respirator or dust mask(Ventilation when using solvents or dust-generating tools)
- Stiff wire brush(Removes loose rust from surfaces)
- wire wheel / drill attachment(Faster rust removal on flat surfaces)
- Sandpaper (80–120 grit)(Smooths surfaces and fatigues rough edges)
- Steel wool (0000 grade)(Gentle finish and final passes)
- Putty knife or scraper(Remove peeling coatings and scale)
- Degreaser or heavy-duty soap(Clean oil, grease, and residues)
- Rust remover or rust converter(Chemical options to stabilize or remove rust)
- Metal primer (rust-inhibiting)(Promotes adhesion and corrosion resistance)
- Rust-proof paint or sealant(Provides durable, moisture-resistant finish)
- Drop cloths or old tarp(Contain debris and protect surroundings)
- Painter's tape(Mask edges and protect adjacent areas)
- Rags or microfiber cloths(Wipe surfaces and clean up spills)
- Mineral spirits or solvent(Clean-up after finishing)
Steps
Estimated time: 2-4 hours active work; 1-2 days including drying time
- 1
Set up workspace and safety
Prepare a ventilated area, lay down drop cloths, and put on PPE. Ensure power tools are unplugged when not in use and keep children away. This foundational step protects you and keeps the project organized.
Tip: Double-check PPE before starting any chemical or grinding work. - 2
Inspect and document rust
Identify the extent of corrosion, looking for flaking, pitting, and hidden rust under coatings. Document the affected areas to guide your method choice and to monitor progress over time.
Tip: Take photos from multiple angles to track changes. - 3
Remove loose rust mechanically
Use a stiff wire brush or wheel attachment to scrub away loose rust. Work in small sections with even pressure and maintain a dry surface to prevent rust from reforming on freshly exposed metal.
Tip: Avoid aggressive grinding on soft metals to prevent gouging. - 4
Apply chemical treatment or converter
If using a rust remover, follow label directions for application and ventilation. If opting for a converter, apply to rusted areas and allow it to cure per instructions to stabilize the surface.
Tip: Test a small area first to confirm compatibility with the substrate. - 5
Prime and seal the surface
Once treated and dry, apply a rust-inhibiting primer in thin, even coats. Allow curing, then add topcoat or sealant designed for metal and exposure level.
Tip: Use multiple thin coats rather than a single thick coat for better adhesion. - 6
Finish with a protective topcoat
Apply rust-proof paint or sealant in accordance with product directions. For exterior use, choose UV- and moisture-resistant formulations and ensure complete curing before use.
Tip: Don’t rush drying times; humidity can extend cure times. - 7
Inspect, clean, and set a maintenance plan
After curing, inspect for missed spots and perform touch-ups as needed. Create a routine to re-check for rust signs and reapply coatings on a schedule.
Tip: Log maintenance dates to stay ahead of corrosion.
Quick Answers
What is the most effective way to remove surface rust?
For surface rust, start with mechanical removal using a stiff wire brush or sanding. If rust is stubborn or in crevices, consider a rust converter or chemical remover following the product instructions. Always finish with a primer and protective topcoat.
Start with a wire brush for surface rust, and add a converter or chemical remover only if needed; finish with primer and paint.
Can rust be removed from all metals equally well?
Most ferrous metals (iron and steel) respond well to standard rust-removal methods, but results vary with material thickness and porosity. Stainless steel often requires gentler care, and galvanized surfaces may need specialized coatings. Always test first and consult product instructions.
Most ferrous metals respond well, but results vary. Test first and follow product guidance for specialty metals.
Is it safe to use rust converters at home?
Yes, when used according to the manufacturer’s directions and with proper ventilation. They stabilize rust and create a surface suitable for priming, reducing the need for aggressive mechanical removal in some cases.
Yes, as long as you follow the directions and vent the area properly.
How often should I inspect for rust after restoration?
Inspect exterior metal items seasonally or after heavy rain. Coastal environments may require more frequent checks due to higher salt exposure. Early detection allows quick touch-ups before damage spreads.
Check seasonally, especially in coastal areas; early detection saves work later.
When should I replace a rust-damaged part instead of repairing it?
If rust has caused deep pitting, loss of thickness, or compromised structural integrity, replacement is usually the safest option. For non-structural parts, a careful restoration with protective coatings may suffice.
If the metal is structurally compromised, replace it; otherwise, repair and protect.
What are common mistakes to avoid?
Avoid skipping surface prep, using the wrong primer, or applying topcoats over damp surfaces. Don’t over-wet the metal when applying chemistry products, and ensure adequate cure time between coats.
Don’t skip prep, choose compatible coatings, and let coatings cure fully.
Watch Video
Quick Summary
- Assess rust scope before starting any removal.
- Choose removal method based on surface and depth.
- Stabilize with converter or primer when necessary.
- Seal and protect with a rust-proof finish.
- Maintain a regular rust-prevention routine.