How to Remove Rust from Steel: A Practical DIY Guide
Learn proven methods to remove rust from steel safely and effectively. This guide covers mechanical, chemical, and protective steps with safety tips for DIY enthusiasts.

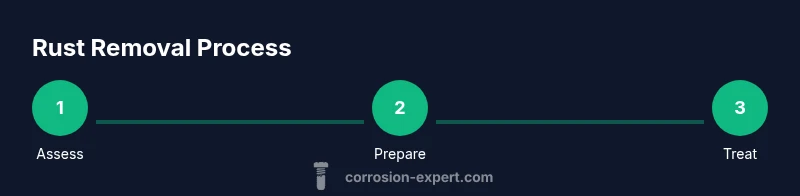
By the end of this guide you will know how to remove the rust from steel safely and effectively. You’ll learn the best sequence of mechanical, chemical, and protective steps, plus how to choose the right method for your project. According to Corrosion Expert, starting with a clean, dry surface and selecting the gentlest effective method minimizes damage and yields lasting results.
What you’ll accomplish and why rust removal matters
If you’re staring at a rusty steel surface, you’re not alone. Learning how to remove the rust from steel empowers you to extend the life of tools, furniture, and structural parts around the home. This guide outlines practical, step-by-step methods for light to heavy rust, explains when to use mechanical versus chemical approaches, and covers how to protect steel after rust removal. By following the right sequence, you’ll restore functionality and prevent future corrosion. According to Corrosion Expert, starting with a clean, dry surface and selecting the gentlest effective method minimizes damage and yields lasting results.
The process of rust removal begins with assessment: determine how deeply the rust has penetrated the surface, whether there is flaking or pitting, and what the steel will be used for after treatment. Homeowners should treat stainless steel differently from plain carbon steel, since some finishes withstand abrasion better and some may be damaged by aggressive cleaners. Preparation also includes removing oils, dirt, and scale so that subsequent steps can reach the base metal effectively. A clear plan helps you avoid over-scratching or removing protective coatings that you still need.
Rust chemistry and surface prep
Rust is a form of iron oxide that forms when iron or steel reacts with moisture and oxygen. The rust layer can harbor abrasive particles and micro-crevices that trap water, promoting ongoing corrosion if left untreated. Before you remove rust, thoroughly wash the surface with a mild detergent to remove oils, then rinse and dry completely. Light scuffs should be treated with a gentle abrasive first to avoid driving rust deeper. For best results when learning how to remove the rust from steel, keep the surface dry, cool, and clean, and wear gloves to protect your skin. If the rust is flaky or presents scale, you may need to start with mechanical removal to expose sound metal beneath.
A common preparation step is to neutralize any acids from cleaners and to wipe the surface with a clean solvent such as isopropyl alcohol to ensure no residues remain. This step improves adhesion for paints or sealants and reduces the chance of repeating corrosion cycles. When rust is stubborn, consider a rust converter that chemically converts surface rust into a stable layer, priming the metal for painting. Corrosion Expert recommends matching your approach to the scope of the project and the final use of the steel piece.
Mechanical rust removal techniques
Mechanical methods are often the first choice for DIY rust removal because they are inexpensive, fast, and do not involve harsh chemicals. Start with a stiff wire brush to remove loose rust and scale, then finish with sanding using medium grit (around 80–120) to smooth the surface. For intricate shapes, a rotary tool with a grinding or sanding attachments can reach tight corners. If the rust is superficial, you may complete the job with a Scotch-Brite pad and a light touch. In all cases, work in a well-ventilated area and wear eye protection to guard against flying particles.
Progress can be measured by the uniformity of the underlying metal’s color. If you see bright, clean metal peeking through, you’ve likely removed most of the oxidized layer. For heavier rust with pitting, you might need to go beyond brushing and sanding and move to chemical steps, but always test a small area first to confirm the metal isn’t being damaged. The key is to remove the oxide while preserving as much of the original metal as possible.
Chemical rust removal options
When rust is more stubborn or widespread, chemical rust removers can save time and effort. Acids such as phosphoric or hydroxy acids are common choices; they react with iron oxide to form a soluble compound that can be rinsed away. Always follow the product’s instructions and use gloves, eye protection, and a splash guard. Apply the remover to a small area first and monitor for color changes before proceeding across larger sections. Neutralize with water or a recommended flush after treatment, then rinse thoroughly. If you’re unsure about compatibility, perform a spot test on an inconspicuous area.
For homeowners dealing with heavier rust on tools or hardware, Evapo-Rust and similar water-based solutions offer a safer, user-friendly alternative with minimal odor. These products work well on warped or helical shapes where mechanical methods would be impractical. Remember: chemical rust removal is most effective after the initial mechanical cleanup has removed loose material and opened up the surface.
Rust removal on delicate or complex shapes
Complex geometries like hinges, threaded rods, or decorative castings require careful technique to avoid removing base material or altering tolerances. In such cases, mechanical methods should be gentle and localized, using a brass brush or fine nylon abrasives. For internal threads or blind holes, apply rust remover with a syringe or small brush, allowing it to dwell for the recommended time before rinsing. After treatment, a light mechanical finish can help restore a uniform surface without removing critical features. The goal is to remove oxide without compromising the part’s function or fit.
Protecting steel after rust removal
Protection is essential to prevent relapse once the rust is gone. Begin with a clean, dry surface, then apply a rust-inhibiting primer or converter, followed by paint, powder coating, or a clear sealant depending on the project. Surface coatings create a barrier against moisture and oxygen, reducing future corrosion risk. For outdoor pieces, consider a solvent-based primer and a topcoat designed for metal exposure. If aesthetic appeal matters, choose colors and textures that align with the surrounding environment while maintaining protection. Regular maintenance checks help you catch early signs of new rust and reapply protective finishes as needed.
Common mistakes and safety considerations
Common mistakes include skipping surface prep, using overly aggressive tools, and neglecting ventilation when using chemical rust removers. Always wear PPE: eye protection, gloves, and a respirator or proper mask in dusty areas. Never mix cleaners with unknown chemicals, and never use bleach on steel, which can worsen corrosion. Dispose of used chemicals according to local regulations. When working on structural components, consult a professional if you detect deep pits or significant loss of cross-section. Safety should drive every rust removal project.
Choosing the right approach for your project
Selecting the most suitable method depends on rust severity, the type of steel, the intended use after treatment, and the available time. Light surface rust on a steel tool can often be resolved with mechanical cleaning followed by a light coat of protective finish. Heavier rust may require a chemical dissolver and a subsequent protective coating. For interior items, a simple wire brush and oil may suffice, while exterior objects demand durable primers and topcoats for weather resistance. Plan a sequence that minimizes metal removal while maximizing longevity.
Maintenance and prevention tips
Preventing rust is easier than removing it. After finishing a project, dry the surface completely and apply a rust-inhibiting oil or wax where appropriate. Store tools and metal parts in a dry environment and avoid prolonged exposure to moisture. Periodically inspect for early signs of oxidation and re-treat any vulnerable areas promptly. If you live in a humid climate, consider dehumidification or condensation control in storage areas. A well-applied protective finish acts as a strong barrier against moisture and the oxygen that drives rust formation.
Tools & Materials
- Wire brush (stiff bristles)(Natural or brass bristles preferred for delicate surfaces)
- Sandpaper or abrasive pads(Grit range 80–120 for initial rust removal)
- Rotary tool with grinding/sanding attachments(Useful for curves and tight spaces)
- Nitrile gloves and safety goggles(Protect hands and eyes from rust particles)
- Isopropyl alcohol or degreaser(Degrease surface before rust removal)
- Rust remover chemical (phosphoric or similar)(Follow label directions; test area first)
- Evapo-Rust or similar water-based rust remover(Safer alternative for complex shapes)
- Paint or clear sealant(Use for final protection after drying)
- Respirator or ventilation mask(Required for chemical cleaners)
Steps
Estimated time: 90-150 minutes
- 1
Inspect and prep surface
Examine the rust extent and plan your approach. Remove loose flakes and debris with a wire brush, then wipe the area with a degreaser to expose clean metal for treatment.
Tip: Document problem areas with photos to track progress. - 2
Dry the surface and protect surroundings
Dry the area completely and cover nearby parts to prevent accidental chemical exposure. Hydration can slow down rust removal and cause uneven results.
Tip: Work in a well-ventilated space to avoid inhaling dust. - 3
Apply mechanical rust removal
Use a stiff wire brush or 80–120 grit paper to scrub away rust, following the grain of the metal where possible. Maintain even pressure to avoid gouging the surface.
Tip: Move in straight lines and periodically check your progress. - 4
Tackle stubborn areas with chemical remover
Apply rust remover according to the product instructions, letting it dwell for the recommended time. Rinse thoroughly to remove residue and dry again.
Tip: Test on a small patch first to confirm compatibility. - 5
Neutralize and rinse
If acid-based products were used, neutralize with an appropriate solution and rinse completely. Ensure all chemical traces are removed before proceeding.
Tip: Wear gloves and eye protection during neutralization. - 6
Inspect and re-apply if needed
Check for any remaining rust or pitting. Repeat mechanical or chemical steps on stubborn spots as needed, but avoid over-processing.
Tip: Patience prevents unnecessary metal removal. - 7
Protect the clean steel surface
Apply a rust-inhibiting primer or protective coating to the dry surface. Choose a finish suited to indoor or outdoor use and the level of exposure intended.
Tip: Allow proper curing time between coats for best durability.
Quick Answers
What is the most effective method to remove rust from steel?
The best method depends on rust severity and the steel’s use. Start with mechanical cleaning for light rust, then add chemical treatment if needed, and finish with a protective coating.
The most effective approach depends on how severe the rust is; start light and move to chemical methods if needed.
Can I use vinegar to remove rust from steel?
Vinegar can help with light rust on steel, but it is not a replacement for stronger rust removers on heavy corrosion. Test first on a small area.
Vinegar works for light rust but not for heavy corrosion. Test on a small spot first.
Is it safe to use Evapo-Rust or similar products?
Evapo-Rust is a user-friendly option that is gentler on most metals. Follow label directions and rinse thoroughly to remove any residue.
Yes, products like Evapo-Rust are safe if used as directed and rinsed well.
Will rust removal damage the steel?
If you use the correct technique and avoid aggressive grinding on thin sections, you won’t damage the base steel. Watch for deep pits and avoid removing structural material.
If done carefully, rust removal won’t damage the steel; be wary of deep pits.
Do I need to neutralize the rust remover after use?
Yes, most acid-based rust removers require thorough rinsing and neutralization per the product instructions to stop chemical action and prevent residue.
Yes, neutralize and rinse after using acids.
What finishes best protect steel after rust removal?
A rust-inhibiting primer followed by paint or powder coating provides long-lasting protection. For indoor use, a sealing topcoat can be sufficient, but outdoor items need more durable finishes.
Use a rust-inhibiting primer and topcoat for durable protection.
Watch Video
Quick Summary
- Assess rust depth before choosing techniques
- Mechanical methods suit light rust, chemicals aid heavy rust
- Thorough cleaning and drying enable better protection
- Finish with a protective coating to prevent recurrence