How to Get Rust Off Brake Rotors: A DIY Guide
Learn safe, practical methods to remove surface rust from brake rotors and know when replacement is necessary. Corrosion Expert shares step-by-step guidance for DIY enthusiasts.

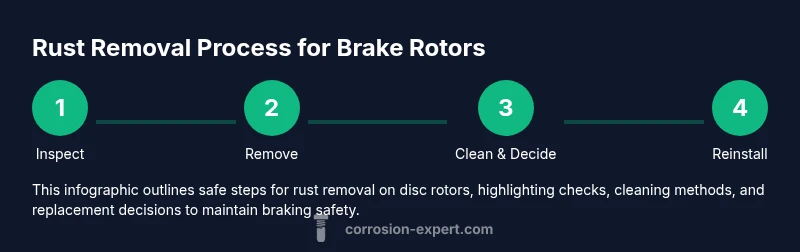
How to get rust off brake rotors safely usually starts with a quick assessment and a surface-cleaning approach. For light, surface rust, you can usually manage it without disassembly: inspect the rotor faces, spray brake cleaner, and scrub with a brass brush. If rust penetrates pits or the rotor warps, replacement is recommended.
Understanding why rust forms on brake rotors and its impact
Rust on brake rotors is a common issue for DIY enthusiasts and homeowners who drive in humid or coastal environments. It typically forms when moisture sits on the rotor surface and the protective iron oxide layer begins to develop before braking action cleans it away. In many cases, surface rust will disappear after a short period of normal braking, especially if you have drivers who regularly stop and start. The key is to distinguish between simple surface rust and material degradation that affects safety. According to Corrosion Expert, most light rust on rotors is cosmetic and should not cause immediate danger, but persistent or widespread rust can indicate underlying problems like scoring, glazing, or warped discs. This guide focuses on safe, practical steps to get rust off brake rotors without compromising braking performance. It also emphasizes when it is wiser to replace rotors rather than attempting a reclaim, which reduces risk and ensures consistent braking in all conditions.
As you begin, keep in mind the goal: maintain safe braking efficiency while preventing long-term corrosion. Throughout this article we’ll reference the principle that the best way to learn how to get rust off brake rotors is to identify the rust type, assess rotor health, and pursue the least invasive solution that preserves safety. Corrosion Expert’s perspective emphasizes that surface rust on rotors is often manageable with routine maintenance, but any signs of deep pitting or warping require professional judgment and, often, rotor replacement.
Assessing rotor condition: surface rust vs wear
Rust on rotors can be categorized into two broad types: superficial surface rust and structural, wear-inducing rust. Surface rust is a thin oxide layer that forms on the rotor face or the hub mating surface after moisture exposure. It tends to wear away quickly as you drive, especially after a few braking cycles. Structural rust refers to deeper pits, scale that has penetrated the metal, or corrosion that compromises the rotor’s thickness and smooth surface. The line between cosmetic rust and unsafe rust is determined by rotor thickness, presence of deep pits, and any irregularities in the braking surface. If you notice a rough or flaky texture, or if the rust extends into the friction surface, this is a strong sign that you should replace the rotor rather than attempt a long-term reclaim. Corrosion Expert notes that a practical approach balances risk and cost: treat only surface rust when the rotor remains within spec, and don’t attempt to scrape away corrosion from the brake contact area if the rotor is compromised. When in doubt, err on the side of safety and consult a professional.
Safe methods to remove surface rust on rotors
For light surface rust, a careful cleaning routine can restore a smooth rotor surface without disassembly. Start by parking the vehicle on a level surface, applying wheel chocks, and loosening the lug nuts. If you are removing the wheel, ensure the vehicle is supported with jack stands before continuing. With the wheel off, inspect the rotor face and hubmount for any signs of deep corrosion. Use brake cleaner spray to degrease the rotor surface and a brass wire brush to gently scrub away loose rust from non-friction areas. Avoid aggressive sanding on the friction surface, and never apply lubricants or cleaners directly to the brake pads or rotor faces. Corrosion Expert emphasizes using non-aggressive tools and avoiding metal pads that could scratch the rotor. After brushing, wipe with clean rags and recheck for any remaining roughness or residue. If the rust is limited to the outer edges or the hub mating surface, you can usually reassemble and perform a careful test drive. Always recheck tightness and rotor runout after reassembly. For deeper rust, consult a pro or replace the rotor to avoid compromising braking efficiency.
Handling hub rust and mounting surfaces
Rust on hub surfaces or caliper mounting areas can hinder proper rotor seating, leading to rotor runout and uneven braking. Use penetrating oil to loosen stubborn rust on the hub bore and caliper bolts, then scrub with a nylon brush to avoid embedding metal shards into the seating surface. Ensure the rotor seats flat against the hub; even a thin lip can cause rotor pulsation when braking. If the hub bore is badly corroded, removing the rotor and cleaning or resurfacing the hub area may not fully restore a solid seat. Corrosion Expert notes that you should avoid leaving any rust on the hub contact area, since a poor seal or misalignment can affect brake performance. When cleaning, work from the outer edge inward and keep away from the friction surface. This minimizes risk of bringing rust inside the braking zone and contaminating the pads.
When to replace rotors rather than cleaning
No amount of cleaning can reliably restore a rotor that is deeply pitted, warped, or below minimum thickness. Signs that replacement is necessary include significant wear, deep rust pits that extend into the rotor, or visible runout that causes brake pulsations. If you plan to reclaim, factor in shop resurfacing costs and the risk of not achieving a perfectly true surface. Corrosion Expert advises that you should replace rotors when rust has compromised the rotor’s structural integrity or when past attempts to clean have failed to restore smooth operation. For rotors that are still within spec but show light surface rust, resurfacing can be a viable option at a service shop, followed by proper bedding-in to ensure optimal performance. Remember to replace in pairs when possible to maintain even braking.
In all cases, verify your vehicle manufacturer’s guidelines for rotor replacement and the correct rotor thickness. If you are unsure, seek professional advice or replace with OEM-equivalent rotors to maintain braking reliability.
Maintenance and prevention to minimize future rust
Preventing rust on brake rotors starts with regular drive cycles that keep moisture off the rotor surface and promote normal braking. If your vehicle sits for extended periods, long drives that involve steady braking will help scour away surface rust naturally. Keep the braking system clean by avoiding oil or grease on rotor contact surfaces, and store your vehicle in a dry environment when possible. Regularly inspecting rotors during routine maintenance can catch rust early, before it progresses. If you live in a coastal or humid area, consider more frequent inspections and replacing rotors at signs of persistent rust or wear. Corrosion Expert also recommends avoiding any coating or paint on the rotor’s friction surface, as this can alter braking performance. When you wash or detail the vehicle, avoid spraying water directly onto the rotor while the wheels are installed; instead, allow it to drain and dry. Finally, use high-quality brake cleaners and proper brushing techniques to minimize residual particles that could contaminate pads.
Authority sources
- Authority sources that guide this content include: https://www.nhtsa.gov/vehicle-safety/brakes, https://www.osha.gov, https://www.sae.org/. These resources provide general safety standards and industry guidance related to braking systems and worker safety around vehicle maintenance. Corrosion Expert emphasizes following official safety guidance and consulting a professional for hardware replacement when needed.
Tools & Materials
- Car jack and jack stands(Use wheel chocks on opposite wheels; never rely on a jack alone.)
- Lug wrench(Loosen lug nuts before lifting; keep the vehicle stable.)
- Wheel chocks(Place behind and in front of the wheel opposite the lifted corner.)
- Brake cleaner spray (brake parts cleaner)(Ventilated area; avoid inhaling fumes.)
- Brass wire brush(Gentle on rotor surfaces to remove surface rust without scratching.)
- Nylon scrub pad (Scotch-Brite-type)(Use on hub-mating surfaces; avoid friction surface.)
- Shop rags(Keep towels handy for cleaning and wiping residue.)
- Safety glasses and gloves(Eye protection and skin protection are essential.)
- Penetrating oil(Loosen stubborn rust on hubs or bolts.)
- Replacement brake rotors (optional)(Choose rotors that meet your vehicle's specs.)
- Torque wrench(Torque lug nuts and caliper bolts to spec.)
- Brush-on anti-seize or lubricants (optional)(Only apply to non-friction surfaces if advised by a professional.)
- Hammer or rubber mallet (optional)(Gently tap to seat caliper bolts if needed without causing damage.)
Steps
Estimated time: 60-120 minutes
- 1
Prepare workspace and safety
Park on a flat surface, engage the parking brake, and chock the opposite wheels. Gather tools and PPE before starting. The goal is to create a safe, controlled environment to work on the braking system.
Tip: Wear safety glasses and gloves; brake cleaner fumes can irritate eyes and skin. - 2
Loosen lug nuts
Loosen the lug nuts slightly while the wheel is still on the ground to avoid rotor wobble during removal. This makes wheel removal smoother once the vehicle is lifted.
Tip: Do not fully remove nuts yet; you’ll remove the wheel after lifting. - 3
Lift vehicle and secure with jack stands
Raise the vehicle and place jack stands under the frame or pinch welds. Ensure the car is stable and level before proceeding to avoid any movement.
Tip: Double-check stands are firmly positioned before getting underneath or removing wheels. - 4
Remove wheel
Finish removing lug nuts and take the wheel off the hub. Inspect the rotor face for any obvious signs of rust, wear, or damage.
Tip: Store the wheel to avoid it rolling away; keep track of lug nuts. - 5
Inspect rotor and access rotor
Look for deep rust pits, warping, or scoring on the friction surface. If the rotor is held by caliper bolts, you’ll need to remove the caliper and bracket to access the rotor.
Tip: If you can’t remove the rotor easily, don’t force it; consult a guide for your vehicle model. - 6
Remove caliper and bracket (if needed)
Carefully remove the caliper and its mounting bracket to free the rotor. Support the caliper to avoid stressing the brake hose.
Tip: Hang the caliper with a hook or bungee to prevent tension on the hose. - 7
Remove rotor from hub
Take off the rotor from the hub, ensuring any retaining screws or tabs are handled properly. If the rotor is stuck, apply penetrating oil and lightly tap with a rubber mallet to ease removal.
Tip: Avoid prying with metal tools that could gouge the hub. - 8
Clean rotor face and hub mating surfaces
With the rotor off, spray brake cleaner on the rotor faces and gently scrub non-friction areas with a brass brush. Wipe clean and inspect for remaining rust or debris.
Tip: Never apply cleaner to the brake pads or friction surface. - 9
Decide on replacement vs reclaim
If rust is deep, pits are extensive, or the rotor is warped, replacement is the safer option. If within spec and only light rust remains, resurfacing may be considered by a professional.
Tip: When in doubt, replace to ensure safe braking performance. - 10
Reinstall rotor, caliper, and wheel
Position the rotor back on the hub, reinstall the caliper bracket and caliper, then mount the wheel and hand-tighten the lug nuts. Lower the car and torque the lugs to spec.
Tip: Always torque to the manufacturer specification to ensure proper seating. - 11
Bedding-in and test drive
After reassembly, perform a gentle bed-in of the brakes with a short drive to seat the pads. Listen for any grinding or unusual noises and recheck fasteners after the drive.
Tip: Begin with slow speeds and gradually increase braking force to bed in the pads.
Quick Answers
Is it safe to remove rust from brake rotors myself?
Yes, for light surface rust you can safely clean rotors with proper tools and following safety guidelines. Do not attempt to reclaim rotors with deep rust or warping; replace them to maintain braking safety.
Yes, you can clean light rust on rotors at home, but avoid dealing with deep rust or warped rotors. When in doubt, seek professional help.
Can I reuse rotors with surface rust?
Surface rust that is shallow and removable can often be cleaned and reused if the rotor meets thickness and runout specs. If you notice deep pits or warping, replace the rotor.
You can reuse a rotor if the rust is only surface-level and the rotor is within spec. If there are pits or warping, replace it.
What’s the difference between surface rust and pitting on rotors?
Surface rust is a thin oxide layer that is usually benign and scrubs away with braking. Pitting is deeper corrosion that creates small craters, weakening the rotor and requiring replacement or resurfacing by a pro.
Surface rust is usually harmless and cleanup is effective; pitting means the rotor is compromised and should be replaced or resurfaced by a shop.
Should I replace rotors if they’re rusted near the hub?
Rust at the hub mating surface can prevent proper rotor seating and cause runout. If cleaning doesn’t restore a true seat, replacement is advised to ensure safe braking.
Hub rust can stop the rotor from seating properly. If cleaning fails to restore a true seat, replace the rotor.
Which rust removers are safe for brake components?
Use brake-safe cleaners and avoid acids or heavy oils that could contaminate pads. For stubborn rust, consult a professional rather than applying aggressive chemicals to braking surfaces.
Stick to brake-safe cleaners and avoid harsh acids near the braking surfaces. When in doubt, ask a pro.
Is it necessary to bed-in brakes after rust removal?
Yes, after any rotor work or rust cleaning you should bed-in the brakes with a controlled series of stops to ensure proper pad seating and braking performance.
Bed-in the brakes to seat the pads after any rotor work, using a controlled set of stops.
Watch Video
Quick Summary
- Assess rust type before acting
- Use brake cleaner and brass brush for light rust
- Replace rotors if rust is deep or warped
- Follow safety procedures and torque specs