How to Format Rust: A Practical DIY Guide
Learn how to format rust on metal surfaces with a practical, step-by-step approach. Prep, remove corrosion safely, and protect metal to extend life. Corrosion Expert guides DIY enthusiasts through safe, effective rust formatting.

This guide shows how to format rust on metal surfaces, from safe assessment and surface preparation to removal and protective finishing. You’ll learn practical, repeatable steps to restore metal integrity, reduce future corrosion, and maintain a durable finish. With the right tools and safety practices, you can format rust confidently and extend the life of your metal goods.
Why proper rust formatting matters
Formatting rust is more than a cosmetic fix. When you learn how to format rust, you’re extending the life of metal tools, fences, and structural components, while reducing safety risks and the cost of replacement. The Corrosion Expert team emphasizes that thorough surface prep and correct coating choice are the two levers that determine a durable result. In this section, you'll understand the lifecycle of rust on common metals and why deliberate formatting matters for homeowner projects, especially in humid environments or coastal areas where rust accelerates. This is also where we introduce the core idea behind rust formatting: control the surface, remove oxidized layers, and restore a barrier that resists future corrosion.
What you’ll gain from a proper rust format
When rust is properly formatted, you achieve three outcomes: safer surfaces, longer life for hardware and tools, and fewer maintenance cycles. You’ll learn to identify the extent of corrosion, separate loose from bonded rust, and decide whether you can safely proceed with mechanical methods or need chemical aids. This knowledge helps DIY enthusiasts plan a project scope, budget, and time, avoiding over-ambitious methods on delicate substrates. Throughout this guide, the Corrosion Expert team provides practical advice that translates into real-world results, including safer handling practices and longer-lasting finishes.
Surface preparation and safety fundamentals
Surface prep is the backbone of rust formatting. Start by cleaning the area to remove dirt, grease, and loose rust flakes, which ensures the effectiveness of subsequent steps. Next, inspect the metal for pitting, perforation, or coating failures that would require additional repair. PPE is essential: wear safety goggles, gloves, and a dust mask or respirator if you’re working with rust-removal chemicals or generating dust. A clean, well-lit workspace reduces mistakes and helps you track progress accurately. The goal of this stage is to create a flat, clean, and stable base for rust removal and subsequent protection.
Inspection, testing, and decision-making
Before committing to a method, assess the rust’s depth and the metal’s integrity. Try a quick test by gently probing with a wire brush in an inconspicuous area to gauge how much material you’ll remove. If the rust is superficial, mechanical removal paired with priming may suffice; deeper rust may require chemical rust converters or rust removers. In all cases, keep X for safety—work in a ventilated space, avoid sparks near flammable solvents, and follow product labels precisely. This testing phase informs your choice of tools, chemicals, and protective coatings, helping you balance effort, time, and risk.
Steps that reliably restore a metal surface
A reliable rust formatting process combines mechanical action, chemical aids (when needed), and protective coatings. Start with removing loose rust using a wire brush or grinder with a low-speed setting to prevent substrate damage. Then, if needed, apply a rust remover or converter according to the manufacturer’s instructions and allow proper dwell time. After treatment, scrub again to remove residues, degrease with a clean solvent, and dry thoroughly. Finally, apply a primer and finish with a protective topcoat designed for the metal you’re treating. This sequence protects against future moisture ingress and oxidation.
Finishing and long-term protection strategies
The best results come from sealing the surface after rust formatting. Choose a primer compatible with the substrate (steel, cast iron, aluminum) and a topcoat rated for outdoor exposure if applicable. For interior items, a rust-inhibiting primer plus a durable enamel or epoxy can deliver long-lasting protection. Consider adding a corrosion inhibitor or a rust-preventive oil to hard-to-reach areas or moving parts. Regular maintenance checks, especially after heavy use or exposure to moisture, help you catch and address new rust formation early, preserving function and appearance.
Tools & Materials
- Safety goggles(Impact-resistant if grinding; ANSI Z87.1 compliance preferred)
- Gloves(Nitrile or leather; protect from sharp edges and chemicals)
- Dust mask or respirator(NIOSH-rated when using chemicals or generating dust)
- Wire brush or wire cup brush(Medium stiffness for rust breakup without substrate damage)
- Sandpaper or sanding blocks (60-120 grit)(Coarse for rust removal, finer grits for finishing)
- Grinder or rotary tool with appropriate wheels(Low speed recommended to avoid heat buildup)
- Rust remover or rust converter (optional)(Follow label directions; test on inconspicuous area first)
- Degreaser or acetone(Properly degreases after rust removal)
- Primer suitable for metal(Choose rust-inhibiting or epoxy primer)
- Protective topcoat (paint or clear coat)(Outdoor-rated if exposed to weather)
- Clean rags or microfiber towels(For degreasing and wiping surfaces)
- Ventilated workspace or outdoors(Minimize inhalation risk when using chemicals)
Steps
Estimated time: 60-120 minutes (plus cure times per product)
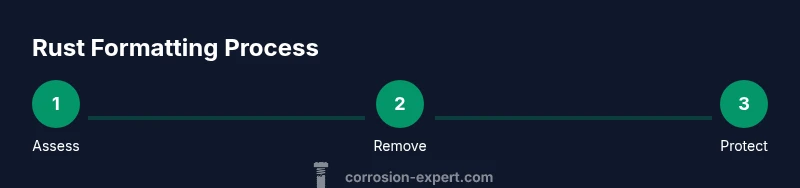
- 1
Assess and prep workspace
Select a well-ventilated area, clear the workspace, and inspect the item for structural damage. Gather safety gear and the required tools. This initial assessment helps you tailor the approach and reduces back-and-forth as you proceed.
Tip: Document areas of severe rust with photos to guide future maintenance. - 2
Remove loose rust and debris
Use a wire brush or cup brush attached to a drill/rotary tool to knock off loose rust without gouging the base metal. Work in short passes to avoid heat buildup that could warp thin sections.
Tip: Keep the brush at a low speed and use steady, overlapping strokes. - 3
Apply rust remover or converter (if needed)
Follow the product directions for dwell time and application. This step chemically converts deeper rust or penetrates stubborn deposits when mechanical removal isn’t enough.
Tip: Test on a small area first and wear the provided gloves and eye protection. - 4
Degrease and rinse
Degrease the surface with acetone or a dedicated degreaser, then rinse and dry thoroughly. Any remaining oils or solvents can prevent primer adhesion.
Tip: Wipe along the grain of any wood components and avoid leaving solvent residues. - 5
Prime the surface
Choose a rust-inhibiting primer suitable for the metal. Apply a thin, uniform coat and allow it to dry as per the manufacturer’s guidance. A solid primer foundation improves coating longevity.
Tip: Do not rush drying; any tackiness can reduce topcoat bonding. - 6
Finish with topcoat
Apply a compatible topcoat (enamel, epoxy, or polyurethane) in thin, even coats. For outdoor items, add a second coat after the first cures. Ensure full coverage to seal remaining pores.
Tip: Inspect for missed spots and touch up before the coat cures. - 7
Cure and maintain
Allow adequate curing time in a controlled environment. Reinspect after weather exposure to catch any early rust signs. Implement a routine maintenance schedule to prevent recurrence.
Tip: Keep a maintenance log and recoat as recommended by the product instructions.
Quick Answers
What does 'formatting rust' mean in practical terms?
Rust formatting means preparing the surface, removing corrosion, and sealing it to stop further oxidation. It combines physical removal with protective coatings to extend metal life.
Rust formatting means cleaning the surface, removing corrosion, and applying a protective finish to prevent further rust.
Can I format rust without grinding or sanding?
Yes, for light surface rust you can often format with hand tools and chemical rust converters. Deeper rust may require mechanical removal to restore structural integrity. Always assess depth first.
You can sometimes format rust without grinding, but deep rust may need mechanical removal.
What safety precautions are essential?
Wear eye protection, gloves, and a respirator if using chemicals. Work in a well-ventilated area and follow product labels to avoid hazards.
Wear safety gear, work in ventilation, and follow chemical product instructions.
What coatings are best after rust formatting?
Use a rust-inhibiting primer followed by a durable topcoat suitable for the environment (indoors vs outdoors). For high moisture, consider epoxy or polyurethane finishes.
A rust-inhibiting primer with a durable topcoat works best, especially outdoors.
How long does rust formatting last?
Durability depends on environment, coating quality, and maintenance. Regular inspections and timely re-coating extend the interval between projects.
Durability varies, but good coatings with maintenance last longer.
Is rust formatting the same for steel and cast iron?
The basic approach is similar, but substrate differences affect prep, primers, and coatings. Cast iron requires gentler surface work to avoid cracking, while steel can tolerate slightly more aggressive prep.
Steel and cast iron share methods, but prep must respect material differences.
When should I call a professional?
If rust has compromised structural integrity or involves tricky substrates, a professional assessment ensures safety and proper restoration.
Call a professional if there’s structural damage or complex substrates.
Watch Video
Quick Summary
- Assess rust depth before choosing methods.
- Mechanical removal plus proper coatings yields best longevity.
- Safety gear and ventilation protect you during the process.
- Regular maintenance prevents future rust buildup.