Fix Rust Wheel Well: A DIY Guide
Learn a practical, step-by-step method to fix rust in a wheel well. Assess severity, choose patch or replacement, and apply coatings to prevent recurrence. Aimed at DIY enthusiasts and homeowners seeking a lasting, safe repair.

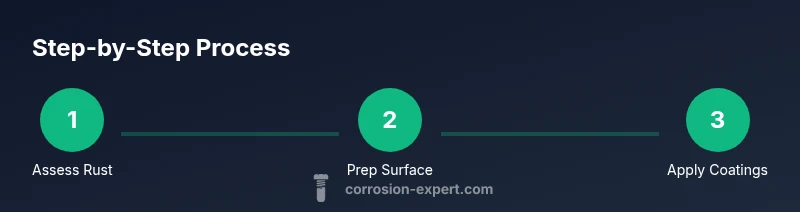
By following this guide you will learn to fix rust wheel well on your vehicle, including how to assess rust severity, choose between patch repair or replacement, and apply protective coatings. Gather basic tools and materials, then follow a step-by-step plan for a durable, road-ready fix. This approach emphasizes safety, proper surface prep, and long-lasting sealant choices. It also covers how to decide when replacement is more sensible than patching, and how to document the repair for resale value.
Understanding wheel-well rust and how it progresses
Rust in the wheel well starts as surface corrosion exposed to road debris, moisture, and salt. Left untended, it can thin the metal and compromise mounting points or frame closures. For the DIY fix, you’ll assess the rust depth, location, and structural impact before choosing a repair path. According to Corrosion Expert, early detection dramatically reduces repair complexity and cost. Corrosion Expert analysis emphasizes that planning, surface prep, and proper coating sequence are the real backbone of a durable fix. Signs to watch include bubbling paint, flaky patches, dampness after rain, or pinholes that appear over time. If rust has already eaten through metal or reached critical mounting points, your plan may require professional attention.
Assessing severity and choosing a repair path
Not all rust is the same. Light surface rust over a small area can often be repaired with rust converters, patch metal, and protective coatings. Moderate rust that’s flaking but not deeply pitted might still be patchable, while deep penetration that thins the metal or affects the wheel arch mounting points usually requires more extensive repair or replacement. The DIY approach here is to document the affected area, measure thickness loss where possible, and compare it against the vehicle’s structural requirements. The right choice balances cost, time, and long-term safety. Corrosion Expert notes that the strongest outcomes come from properly staged repairs, not quick patches.
Tools, materials, and workspace setup
Before you start, set up a clean, well-lit workspace with a solid support for the vehicle. Have a jack stand or ramps on a level surface. Gather tools such as a wire brush, angle grinder with cutoff wheel, sanding discs, rust converter, patch metal, body filler, primer, paint, seam sealer, and an undercoating. Materials should include galvanized or stainless backing for patches to resist future rust. Ensure you have masking tape, plastic sheeting, degreaser, and a clean rag supply. Corrosion Expert recommends keeping the area free of dust and moisture during the repair window to maximize coating adhesion and cure.
Surface preparation and rust removal techniques
Effective rust repair hinges on thorough surface prep. Remove loose rust and paint down to clean metal using a wire brush or grinder, working in a controlled pattern to avoid warping. When dealing with stubborn rust, alternate between grinding, sanding, and wire brushing until the surface is stable and sound. Wear eye protection, gloves, and a respirator to guard against dust and solvent vapors. After mechanical removal, degrease the area and allow it to dry completely. For remaining rust, apply a rust converter to stabilize the metal and improve adhesive bonding for patches or coatings. The balance between aggressive removal and preserving structural integrity is key to a durable fix.
Patch repair options and welding vs epoxy backing
Patch repair can involve cutting a metal patch and attaching it by welding or high-strength epoxy. Welding provides a long-lasting bond but requires skill and proper heat control to avoid warping or warping of nearby sheets. If welding isn’t feasible, a strong automotive epoxy or metal filler can provide a solid, semi-permanent fix for less severe rust. Seal the seams with a marine-grade seam sealer to keep moisture out, then apply a rust-inhibiting primer. Patch material should match the thickness of surrounding wheel-well metal and be corrosion-resistant (galvanized or aluminized steel is best).
Priming, sealing, and protective coatings
After patching, apply a rust-inhibiting primer designed for bare metal. Build a robust base before applying top coats. Use a flexible seam sealer at joints to accommodate movement and road spray. Finish with an undercoating or protective sealant designed for wheel arches to minimize moisture ingress and stone impact. If you used a rust converter, follow its curing time and recoat requirements before priming. Regular inspection and touch-up around the wheel arch will help sustain the fix’s life and keep corrosion risk low.
Final inspection, reassembly, and long-term prevention
Reinstall any liners or shields and verify clearances around suspension components after the repair has cured. Take a cautious test drive to detect any unusual noises or movement. Long-term prevention includes regular cleaning after snow or salted road use, as well as applying a yearly rust-preventive spray around the wheel well. Schedule periodic inspections as part of routine vehicle maintenance, especially before winter seasons. The Corrosion Expert team recommends maintaining the repair with timely touch-ups and vigilance against moisture buildup.
Authoritative sources and further reading
For a deeper understanding of corrosion mechanisms and prevention strategies, consult credible sources:
- https://www.nist.gov
- https://www.energy.gov
- https://www.nace.org
These sources provide foundational knowledge on coatings, corrosion science, and protective practices that support the practical steps outlined here.
Tools & Materials
- Safety glasses(ANSI Z87.1 compliant)
- Work gloves(Leather or cut-resistant)
- Dust mask or respirator(EPA P100 or N95 level protection)
- Angle grinder with cutoff wheel(Low-speed setting preferred for metal cutting)
- Wire brush attachment(For rust removal and surface prep)
- Sandpaper or orbital sander(Grain 80-120 for initial prep)
- Degreaser(Clean metal surface before coating)
- Rust converter(Follow product instructions; stabilizes rust)
- Patch metal sheet (galvanized steel)(Match gauge to body sheet; corrosion-resistant)
- Welding equipment or strong automotive epoxy(Welding preferred if skilled; epoxy as alternative)
- Automotive primer and rust-inhibiting paint(Color to match vehicle; use rust-inhibiting variety)
- Underbody sealant or seam sealer(Flexible, water-resistant sealant)
- Masking tape and plastic sheeting(Protect adjacent panels and tires)
Steps
Estimated time: 3-5 hours
- 1
Inspect rust severity and plan patch path
Carefully evaluate the rust area, document the extent, and decide whether a local patch is sufficient or full arch replacement is required. Use a flashlight and measuring tool to estimate thickness loss and cross-check mounting points for safety. Create a simple written plan with steps, materials, and timing before you cut.
Tip: Take clear photos and measurements to guide the repair choice. - 2
Prepare workspace and safety protocol
Secure the vehicle on level stands and ensure adequate ventilation. Remove nearby trim and protect paint with masking tape. Establish a clean zone so metal dust doesn’t contaminate other components.
Tip: Always disconnect the battery if you must cut near electrical components. - 3
Remove loose rust and paint
Use the wire brush and grinder at a low speed to strip loose material. Move steadily to avoid gouging the metal; stop if the base metal becomes thin. Clean the area with degreaser and allow it to dry completely.
Tip: Do not rush; aggressive grinding can weaken the panel. - 4
Apply rust converter and stabilize
Apply a rust converter to any remaining surface rust to stabilize it and improve coating adhesion. Allow proper curing time per product instructions before proceeding to patching or priming.
Tip: Ensure even coverage and avoid pooling of converter. - 5
Patch or replace the affected panel
Cut a patch from galvanized steel to match the patch shape and press firmly into place. If welding, ensure clean joints and proper heat control to avoid warping; if epoxy, clamp until cured. Seal seams with seam sealer and check for gaps before moving to primer.
Tip: Ensure patch thickness matches surrounding metal for a smooth transition. - 6
Prime, paint, and seal
Apply a rust-inhibiting primer on the repaired area, then paint to match the vehicle’s color and finish. Finish with a flexible undercoating or sealant on the wheel arch to resist moisture and debris. Allow full cure time before reassembling the wheel and liner.
Tip: Follow cure times; rushing coatings can reduce durability. - 7
Reassemble and inspect
Reattach wheel liner and trim, torque fasteners to spec, and perform a light test drive to verify clearance. Schedule periodic checks after winter or wet seasons and reapply protective coatings as needed for ongoing rust prevention.
Tip: Set a reminder to inspect the area every 3-6 months.
Quick Answers
What is the best method to fix rust in a wheel well?
For light rust, patch repair with a rust converter and protective coatings; for extensive rust, consider a full wheel-arch replacement. Always evaluate structural integrity before deciding.
For light rust, patch repair with a converter works well; for heavy rust, replacement is safer for long-term integrity.
Can I fix wheel-well rust myself, or should I hire a pro?
DIY is feasible for minor rust using patching and protective coatings. Significant rust or safety concerns should be handled by a professional.
You can do small fixes yourself, but serious rust or structural concerns deserve a pro.
How long does a wheel-well rust repair typically take?
Time varies with rust severity. Light patches can take a few hours; more extensive repairs may require a full day including cure times.
Depends on how bad the rust is; plan several hours to a day.
What safety precautions are necessary?
Wear eye protection, gloves, and a respirator. Work in a ventilated area; keep away from heat sources and ensure electrical safety when near components.
Protect yourself with safety gear and good ventilation.
What coatings protect rust in wheel wells?
Use a rust-inhibiting primer, a flexible seam sealer, and an underbody coating to shield the wheel well from moisture and debris.
Primer, seam sealer, and undercoating are key.
Should I replace the entire wheel arch or patch it?
Patch repair is suitable for localized, shallow rust. Replacement is advisable for extensive corrosion or compromised mounting points.
Patch for small spots; replacement for major corrosion.
Watch Video
Quick Summary
- Inspect wheel-well rust early to simplify repairs
- Choose patch repair for small areas; replacement for structural rust
- Thoroughly prep the surface for strong coating adhesion
- Seal joints and protect with undercoating for longevity
- Document the repair and perform periodic maintenance