Covering Rust with Paint: A Practical DIY Guide
Learn to cover rust with paint through thorough surface prep, rust inhibitors, and durable topcoats. This comprehensive guide covers tools, safety, product selection, and maintenance to extend metal life.

Covering rust with paint is achievable when you follow proper surface prep, use a rust-inhibiting primer, and apply a durable topcoat. Start by removing loose rust and degreasing the surface, then seal the metal with a converter or etching primer. Finally, apply multiple coats of paint and a protective sealant.
Why covering rust with paint is a practical DIY solution
For many homeowners and DIY enthusiasts, painting over rust is a practical way to extend the life of metal surfaces without costly replacements. The approach works best when you treat rust as a surface condition rather than a permanent flaw, and you follow a disciplined prep and coating sequence. According to Corrosion Expert, the key to long-lasting results is a clean, etched substrate, a rust-inhibiting primer, and a topcoat designed to flex with temperature changes and moisture. By choosing products that are specifically formulated for iron, steel, and galvanized surfaces, you reduce the chance of future corrosion under the coating. While some rusty areas may require more aggressive rust removal, many practical repairs can be achieved with careful sanding and sealing, especially on tools, rails, and outdoor fixtures that experience seasonal exposure. This article walks you through the steps, from initial assessment to protecting your painted surface, so you can confidently cover rust with paint instead of replacing entire components.
Surface preparation: cleaning, rust removal, and substrate conditioning
Surface prep is the foundation of a durable paint job over rust. Begin with a safety assessment and set up a well-ventilated workspace. Remove dust, oils, and loose corrosion using a stiff wire brush and a putty knife to lift flaky layers. Degrease the area with a solvent or mild detergent, then rinse and dry completely. Depending on the condition, lightly sand to 180–220 grit to create a micro-rough surface that improves primer bite. If you encounter deep pitting, you may need to fill or patch the area before priming. The goal is a stable, clean substrate free of contaminants that could cause corrosion beneath the coating.
Primer options: rust converters, etching primers, and primers with corrosion inhibitors
Choosing the right primer is critical for adhesion and protection. A rust converter chemically neutralizes iron oxide and converts it into a stable layer you can paint over, while etching primers create an anchored surface for metal coatings. For galvanic or previously painted surfaces, select a rust-inhibiting primer formulated for metal and compatible with your topcoat. If you anticipate prolonged exposure to moisture, consider a primer with built-in corrosion inhibitors for extended protection. Always follow the product instructions for surface compatibility, recoat window, and ventilation requirements. Remember, primer choice can dramatically impact adhesion, finish quality, and durability.
Paint choices: epoxy, enamel, and durability considerations
Topcoat selection should balance appearance, protection, and performance in your environment. Epoxy-based paints offer strong adhesion and chemical resistance, making them ideal for outdoor metalwork and tools. Enamels provide a smoother finish and good UV stability for architectural pieces and rails. For DIY projects that are budget-conscious, scrupulous surface prep combined with a high-quality rust-resistant acrylic enamel can suffice. If you expect heavy wear or moisture, opt for two-part epoxies or polyurethane topcoats that cure to a hard, durable film. Always verify compatibility between primer and paint, check drying times, and respect recoat intervals to avoid trapped solvents beneath the finish.
The painting process: masking, layering, and curing times
Begin with masking to protect nearby surfaces and prevent bleed-through. Apply a thin, even coat of primer and let it cure according to the manufacturer’s guidance. Apply the first topcoat with even strokes or a roller, ensuring complete coverage and edge-to-edge adhesion. Allow the coat to cure fully before applying a second layer, again following the recommended recoat window. In outdoor or high-wear areas, a third lightweight coat can improve protection. Between coats, lightly sand with very fine grit (320–400) to remove imperfections and promote adhesion. Curing times vary; plan for a full day or more in moderate climates, longer in cooler or damp conditions. A final inspection should confirm no bare spots or pinholes and that joints remain sealed against moisture.
Caring for painted rust-prone surfaces: environmental considerations and maintenance
Maintenance is critical to extending the life of a painted rust-prone surface. Clean with a mild detergent and water to remove dirt without abrading the topcoat. Inspect annually for bubbling, cracking, or signs of moisture infiltration, especially at seams or joints. If damage is detected, sand lightly, clean, and touch up with the same primer and topcoat system. In humid or coastal environments, perform more frequent inspections and consider a sacrificial topcoat or additional sealant layer for added longevity. Environmental exposure, including sun, rain, and salt spray, influences the coating’s longevity and should guide re-coating intervals.
Common mistakes to avoid when painting over rust
Common errors include skipping rust removal or underprepping a surface, which leads to poor adhesion and premature failure. Using the wrong primer or topcoat for the substrate can cause peeling or blistering. Painting in high humidity or during temperature extremes slows cure times and traps solvents. Failing to mask adjacent areas results in messy edges and potential damage to surrounding materials. Finally, neglecting proper safety gear, including a respirator, gloves, and eye protection, can create health risks from fumes and dust.
Troubleshooting and long-term prevention strategies
If you notice peeling, cracking, or rapid rust reappearance after painting, reassess prep steps and verify product compatibility. Re-sand, re-prime, and re-coat as needed, ensuring proper curing times between layers. Long-term prevention focuses on minimizing moisture exposure and protecting vulnerable sections with sealants or protective coatings. In challenging environments—such as submerged metal, coastal areas, or vehicles with frequent weather exposure—consider periodic inspection, a maintenance-friendly coating system, and storage considerations that reduce exposure to corrosive elements. Regular upkeep is the best defense against rust return, keeping painted surfaces looking good and performing well.
Tools & Materials
- wire brush(Stiff-bristled; remove loose rust and scale)
- putty knife or scraper(Lift flaky rust and debond paint from edges)
- sandpaper (80–120, then 180–320 for finish)(Coarse grit to remove rust, fine grit for adhesion)
- degreaser or mild detergent(Remove oils and contaminants; rinse thoroughly)
- rust converter (optional)(Chemically neutralizes rust; use only if recommended by primer/product line)
- rust-inhibiting primer(Anchors the surface and blocks future rust under the topcoat)
- epoxy or enamel topcoat(Durable, moisture-resistant finish; ensure compatibility with primer)
- paint thinner/solvent(Cleanup and thinning per product directions)
- paint brushes and/or rollers(Synthetic bristles or foam; choose nap for surface texture)
- masking tape and drop cloths(Protect adjacent surfaces; contain debris and spills)
- respirator or masks(Protect lungs from dust and fumes; ensure proper fit)
- nitrile gloves and eye protection(Safety PPE for chemicals and dust)
- sandable filler/putty (if needed)(Patch small pits or gouges before priming)
Steps
Estimated time: 2-6 hours
- 1
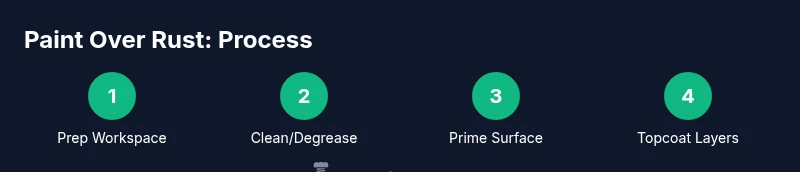
Prepare the workspace
Set up in a well-ventilated area. Use drop cloths to protect floors and nearby surfaces. Gather all tools and materials and organize the work zone for clean, efficient progress.
Tip: Lay down plastic sheeting to catch dust and wipe-down after finishing. - 2
Clean and degrease the surface
Wipe the metal with a degreaser to remove oils and fingerprints. Rinse with clean water and dry completely before proceeding. A clean surface ensures better primer adhesion.
Tip: Use a dedicated lint-free cloth to prevent fabric fibers from embedding in the surface. - 3
Remove loose rust
Use a wire brush or scraper to remove loose rust and scale. For stubborn areas, gently abrade with 180–220 grit sandpaper until the surface feels stable and matte, not shiny.
Tip: Don’t press too hard; you may gouge the metal and create pits that trap moisture. - 4
Treat with rust converter or etch primer
If you’re using a rust converter, apply as directed to convert surface rust to a stable layer. If you’re using an etch primer, apply a light coat to create a chemical bond for the topcoat.
Tip: Follow product-specific cure times before priming. - 5
Apply rust-inhibiting primer
Coat evenly with a high-build primer designed for metal. Allow the primer to dry fully according to the label, then lightly sand to remove imperfections.
Tip: A tack cloth between coats helps remove dust and ensures a smooth finish. - 6
Apply topcoat layers
Apply the first topcoat in thin, even layers, overlapping strokes. Let each coat dry completely before applying the next; two to three coats are common for durable protection.
Tip: Keep coats thin to avoid runs and sags. - 7
Final cure and inspection
Allow the final coat to cure as recommended. Inspect for missed spots, adhesion, and edge sealing. Clean up and store materials properly for future touch-ups.
Tip: Test a small area by gently pressing with a fingernail to confirm full cure.
Quick Answers
Do I need to remove all rust before painting?
You don’t need to eliminate every speck of rust, but you should remove loose, flaky rust and create a stable, clean substrate. Heavily pitted areas may require patching or replacement. The key is good adhesion and a uniform base.
You should remove loose rust and create a stable surface before painting; patch or replace areas that are deeply pitted.
Can I use any paint over rust?
Not all paints adhere well to rust. Use a rust-inhibiting primer followed by a durable topcoat suitable for metal. Check compatibility and follow the manufacturer’s guidance for best results.
Use a rust-inhibiting primer and a metal-safe topcoat for best adhesion and durability.
How long does drying/curing take between coats?
Drying times vary by product and weather conditions. Follow label directions, but plan for at least several hours between coats in moderate temps and avoid handling until fully cured.
Dry times depend on the product and weather; follow the label and allow full cure before handling.
Is a rust converter necessary?
A rust converter is optional but helpful for stabilizing light rust and improving adhesion. In heavy rust or porous areas, sanding and primer still matter more for long-term durability.
A rust converter isn’t always required, but it can help stabilize light rust before priming.
What safety precautions are essential?
Work in a well-ventilated area, wear PPE (mask, gloves, goggles), and follow product safety data. Dispose of waste materials according to local regulations.
Ventilation and PPE are essential for safe painting; follow product safety instructions.
How can I prevent rust after painting?
Prevent rust by sealing joints, addressing chips or scratches promptly, cleaning regularly, and re-coating as needed. Use coatings designed for exterior exposure and periodic inspections.
Keep an eye on chips, clean the surface, and reapply coatings when you notice wear.
Watch Video
Quick Summary
- Proper prep is non-negotiable for adhesion
- Choose rust-inhibiting primers designed for metal
- Allow thorough curing between coats for best results
- Use appropriate PPE and ventilation at all times
- Regular maintenance extends the life of painted surfaces