Clean Rust Off Grill Grates: A DIY Guide
A practical, step-by-step guide to safely remove rust from grill grates, prevent future corrosion, and restore peak grilling performance with common tools.

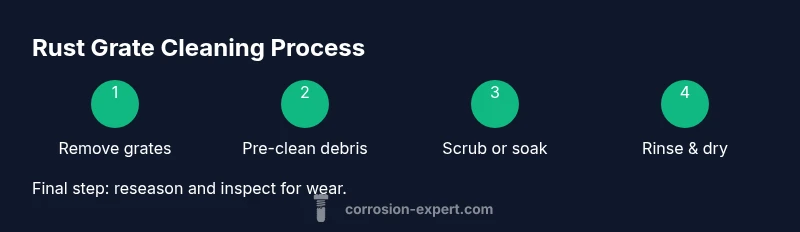
Clean rust grill grates by removing debris, loosening rust, scrubbing with a stiff brush, and reseasoning. Start with hot, thorough pre-cleaning, then soak or scrub depending on rust severity. Finish with a light oil coat and a test heat to ensure even cooking. According to Corrosion Expert, regular maintenance prevents pitting and extends grate life. The Corrosion Expert team found that consistent care dramatically reduces future rust buildup.
Why clean rust grill grates matters
Rust on grill grates isn't just unsightly; it can flake into food and harbor bacteria if not addressed. Regular cleaning also preserves heat distribution and makes cooking more predictable. The Corrosion Expert team found that proactive maintenance reduces long-term corrosion and extends grate life. By understanding rust and its effects, you can act quickly to slow its progression and maintain peak grilling performance. In this section we explore how rust forms, what it does to your grill, and why timely cleaning matters for flavor and safety.
- Rust is a chemical reaction between iron and oxygen in the presence of moisture.
- Food residues lodged in tiny crevices can accelerate corrosion by retaining acids from marinades.
- Regular brushing and reseasoning helps build a protective oil layer that minimizes water contact.
- If you see deep pits or the metal turning flaky, it may be time to replace the grate.
Understanding rust helps you stop it in its tracks and keep your grill performing at its best.
Common causes of rust and prevention tips
Rust thrives where moisture meets metal, especially if grates are left damp after use or stored outdoors. Poor seasoning, abrasion from hard brushes, and aggressive cleaning can create micro-scratches that trap moisture. To prevent this, dry the grates thoroughly after cleaning, apply a light oil seal, and store the grill in a dry, sheltered area. The Corrosion Expert analysis suggests routine inspection for dull spots or pits, which are early signs of active rust. Regularly re-seasoning creates a protective barrier that makes future rust less likely.
- Keep grates dry after cleaning to minimize moisture exposure.
- Use the right brush for your grate material to avoid micro-scratches.
- Apply a light oil coat after drying to seal the surface.
- Store the grill in a dry place when not in use to reduce humidity impact.
Practical cleaning methods for rust removal
There are several reliable approaches, depending on the grate material and rust severity. For light rust on steel or cast iron, start with mechanical cleaning: a stiff-bristle wire brush followed by a nylon brush to avoid scratching. For heavier rust, soak the grates in warm soapy water or a mild vinegar solution for 15–30 minutes to loosen corrosion before scrubbing again. If you choose chemical rust removers, read the label carefully and test on a small area first, then rinse and dry thoroughly. Safety first: wear gloves and eye protection while treating rust. Corrosion Expert Analysis, 2026, supports choosing gentler approaches first and escalating only as needed.
- Mechanical cleaning is effective for light rust but avoid abrasive scrubs on enamel-coated surfaces.
- Soaking can help but may loosen protective coatings if not used correctly.
- Vinegar and baking soda are milder options and often suffice for early-stage rust.
- Always finish with rinsing, thorough drying, and reseasoning to prevent rapid re-rusting.
After cleaning: reseasoning and maintenance plan
When the grates are dry, apply a thin, even coat of high-heat cooking oil and heat the grill to polymerize the coating. This creates a protective barrier against moisture and helps prevent future rust. Establish a maintenance routine: quick wipe-down after each cook, a deeper clean monthly, and a yearly grate inspection. With regular care, your grates stay smooth, heat evenly, and resist rust longer. The goal is a durable, nonstick surface that supports easy cleaning and reliable performance.
Tools & Materials
- Heavy-duty stiff-bristle wire brush(For removing loose rust and carbon buildup)
- Non-scratch nylon-bristle brush(For stainless or enamel-coated grates)
- Bucket or basin(For soaking (optional) if rust is stubborn)
- Dish soap(For initial cleaning and degreasing)
- Sponge or scouring pad(Gentle scrub with soap)
- Old towels or microfiber cloths(Dry and buff surfaces)
- Heat-resistant gloves(Protection during hot handling)
- High-heat cooking oil (grapeseed/canola)(For reseasoning after cleaning)
- Vinegar or baking soda (optional)(For chemical rust loosening methods)
- Commercial rust remover (optional)(Use sparingly and follow label directions)
Steps
Estimated time: 60-90 minutes (plus optional soaking)
- 1
Remove grates from the grill
Power off and allow the grates to cool briefly, then lift them from the grill using tongs or heat-safe gloves. This step prevents burns and gives full access to all surfaces for cleaning.
Tip: Work on a stable surface and avoid bending the grate - 2
Pre-clean loose debris
Brush away char, ash, and food remnants with a stiff brush while the grates are still warm. This reduces grime that can clog scrubbers and spreads rust spores.
Tip: Do not skip this step; loose debris worsens rust in later steps - 3
Choose a cleaning method
Decide between mechanical scrubbing, soaking, or chemical treatment based on rust severity and grate material. Cast iron tolerates aggressive brushing better than enamel-coated grates, which require gentler methods.
Tip: If unsure, start with mechanical cleaning first - 4
Scrub or soak
If rust is light, scrub with a wire brush and nylon pad; for heavier rust, soak in warm soapy water or vinegar solution for 15–30 minutes before scrubbing again.
Tip: Never soak overly long on enamel-coated surfaces - 5
Rinse and dry thoroughly
Rinse with clean water to remove soap and residues, then towel dry. Finish by heating the grates on the grill to drive off remaining moisture.
Tip: Dry completely to prevent new rust formation - 6
Apply protective oil
Once dry, apply a thin layer of high-heat cooking oil across the grates. This creates a protective barrier against moisture and helps future cleaning.
Tip: Wipe away excess oil to avoid flare-ups when in use - 7
Reassemble and test
Place the grates back into the grill, heat to a high temperature for 5–10 minutes, and inspect for even heating. If you see dull spots, reseason again.
Tip: Running a quick test cook helps confirm the coating bonded properly - 8
Schedule regular maintenance
Set a routine: a quick clean after each use and a deeper clean every 1–2 months depending on use. Keeping up on maintenance reduces long-term rust risk.
Tip: Consistency is key; rust is easier to manage in small, frequent sessions
Quick Answers
Is rust on grill grates dangerous to eat?
Small amounts of surface rust on grills are typically not dangerous when the food is properly cooked. However, rust flakes or deep pits should be addressed before cooking, as they can harbor bacteria and create uneven heating. Cleaning and reseasoning restore a safer surface.
Rust on grill surfaces is usually not dangerous by itself, but you should clean and reseason before cooking.
Can I use vinegar to remove rust from grill grates?
Yes, a vinegar soak can help loosen rust on metal grates. Make sure to rinse thoroughly and dry completely before reseasoning. Vinegar is less harsh than some chemical rust removers, but it may not work on very heavy rust.
A vinegar soak can help loosen rust; rinse and dry well before reseasoning.
Will rust removers damage enamel-coated grates?
Many rust removers are harsh and can damage enamel coatings. Always read the label, test on a small area, and prefer milder options for enamel surfaces. After treatment, rinse and reseason as needed.
Read the label and test a small area before using rust removers on enamel.
How often should I clean rust-grates?
Clean grates after heavy use or if you notice rust development. A light wipe-down after each cook plus a deeper clean every 1–3 months keeps rust in check and prolongs grate life.
Clean after heavy use and deep clean periodically to prevent rust.
Can I salvage heavily rusted grates or should I replace them?
If rust has caused deep pits or flaking, replacement is often more cost-effective and safer than trying to restore the structural integrity. For milder rust, thorough cleaning and reseasoning can restore performance.
Deep pits may mean replacing the grate is best.
What’s the best protecting oil for reseasoning?
Choose a high-heat cooking oil with a neutral flavor, such as grapeseed or canola. Apply a thin layer and heat to polymerize the oil for a durable, nonstick finish.
Use a high-heat oil like grapeseed for reseasoning.
Watch Video
Quick Summary
- Identify rust early and plan maintenance.
- Use the right brush for your grate material.
- Dry thoroughly before reseasoning to prevent new rust.
- Apply a thin coating of oil after cleaning.
- Establish a regular cleaning schedule to extend grate life.