Troubleshooting Broken Rust: Urgent DIY Fixes
Urgent guide to diagnosing and repairing broken rust on metal surfaces, tools, and appliances. Learn safety steps, common causes, and practical fixes to stop corrosion fast.

Safety first: broken rust typically stems from compromised coatings that expose bare metal, allowing rapid corrosion. The quick fix is to stop use, isolate the area, and perform a staged repair: remove loose rust, apply a rust converter, prime, and repaint. If structural damage or pitting is visible, pause and consult a professional.
Understanding broken rust and why it matters
Broken rust is more than a cosmetic blemish; it signals that a protective barrier has failed and moisture can reach the underlying metal. When rust breaks through paint or sealant, oxygen and water accelerate corrosion and create weak spots that can grow over time. In practical terms for DIYers, this means a small area can spread if not treated promptly. According to Corrosion Expert, broken rust is not just ugly—it can compromise structural integrity on load-bearing parts and accelerate wear on household tools and appliances. The aim of this guide is to help you quickly assess the damage, choose safe repair options, and implement a lasting prevention plan that stops rust from advancing.
Common sources of coating failure that lead to broken rust
Rust becomes a problem when a protective barrier is damaged and moisture remains in contact with bare metal. Common sources include improper surface preparation before painting (dust, oil, or residual rust), exposure to salt environments (coastal areas or winter road salt), mechanical abrasion (scratches or impact that tears the coating), and rapid temperature changes causing cracks. Detecting these sources early helps prevent a cycle of damage that accelerates rust activity. In many cases, rust starts at joints or creases where water pools. The corrosion pathway is enhanced when dissimilar metals create galvanic cells under moisture, so watch for mixed metals in fittings.
Immediate safety steps you should take now
Before touching the damaged area, ensure personal safety: wear eye protection, gloves, and a dust mask. If the item is connected to power or water, disconnect and shut off the supply. Ventilate the space to reduce fumes from solvents or rust removers. Keep children and pets away, and place absorbent rags to catch drips. If you suspect lead-based coatings or hazardous materials, stop and call a professional. The goal is to minimize exposure risk while you assess the damage and plan the repair.
How to assess the extent of damage without making things worse
Begin with a visual inspection for flaking, pitting depth, and any soft spots. Gently probe with a plastic or wooden tool to avoid further scratching; if the metal yields, stop and seek expert advice. Use simple measurements to estimate metal loss, and note areas around welds, joints, and corners where moisture tends to accumulate. Rust repair options work best with mild to moderate corrosion; heavy structural rust may require replacement. Photographs help you communicate the scope to suppliers or professionals, and they keep you honest about what can be fixed at home.
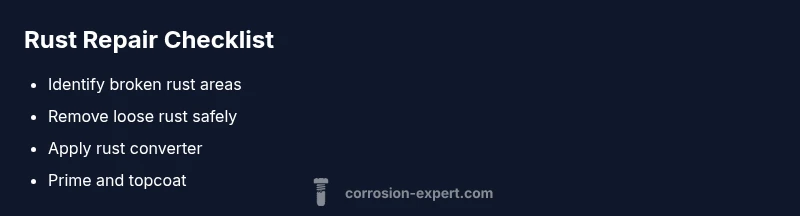
Repair strategies: from quick fixes to full restoration
Light surface rust responds well to cleaning and rust converters. Remove loose rust with a stiff brush or non-metallic pad, wipe clean, then apply converter per label directions. After converter cures, coat with a rust-inhibiting primer and durable topcoat. Deeper rust may require sanding to clean metal, filling pits with an appropriate filler, and then applying primer and paint. For critical structural components, consider professional services to ensure safety and load-bearing integrity. Always follow product labels and curing times for best adhesion; rushed repairs invite rapid relapse.
Long-term prevention: maintenance routines and protective products
Prevention is easier than repair: keep surfaces dry, recoat wear-prone areas regularly, and schedule rust-inhibitor applications as part of routine maintenance. Outdoor metal benefits from UV-stable, moisture-barrier coatings, while joints should be sealed to prevent water intrusion. Annual inspections help catch early signs of corrosion; use wax-based protectants on high-contact areas and store items in sheltered spaces whenever possible. Routine cleaning removes salts and grime that accelerate rust, and documenting repairs helps guide future prevention.
When to call a professional: red flags and decision guide
Deep pitting, thinning metal, or rust near critical load-bearing areas demands professional assessment. If rust has penetrated the base metal or multiple cycles have occurred, replacement or structural reinforcement may be necessary. A pro can perform non-destructive testing and thickness measurements to determine if coatings can restore safety and function. The Corrosion Expert team recommends erring on the side of caution for anything that could compromise strength or safety.
Common mistakes to avoid during DIY rust repairs
Avoid skipping surface prep or ignoring cure times. Using metal fillers on rust can trap moisture and fail. Do not mix rust converters and primers from different brands unless compatibility is specified. Avoid over-wetting surrounding wood or fabrics, which can introduce additional moisture. Lastly, neglect PPE and ventilation can lead to health risks from dust and fumes.
Steps
Estimated time: 60-90 minutes
- 1
Safety and preparation
Power down equipment, wear PPE, and work in a dry, well-ventilated area. Isolate the item from moisture and remove any nearby flammables. Confirm that no live electrical connections remain if the item is powered.
Tip: Set up a dedicated workspace with a drop cloth to catch rust particles. - 2
Evaluate extent of damage
Inspect the area for depth of rust, flaking, and soft spots. Document spots with photos and measurements to guide repair choices and to inform suppliers or pros.
Tip: Mark edge boundaries with painter’s tape for precision. - 3
Remove loose rust
Use a stiff bristle brush or non-metallic pad to remove loose rust. Avoid aggressive grinding on delicate surfaces. Wipe the area clean to reveal fresh metal.
Tip: Never press too hard; you want to remove rust, not gouge metal. - 4
Apply rust converter
Follow product instructions to apply rust converter. It reacts with iron oxide to form a stable layer that can be primed over. Allow full curing time as directed.
Tip: Choose a converter compatible with your next coating (paint or sealant). - 5
Prime and paint
Apply a rust-inhibiting primer, then topcoat with an enamel or epoxy designed for metal. Apply thin, even coats and allow proper curing between layers.
Tip: Ventilate, and avoid heavy coats that trap moisture. - 6
Cure and re-test
Let coatings fully cure before resuming use. Check for adhesion by gently scratching with a fingernail; if the coating peels, re-apply primer and paint.
Tip: Periodic checks prevent early relapse. - 7
Document and schedule prevention
Record the repairs and a maintenance schedule. Plan annual inspections, surface treatments, and storage improvements to minimize future rust.
Tip: Set reminders for routine checks.
Diagnosis: Visible rust damage with coating failure on metal surface
Possible Causes
- highMoisture trapped under coating
- mediumPoor surface preparation before painting
- lowSalt exposure accelerating corrosion
- lowMechanical abrasion tearing protective layer
Fixes
- easySafety check, isolate area, and ventilate the space
- easyRemove loose rust with a stiff brush, clean, and apply rust converter
- mediumPrime and topcoat after converter cures to seal surface
- hardIf corrosion is structural, consult a professional for assessment/replacement
Quick Answers
What exactly is broken rust?
Broken rust refers to rust that has penetrated through protective coatings, exposing bare metal. It often presents as flaking, pits, or soft spots and indicates active corrosion. Early intervention is key to preventing structural failure.
Broken rust is rust that has breached protective coatings, exposing metal and indicating active corrosion.
Can I fix rust myself, or should I hire a pro?
Many surface rust repairs can be done at home with proper safety and prep. Deep pits, structural weakening, or corrosion near load-bearing parts may require professional assessment and repair.
Many DIY fixes work for surface rust, but structural rust needs a professional.
Which tools and products work best for rust removal and repair?
Use a stiff brush, non-metallic pads, rust converters, rust-inhibiting primers, and appropriate topcoats. Always follow manufacturer directions and compatibility notes to avoid trapping moisture.
Stiff brush, non-metal pads, converter, primer, and topcoat—follow the product directions.
Is rust dangerous to handle?
Rust itself is not typically hazardous, but rust particles and fumes from solvents can irritate skin, eyes, and lungs. Wear PPE and work in a well-ventilated area.
Rust dust and fumes can irritate; protect yourself with PPE and ventilation.
How long does a rust repair typically last?
Durability depends on surface conditions, coating quality, and exposure. Proper prep and a good topcoat can extend life, but outdoor or highly moist environments may shorten it.
Durability varies; with proper prep and coating, repairs last longer but outdoor exposure can reduce life.
How can I prevent rust after repair?
Keep surfaces dry, recoat as needed, and seal joints to deter moisture. Regular inspections help catch early signs before major damage occurs.
Keep things dry, recoat regularly, and inspect for early signs of rust.
Watch Video
Quick Summary
- Act quickly to contain rust and prevent spread
- Follow safety steps before any repair work
- Proper prep ensures coating adhesion and durability
- Use rust converters, primers, and quality topcoats in order
- Establish a long-term prevention plan to minimize future rust