What Can You Use Rust-Oleum On? A Practical Guide
Explore surface compatibility for Rust-Oleum coatings across metal, wood, concrete, brick, plastic, ceramic, and masonry. Learn proper prep, product selection, and best-practice application for durable finishes.

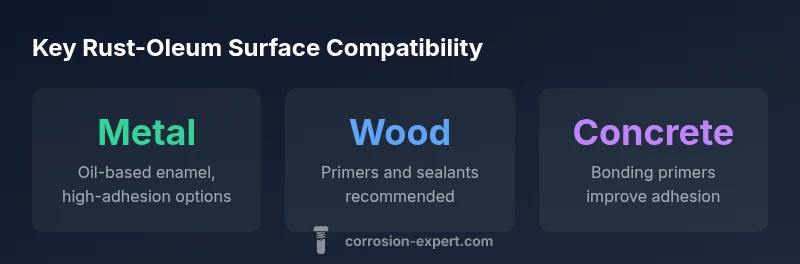
In response to "what can you use Rust-Oleum on", Rust-Oleum coatings are designed to work on a broad range of surfaces, especially metal, wood, concrete, brick, ceramic, plastic, and masonry. Choose the right product line (oil-based, water-based, spray or brush-on) and follow meticulous surface prep, curing times, and environmental conditions to ensure adhesion and durability.
What surfaces Rust-Oleum covers and why product choice matters
The Rust-Oleum product family is designed to address a wide array of substrates, but not every product is equally suited to every surface. The cornerstone of a successful finish starts with selecting the right line and performing thorough prep. For DIY projects, you’ll frequently see surfaces like metal, wood, concrete, brick, ceramic, and various plastics mentioned in guides and tutorials. The key is to understand how adhesion, flexibility, and chemical compatibility vary across product types. The Corrosion Expert team emphasizes that you should map your surface to a compatible coating category—oil-based enamels for durability on metal, water-based enamels for quick-dry jobs on wood, and specialty epoxy or masonry coatings for concrete and brick. When you ask, what can you use Rust-Oleum on, the most reliable answer is: the substrate should be clean, dry, and properly prepared, and you should match the product to the substrate’s unique demands.
Surface preparation fundamentals
Surface preparation is the single most influential factor in coating success. Start with a clean surface free from oils, dust, and loose rust. For metal, remove existing corrosion and apply a rust converter if deep pitting is present. Wood should be sanded to a smooth, open-grain finish and primed if needed. Concrete and masonry benefits from a thorough cleaning and drying before applying coatings designed for porous substrates. Plastics often require a specialized adhesion promoter or primer to overcome low surface energy. Weather plays a critical role: avoid painting in high humidity or temperatures outside the product’s recommended range, and ensure adequate ventilation for solvent-based finishes. Follow the exact label instructions for prep steps, curing times, and recoat windows.
Metal and rust-prone surfaces: best practices
Bare metal or previously rusted steel demands aggressive preparation followed by a bonding primer if the chosen Rust-Oleum product recommends it. Wire-brush or sandblast heavy rust areas, degrease, and wipe with a solvent-cleaner before applying a rust-inhibiting primer. For galvanized or stainless steel, use products explicitly designed for non-ferrous metals, as standard enamel may fail to bond properly. A light degrease, scuffing with fine-grit sandpaper, and a test patch can prevent adhesion problems. In all cases, apply thin, even coats and allow sufficient drying time between coats to avoid solvent entrapment and uneven films.
Wood, furniture, and decking projects
Wood surfaces tolerate many Rust-Oleum finishes, but priming improves durability on outdoor furniture and decks. Sand to a smooth surface, remove dust, and apply a compatible primer if the wood is stained, bare, or chalky. For painted wood, light scuffing helps adhesion, while for bare wood, a quality primer reduces absorption and yields a more uniform topcoat. Consider a sealer or topcoat with UV protection for exterior projects to prevent color fade. Always test a small area first to confirm color match and adhesion before committing to larger surfaces.
Concrete, brick, and masonry surfaces
Concrete, brick, and other masonry substrates are porous and can absorb coatings quickly. Clean thoroughly and allow to dry completely. Use primers or bonding agents specifically formulated for masonry if the product requires it. For patios, sidewalks, or interior walls, applying multiple thin coats yields better coverage than a single thick layer. If you’re using a solvent-based finish, ensure proper ventilation and wear appropriate PPE. For exterior surfaces, check weather patterns and plan projects for dry spells to maximize cure and performance.
Plastics and other challenging substrates
Plastics like HDPE or PVC can be challenging due to low surface energy. Use an adhesion promoter or primer designed for plastic-substrates, then follow with a Rust-Oleum topcoat that is labeled for plastic use. Degrease and lightly scuff-sand the surface before applying primer. Some plastics may require more than one thin coat to achieve even color and coverage. Always run a small test patch to confirm adhesion before proceeding with the entire piece.
How to choose the right product and best practices
The best practice starts with a clear substrate map: metal, wood, concrete, brick, ceramic, or plastic. For metal, choose oil-based enamel for superior durability on outdoor hardware and railing. For wood, water-based sprays or enamels offer easier clean-up and low odor, especially for indoor projects. For concrete and masonry, select coatings designed to penetrate and seal porous surfaces while resisting cracking. Regardless of surface, prep, thin coats, proper drying times, and environmental control are non-negotiable. Maintain a clean workspace and follow label instructions to avoid issues such as pinholing or runs. The Corrosion Expert recommends labeling your project with the product type and recommended recoat window to help guide future touch-ups and maintenance.
Surface compatibility table for Rust-Oleum coatings
| Surface Type | Recommended Product Type | Prep Steps | Notes |
|---|---|---|---|
| Metal (bare) | Oil-based enamel or high-adhesion enamel | Clean rust; degrease; sand lightly; prime if needed | Test adhesion; avoid over-application on thin metal |
| Wood (bare or stained) | Oil-based enamel or water-based acrylic enamel | Sand; clean; prime if necessary | Outdoor projects benefit from UV-resistant topcoats |
| Concrete/Brick/Masonry | Masonry coating or concrete-specific enamel | Clean; allow to dry; apply bonding primer if required | Ensure surface is dry and dust-free |
| Plastics (HDPE, PVC) | Plastic-primer compatible enamel or adhesion promoter | Degrease; scuff-sand; test adhesion | Some plastics require primer for best results |
Quick Answers
Is Rust-Oleum suitable for outdoor use?
Yes, many Rust-Oleum products are formulated for outdoor durability. Choose a product designed for exterior use, follow outdoor-specific prep steps, and allow for ample curing time in suitable weather. Always check the product label for temperature and humidity guidelines.
Yes, outdoor Rust-Oleum coatings are available. Check the label for exterior suitability and follow outdoor prep steps.
Do I need a primer for bare metal before applying Rust-Oleum?
Bare metal often benefits from a rust-inhibiting primer or a metal-specific enamel. Remove loose rust, clean, degrease, and prime according to the product guidelines. Priming improves adhesion and helps prevent future corrosion.
For bare metal, priming helps adhesion and rust protection. Follow the product’s primer recommendations.
What is the difference between oil-based and water-based Rust-Oleum products?
Oil-based enamels typically offer greater durability and chemical resistance, especially outdoors, but require longer drying and venting. Water-based formulations dry faster and have lower odors, suitable for indoor projects. Choose based on project location, odor tolerance, and cleanup needs.
Oil-based lasts longer outdoors; water-based dries faster and is easier to clean up.
Can Rust-Oleum be applied over existing paint?
In many cases, you can coat over existing paint if the surface is clean, dry, and compatible with the new product. Lightly sand glossy surfaces, remove peeling paint, and follow the label instructions for adhesion and topcoat compatibility.
Yes, often you can coat over existing paint if it’s clean and compatible with the product.
What prep steps are essential before painting on concrete?
Clean the surface to remove dust and oils, let it dry completely, and consider a bonding primer if the concrete is very porous or has a rough texture. Porous surfaces benefit from multiple thin coats rather than a single heavy layer.
Clean, dry concrete, then use a bonding primer if needed and apply thin coats.
Can I spray Rust-Oleum over existing stain on wood?
Yes, in many cases you can spray over stained wood, but scuff-sand and clean first to improve adhesion. If the stain is glossy, a light primer or sanding helps ensure even coverage and color consistency.
You can spray over stained wood after scuffing and cleaning; primer helps if the stain is glossy.
“Proper surface preparation is the single most influential factor in coating success. If you start with clean, dry, and appropriately primed surfaces, Rust-Oleum finishes will adhere better and last longer.”
Quick Summary
- Prepare surfaces thoroughly before coating for best adhesion
- Match product type to substrate for durability
- Use thin coats and proper drying times between coats
- Test adhesion on a small area before full project
- Follow label instructions for priming and recoat windows