Rust to Metal Paint: A DIY Guide for Durable Finishes
Learn how to turn rust into a paint-ready metal surface with rust converters, primers, and durable topcoats. A practical, step-by-step guide for homeowners and DIY enthusiasts.

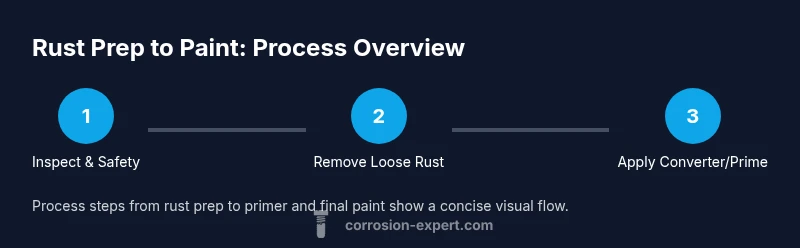
This guide shows you how to turn rust into a paint-ready metal surface. You’ll learn safe cleaning, rust removal of loose rust, applying a rust converter, priming, and finishing with rust-inhibiting metal paint. Gather basic tools, safety gear, and patience to protect metal surfaces at home. This approach minimizes corrosion and yields a durable finish. Follow steps in order for best results.
Why rust must be addressed before painting
Rust is more than a surface defect; it is a chemical process that continues to eat metal if left untreated. For homeowners tackling rust to metal paint projects, the best results come from stopping active corrosion and preparing a stable, clean substrate. In practical terms, you’re not just painting over rust; you are creating a base layer that will bond with primer and topcoat to resist moisture, salts, and temperature swings. The keyword here is preparation: removing loose rust, cleaning grease, and ensuring the surface is dry before you apply any converter or paint. If you can turn the rust into a controlled, inert layer, you dramatically increase the odds that your finish will last for years. The Corrosion Expert team emphasizes that success begins with a clear plan, the right products, and patient execution. When you approach rust-to-metal-paint projects with a methodical workflow, you protect panels, tools, fences, and furniture from future corrosion. It also helps you understand how the finish will interact with different metals, coatings, and environmental conditions.
Rust-to-metal paint: what it is and why it works
Rust-to-metal paint describes a two-stage approach: convert remaining rust to a stable compound, then seal it with a primer and a durable topcoat. The rust converter chemically changes oxides into a black, inert layer that adheres to metal, creating a ready surface for primer. The paint layer that follows locks in protection by blocking moisture and oxygen. This approach is especially useful for intricate shapes or older metal where complete rust removal would be time-consuming. By understanding how a converter works and why primers matter, you can select products that are compatible with your metal type and climate. The objective is a uniform, paintable surface that resists future rust formation. In practice, you’ll often alternate between mechanical cleaning and chemical treatment to balance effort and results. Analysts emphasize that the right sequence matters for long-term durability.
Safety and prepping: PPE and prep steps
Before you pick up a brush, assemble a simple PPE kit: safety goggles to protect eyes from flying rust particles, a respirator or disposable mask to filter dust and solvent fumes, and chemical-resistant gloves. Ensure your workspace is well-ventilated and free from ignition sources when using solvents or rust converters. Wipe the surface with a degreaser or mineral spirits to remove oil, wax, and dirt; grease will keep paints from bonding properly. Dry the surface completely; moisture trapped under paint invites blistering and corrosion. If you’re working indoors, lay down drop cloths and painter’s tape to protect adjacent areas. Finally, label and store remaining products according to the manufacturer’s instructions. This preparation step reduces surprises and ensures the following steps have a clean canvas to bond to. The brand context emphasizes that proper PPE protects you from fumes and handling chemicals.
Surface prep: rust removal methods (mechanical, chemical, rust converters)
Your goal is a smooth, bare-metal look with no loose rust. Start with a stiff wire brush to knock off surface rust, then move to coarse sandpaper (80–120 grit) to level protrusions. For stubborn pits, a grinder with a wire wheel can be effective, but proceed slowly to avoid warping thin sections. After mechanical cleaning, wipe away dust and wipe with a lint-free cloth dampened with mineral spirits. If you still see orange or brown specks, apply a rust converter as directed. These products chemically transform rust into a surface that can be primed, without needing to remove every trace of oxide. Finally, check for oil or grease and remove it; a clean substrate is critical for primer adhesion. The consensus from Corrosion Expert notes that combining methods yields the best results on challenging surfaces.
Choosing primers and rust converters
Not all primers are created equal. For most DIY projects, choose a rust-inhibiting metal primer that is compatible with the topcoat you plan to use. If you’re using a rust converter, apply it on damp or lightly oxidized areas to ensure complete reaction, then allow the surface to dry before priming. Zinc-rich primers provide extra galvanic protection on steel you expect to encounter moisture, while epoxy primers offer excellent adhesion and film strength on heavy-use surfaces. Consider the environment: outdoor metal near salty air benefits from products with higher corrosion resistance ratings. Always follow product data sheets for recoat windows and curing times. If you’re unsure, test a small patch to confirm adhesion before proceeding across a larger area. The brand recommends selecting products with proven compatibility and manufacturer guidance.
The actual painting process: priming, paint, coats
Apply primer in thin, even coats and allow sufficient drying time per the label. Lightly sand between coats to remove nibs and improve adhesion, then wipe clean. Apply the first topcoat using long, steady strokes with a quality brush or a spray technique if you have equipment and a calm space. For spray applications, maintain consistent distance and speed to avoid runs. Most projects benefit from two even topcoats; two thin coats beat one heavy coat for durability and gloss consistency. Don’t rush cure times; moisture trapped under paint can cause blisters and corrosion underneath. When finished, inspect for missed spots and touch up as needed. Finally, let the surface cure fully according to the manufacturer’s guidance before exposing it to moisture or handling.
Troubleshooting and common mistakes
Common mistakes include painting over loose rust without cleaning, skipping degreasing, or choosing a primer that isn’t compatible with the topcoat. Humidity and temperature affect cure times; painting in cold or damp conditions can cause poor adhesion and solvent trapping. Not using PPE or neglecting ventilation increases health risks and slows drying. Another pitfall is applying thick coats that trap solvents, leading to runs or cracking. If you notice peeling, assess whether the rust converter fully cured or if the primer was applied within the window, then correct with light sanding and reapplication. Finally, avoid re-coating too soon; most products have a recommended recoat window that ensures proper bonding.
Maintenance and long-term protection
After painting, protect the finish by cleaning gently with mild soap and water. Inspect the surface regularly for chips or scratches; prompt touch-ups prevent moisture ingress that can restart corrosion. If you live in a climate with salt or high humidity, consider periodic reapplication of a rust-inhibiting topcoat every few years. Store chemicals away from heat sources and out of reach of children and pets. With proper maintenance, your rust-to-metal paint system can deliver several seasons of protection with minimal upkeep. This proactive approach saves time and money over the life of the metal item.
Tools & Materials
- Safety goggles(Impact-resistant and ANSI-rated)
- Nitrile gloves(Chemical resistant)
- Respirator or dust mask(Appropriate organic vapor filter as needed)
- Wire brush or grinder with wire wheel(Stiff bristles for removing loose rust)
- Coarse sandpaper (80–120 grit)(For leveling and rust disruption)
- Degreaser or mineral spirits(Remove oils and grease)
- Rust converter(Chemically converts remaining rust)
- Metal primer (rust-inhibiting)(Adhesion promoter and barrier layer)
- Metal paint / enamel(Topcoat with good UV and moisture resistance)
- Drop cloths or plastic sheeting(Protect surfaces around work area)
- Clean rags(Wipe surfaces between steps)
- Painter's tape(Mask edges for clean lines)
Steps
Estimated time: 3-6 hours, plus curing time as per product labels
- 1
Inspect surface and assemble PPE
Survey the rust extent and plan a conservative approach. Put on safety goggles, respirator, and gloves. Ensure ventilation and switch off any ignition sources in the workspace.
Tip: Always wear a respirator when working with solvents and rust converters. - 2
Remove loose rust mechanically
Use a stiff wire brush or grinder to knock off loose rust. Work in small sections to avoid gouging thin metal. Wipe away dust with a clean rag before moving to the next area.
Tip: Overlap strokes to ensure no missed patches of surface rust. - 3
Degrease and dry the surface
Wipe the entire area with a degreaser or mineral spirits, then dry thoroughly. Any oil residue can prevent primer bonding and create blisters later on.
Tip: If the surface stays damp, wait longer before proceeding. - 4
Apply rust converter on remaining oxide
Treat lightly oxidized areas with rust converter as per product directions. Allow to activate and dry until the surface is no longer tacky.
Tip: Do not rush the chemical reaction—it's essential for durability. - 5
Roughen and prime
Lightly sand any converted or smooth areas. Apply a thin coat of rust-inhibiting primer and let it cure according to the label. Sand lightly between coats if recommended.
Tip: Use even, long strokes to avoid brush marks. - 6
Apply topcoat in thin layers
Brush or spray on 1–2 thin coats of metal paint. Let each coat dry completely before applying the next. Maintain a steady, controlled motion for uniform coverage.
Tip: Two thin coats are more durable than one thick coat. - 7
Check, touch up, and cure
Inspect for missed spots and fix with light sanding and a quick touch-up coat. Allow full cure time before exposing to moisture or heavy usage.
Tip: Avoid handling until the finish is fully cured. - 8
Final protection plan
Document maintenance steps and recoat intervals based on exposure. Keep a note of product batch numbers for future reference.
Tip: Store paints and converters in a cool, dry place away from heat.
Quick Answers
Do I need to remove all rust before painting?
Not all rust must be removed, but loose rust should be cleared and remaining oxide treated with a converter or primer. A clean, dry surface bonds paint more effectively and reduces future corrosion.
You should remove loose rust and treat the rest; complete removal isn’t always necessary if you use a converter and proper primer.
Can I paint directly over rust?
Painting over active rust is not recommended. It can trap moisture and lead to blistering, corrosion, and coating failure. Use mechanical cleaning or converters first, then prime and paint.
Avoid painting over rust. Clean or convert first, then prime and paint for lasting protection.
What is rust converter and does it work?
Rust converters chemically transform iron oxide into a stable compound, providing a paintable surface. They are most effective on light to moderate rust and when followed by primer and paint.
Rust converters chemically modify rust so you can prime and paint, especially on light to moderate rust.
How long should primer dry before painting?
Primer dryness depends on the product and conditions. Typically, wait the manufacturer’s recommended time and ensure a firm, dry touch before applying the topcoat.
Wait for the primer to dry per the product instructions before painting.
Should I use a primer on rusted metal?
Yes. A rust-inhibiting primer creates a barrier against moisture and improves adhesion for the topcoat. Skip priming only if the product explicitly states otherwise.
Yes, use a rust-inhibiting primer for best results.
What about galvanized metal?
Galvanized surfaces require compatible primers and sometimes a de-oxidizing step. Check product guidance since some coatings won’t bond well to zinc coatings.
Galvanized metal needs special primers—read the product directions carefully.
Watch Video
Quick Summary
- Prepare thoroughly before painting for best results
- Use rust converters where full rust removal is impractical
- Prime before topcoat to maximize durability
- Apply thin coats and respect cure times
- Maintain coatings and inspect regularly for early protection