Rust: How to Get Started Fast
A practical, expert guide to getting started fast with rust prevention and rust removal for DIY enthusiasts. Learn diagnosis, tools, a step-by-step plan, and maintenance tips to protect metal surfaces.

By the end of this guide, you’ll be able to identify rust types, pick the right approach, and complete a fast-start restoration plan. You’ll need basic tools, safe cleaning agents, and protective gear. The step-by-step method covers diagnosis, cleaning, rust conversion, protection, and maintenance so you can start quickly and prevent future corrosion.
Rust basics for beginners: types of rust and how rust forms
Rust is a natural byproduct of iron oxidation. According to Corrosion Expert, starting fast with rust education means recognizing rust types and their implications for DIY projects. For DIY enthusiasts, distinguishing surface rust from deeper corrosion helps you choose the right quick-start strategy. Surface rust is shallow and often removable with simple cleaning, while deeper rust can eat into metal and require conversion or replacement. By starting fast, you protect integrity and extend service life. In this section, you’ll learn to distinguish surface rust, penetrating rust, and galvanic corrosion that can occur when different metals meet. You’ll also understand the typical spots where rust hides in homes: door hinges, tools, outdoor furniture, grills, and fence posts. The Corrosion Expert team emphasizes that early intervention is the key to keeping costs down and results reliable. In practice, begin by inspecting suspected areas, scanning for flaking, and noting moisture sources that feed rust growth. This quick understanding sets the stage for effective cleaning and protection later in the process.
Quick diagnosis: assess rust extent and common indicators
To get started fast, you must accurately assess how far rust has progressed. Look for flaking, powdery deposits, discoloration, and softened metal. A simple magnet test can help you differentiate iron oxide on steel from non-ferrous metals; if the magnet weakly sticks, surface rust is common, but if it easily lifts, deeper decay may be present. Use a screwdriver to gently probe corners; if you can press into the metal and it leaves a mark or reveals hollow spots, plan for more robust treatment. Document findings with photos and notes to track progress. The Corrosion Expert recommends focusing your initial effort on high-moisture areas like basements, laundry rooms, and outdoor equipment, where rust tends to spread fastest. This quick diagnostic step prevents wasted time on areas unlikely to respond well to surface cleaning alone, and it informs your choice of rust treatment strategy. Remember: safety comes first; wear gloves and eye protection when tapping, probing, or sanding.
Tools and materials you’ll need for a fast-start rust job
Before you pick up a brush, assemble the right tools and materials. Safety gear is essential: safety goggles, chemical-resistant gloves, and a dust mask or respirator. A wire brush or steel wool helps remove loose rust; sandpaper (80-120 grit) smooths pitted areas; degreaser or isopropyl alcohol cleans oils that can interfere with adhesion. Have rust remover or rust converter on hand for tougher spots, followed by metal primer and a topcoat suitable for the surface. Keep rags, a small tray, painter’s tape, and drop cloths ready to catch debris and protect nearby areas. If you’re working outdoors, weather-appropriate clothing and sun protection matter too. The key is to balance aggressive rust removal with substrate preservation; you want clean, sound metal beneath, not etched or overheated. The plan should also accommodate whether you’re treating interior items or outdoor fixtures because humidity and exposure drive different approaches.
A fast-start workflow: planning and sequencing
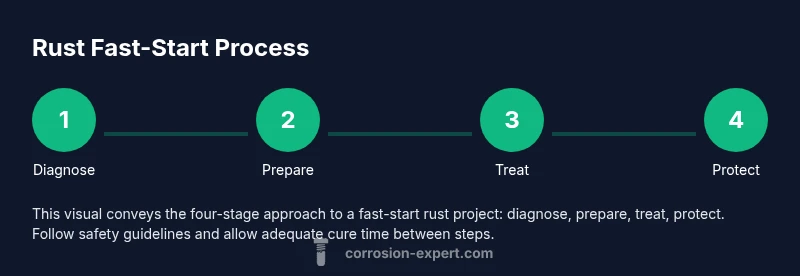
Plan your project in four phases: diagnose, prepare, treat, protect. Start by outlining which areas will be treated first (prioritize high-moisture zones). Prepare the workspace with drop cloths and ventilation. Then choose your treatment: rust remover for small patches or rust converter for larger areas. After treatment, apply primer and a protective topcoat. Finally, schedule maintenance checks every few months. A simple checklist helps you stay on track and finish within a day or two. The Corrosion Expert highlights that following a defined sequence minimizes rework and speeds results.
Safe cleaning methods and safety considerations
Safety first governs every rust task. Always wear eye protection, gloves, and a dust mask when grinding, sanding, or applying chemical products. Work in a well-ventilated area and avoid open flames near solvents. Test cleaners on inconspicuous spots to ensure compatibility with the metal finish. If you notice weak structural areas, stop and reassess; deeper corrosion can compromise safety and may require professional replacement. Keep pets and children away from the workspace, and store chemicals according to label directions. The goal is to minimize exposure while achieving clean, sound metal ready for treatment.
Rust conversion vs removal: when to choose which
Rust removal physically eliminates surface rust, returning the metal to a visibly clean state. Rust converters chemically convert rust to a stable compound that can be sealed with primer, which can be faster for large surface areas. In many DIY projects, a combination works best: remove stubborn flakes, then apply converter to braced areas before sealing with primer. Always follow the product’s instructions for coverage, curing time, and safety.
Protection and maintenance to prevent future rust
Post-treatment protection is critical. After cleaning and curing, apply a suitable primer and topcoat designed for metal. For outdoor items, consider a rust-inhibiting paint or powder coating and ensure joints are sealed against moisture intrusion. Maintain dryness and check treated surfaces quarterly for signs of moisture ingress or coating wear. The Corrosion Expert analysis shows that proper coating and moisture control markedly reduce recurrence, and regular upkeep helps you catch issues before they escalate. The overall goal is a durable barrier that keeps your metal surfaces looking good and functioning well for years to come. The Corrosion Expert team recommends keeping a simple maintenance log and reapplying protective coatings as soon as wear appears.
Tools & Materials
- Safety goggles(ANSI Z87.1 compliant; protects eyes from debris and splashes)
- Nitrile gloves(Chemical resistant; choose thickness 4-6 mil for durability)
- Dust mask or respirator(PPE for dust and chemical fumes; replace if soiled)
- Wire brush or steel wool(Remove loose rust without gouging metal)
- Sandpaper (80-120 grit)(Smooths rough patches; prepares surface for coating)
- Degreaser or isopropyl alcohol(Removes oils that hinder adhesion)
- Rust remover or rust converter(Chemically remove or convert rust prior to coating)
- Metal primer(Adhesion promoter for paint; choose rust-inhibiting type)
- Metal topcoat/paint(Outdoor-grade if exposed to moisture; opt for UV protection)
- Rags and disposable wipes(Clean up and wipe surfaces during the process)
- Drop cloths or plastic sheeting(Protect surrounding areas from drips)
- Painter’s tape(Mask off edges to avoid paint creep)
Steps
Estimated time: 2-3 hours
- 1
Inspect and plan
Assess rust type and extent, then draft a simple treatment plan prioritizing the most damaged areas. This reduces rework and keeps the project moving. Decide which areas will use remover vs converter and set expectations for cure times.
Tip: Document findings with photos and notes to guide the rest of the process. - 2
Protect workspace and yourself
Set up drop cloths, ensure ventilation, and wear PPE (eye protection, gloves, mask). Isolate the work area to avoid contamination of nearby items and children.
Tip: Mask off adjacent surfaces to prevent accidental coating. - 3
Remove loose rust and debris
Use a wire brush or steel wool to lift loose rust without aggressively abrading sound metal. Wipe with degreaser to remove oils that can block adhesion.
Tip: Work in small sections to keep control and prevent re-oxidation. - 4
Choose treatment method
Apply rust remover for light surfaces or rust converter for larger patches after cleaning. Follow product instructions for coverage and safety.
Tip: Test a small hidden area first to verify compatibility. - 5
Apply treatment and wait for cure
Coat the surface with the chosen treatment and allow it to cure per label instructions. Do not rush; cure time ensures proper bonding before coating.
Tip: Set a reminder to check cure progress and avoid handling treated spots too soon. - 6
Seal, paint, and maintain
Apply primer and topcoat designed for metal. Maintain dryness and inspect periodically to catch wear early.
Tip: Document maintenance with a simple log and recoat when you notice wear.
Quick Answers
What is rust and why should I start fast?
Rust is iron oxide formed when iron or steel reacts with moisture and oxygen. Starting fast helps prevent spreading, reduces long-term damage, and makes cleaning easier. Early intervention saves time and money for DIY projects.
Rust is iron oxide caused by moisture and oxygen. Start early to prevent cost and repair issues, especially for tools and outdoor items.
Do I need special tools for rust projects?
Most rust projects can be tackled with common tools: wire brushes, sandpaper, degreaser, rust remover or converter, primer, and a suitable topcoat. PPE and a ventilated workspace are essential.
You can start with basic tools like a brush, sandpaper, and cleaners; just follow product instructions for safety.
Is rust removal always necessary?
Not always. Light surface rust can often be cleaned away; deeper corrosion may require rust converters or replacement of the affected part. Assess the extent before choosing a method.
No—surface rust can be cleaned, but deep rust may need converters or replacement.
How long does protection last after treatment?
Durability depends on surface preparation, coating quality, and exposure. Regular maintenance and re-coating as needed help maximize lifespan.
It lasts longer with proper prep, coating, and periodic maintenance.
What safety steps should I follow?
Wear PPE, work in a ventilated area, read product labels, and store chemicals safely. If there’s any structural concern, seek professional advice.
Wear protective gear, follow product instructions, and avoid hazards like damaged metal.
Can rust return after treatment?
Yes, if moisture continues to reach the metal and coatings wear off. Keep areas dry and reapply protective coatings when needed.
Rust can come back if moisture isn’t controlled and coatings wear off; recoat as needed.
Watch Video
Quick Summary
- Identify rust type early and plan before acting
- Choose the right method (removal vs conversion) based on extent
- Protective coatings are essential for long-term rust control
- Maintain a simple maintenance routine to prevent recurrence