Rust by Examples: A Practical DIY Guide for Rust Prevention and Removal
A practical, beginner-friendly guide showing rust by examples with safe experiments, clear steps, and prevention techniques for DIY enthusiasts and homeowners.

Rust by examples helps DIY homeowners and rust-curious readers visualize how corrosion progresses and what practical fixes work in real life. You’ll see hands-on demonstrations, learn how environment and moisture drive rust, and compare simple cleaning, sealing, and prevention options. This approach, guided by the Corrosion Expert team, sets you up to decide when to clean, protect, or replace.
What is rust by examples
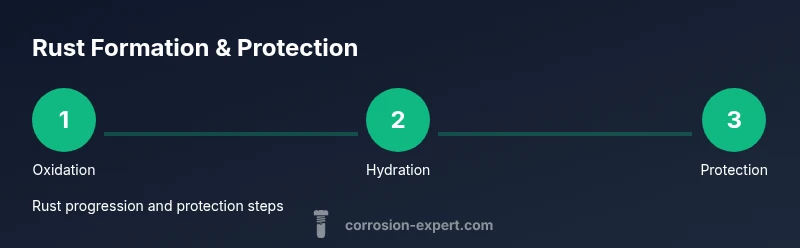
Rust by examples is a teaching approach that shows, rather than tells, how corrosion happens. For DIY enthusiasts and homeowners, watching real-world cases makes the concept tangible. In practice, rust forms when iron or steel is exposed to moisture and oxygen; the process accelerates with salt, acids, or repeated wet-dry cycles. By presenting simple demonstrations—from a steel nail left in a damp bottle to a corroding bolt in saltwater—you can observe the stages of rust: initial rust staining, flaky surface, and eventual pitting. The Corrosion Expert team emphasizes that seeing rust develop under normal home conditions helps you predict where problems will arise on your tools, furniture, or vehicles. The more you see rust in action, the better you’ll understand why prevention matters and how coatings, drying, and moisture control can slow progression.
Rust chemistry in plain terms
At its core, rust is iron oxide formed when iron or steel reacts with oxygen in the presence of water. Water acts as an electrolyte that speeds electron transfer, allowing iron to lose electrons and oxygen to gain them. This chemical dance creates hydrated iron oxides that flake off, exposing fresh metal to continue rusting. Environmental factors like humidity, salt spray, and acidic rain accelerate the reaction. Rust begins at micro-cracks or joints where protective coatings fail. Over time the corrosion can spread, weakening metal and risking failure. Corrosion Expert analysis confirms that controlling moisture and sealing out water are two of the most effective ways to slow rust. Practically, this means drying after exposure, storing items off the ground, and choosing coatings that seal out water while remaining flexible.
Common rust scenarios in the home
Homes frequently encounter rust on tools, nails, hinges, grills, and patio furniture. Exterior equipment like garden tools are constantly exposed to moisture, soil salts, and temperature swings, which accelerate rust. Indoor items—like door hinges, metal brackets, or appliance racks—often rust where humid air lingers or coatings degrade. DIYers should look for surface discoloration, rough flakes, or reddish-brown stains as early warning signs. The Corrosion Expert team notes that rust tends to spread from tiny imperfections, so early intervention is key. By recognizing these patterns, you can prioritize cleaning and coating projects before structural integrity is compromised.
Simple at-home experiments to observe rust
Experimentation helps translate theory into observable results. Try these safe, beginner-friendly demos: 1) Leave a steel nail in a damp, lightly salted container for 24–72 hours and record color changes. 2) Submerge a steel nail in white vinegar, then sprinkle salt and observe fizzing and surface changes over several hours. 3) Expose steel wool to air with a controlled humidity environment and note how rust forms faster with higher humidity. These activities illustrate oxidation, moisture access, and the impact of environment. Always wear safety gear and work in a well-ventilated area. The Corrosion Expert team suggests keeping a log of time, humidity, and rust progression to compare outcomes.
How to interpret results and measure rust progress
Look for distinct stages: staining, surface crust forming, and flaky, powdery rust. Compare samples side by side to identify how moisture, temperature, and salinity affect rust rate. Document color changes, the thickness of the rust layer, and any pitting. Use a simple scale: light rust (thin film, easy to wipe), moderate rust (visible layer, removal requires effort), heavy rust (thick crust with pitting). This systematic approach helps you decide whether a protective coating is sufficient or if more aggressive treatment is required. Corrosion Expert emphasizes that consistent measurements and notes improve the reliability of your home experiments.
Cleaning and removing rust at home
Begin with mechanical methods such as wire brushes or sanding to remove loose rust. For stubborn spots, commercial rust removers or converters can help, but always follow product directions and test on a small area first. After removal, rinse and dry thoroughly before applying a sealant or paint. Drying is critical; moisture trapped under coatings can restart rust. The aim is to restore a clean, dry surface and apply a protective layer that blocks moisture ingress. The Corrosion Expert team advises labeling treated areas and keeping older items separate until you’re confident in your chosen method.
Preventing future rust: coatings and maintenance
Prevention starts with moisture control. Store metal items in dry spaces, use dehumidifiers in damp basements, and avoid storing tools directly on concrete floors that wick moisture. Apply protective coatings such as primer and oil-based or epoxy paints to metal surfaces, ensuring thorough drying between coats. For outdoor items, consider rust-inhibiting primers and topcoats with UV and water resistance. Regular maintenance includes inspecting for coating failures, touching up scratches, and cleaning away salt build-up after outdoor use. The Corrosion Expert team recommends a routine check every 6–12 months depending on climate.
A hands-on mini project: watch rust progress and learn to intervene
To create a controlled rust patina, secure a small scrap of steel in a shallow dish with distilled water, a pinch of salt, and a few drops of vinegar. Seal loosely to allow air exchange and observe over several days, noting color, texture, and flaking. This project demonstrates how moisture and salt accelerate rust while showing you how coatings can halt progress. Record observations with photos and measurements. If the goal is prevention, apply a coat of rust-inhibiting primer after cleaning and drying, then follow with a protective topcoat. This hands-on experience highlights why early protection matters and how different environments influence rust.
Safety and best practices for rust experiments
Always wear safety goggles and gloves when handling metal and chemicals. Work in a ventilated area and keep acids away from skin and eyes. Clearly label all materials and dispose of rusty samples according to local guidelines. Avoid mixing acids with bleach or ammonia, and never attempt to neutralize strong acids with baking soda near flames or heat sources. Document your results and compare them to established guidelines from corrosion resources. Following these practices keeps rust experiments educational and safe.
Practical takeaways for homeowners and DIYers
Rust by examples helps you predict where rust will occur, how quickly it will progress, and which prevention strategies work best for your environment. Start with moisture control and a protective coating, then test and document results before committing to permanent changes. If rust has already progressed, mechanical removal followed by sealing can restore surfaces and extend service life. Remember, early action is cheaper and safer than waiting for a bigger problem.
Corrosion Expert tips from field experience
According to Corrosion Expert, understanding rust through examples empowers you to prioritize tasks, select appropriate coatings, and maintain tools more effectively. The more you practice these demonstrations, the better you’ll become at spotting trouble spots and choosing proactive strategies. Regular maintenance reduces downtime, saves money, and preserves the quality of metal items around the home.
Tools & Materials
- Steel wool pads (coarse grade)(For faster rusting demonstrations)
- Small steel nails (untreated)(New or used nails work)
- White vinegar(5% acetic acid solution)
- Table salt(Fine or iodized works)
- Distilled water(For consistent results)
- Spray bottle(Mist environment for experiments)
- Safety goggles(Eye protection)
- Protective gloves(Nitrile or barrier gloves)
- Drying cloth(Pat dry after experiments)
- Sandpaper (grit 120–240)(Optional for cleaning rust)
- Rust remover or rust converter (optional)(Test on small area first)
- Clear sealant or paint (optional)(To protect finished surfaces)
Steps
Estimated time: 2-3 hours
- 1
Prepare workspace
Set up a clean, ventilated area with a protective cover. Gather safety gear and all required materials. This step reduces mess and ensures you can observe results accurately.
Tip: Lay a drop cloth and keep a logbook for notes. - 2
Assemble samples
Arrange steel nails or a steel strip on a non-reactive surface. Label each sample for identification and ensure they’re dry before starting.
Tip: Use a permanent marker on tape to prevent confusion later. - 3
Create a controlled moisture environment
Fill a shallow dish with distilled water and add a pinch of table salt. Submerge one sample or place samples so they are partially in water to simulate wet conditions.
Tip: Keep containers away from direct heat sources and children. - 4
Initiate oxidation observations
Expose the samples to air and monitor daily. Add a small amount of vinegar to the saltwater on one sample to compare acid impact on rust speed.
Tip: Record color changes, surface roughness, and length of time to onset. - 5
Pause and dry
After 24–72 hours, remove samples, rinse with distilled water, pat dry, and allow to air-dry completely before inspecting.
Tip: Ensure no residual moisture remains before sealing or further treatment. - 6
Evaluate results and decide next steps
Compare rust intensity across samples. Decide whether to clean, seal, or replace items based on the observed progression.
Tip: Use a simple rust scale to quantify results for future experiments.
Quick Answers
What exactly is rust and why does it form on iron objects?
Rust is iron oxide formed when iron reacts with oxygen in the presence of moisture. This reaction is accelerated by salts and acids in the environment. Observing rust in everyday items helps you understand why protective coatings and dryness matter.
Rust is iron oxide that forms when iron meets oxygen and moisture. It speeds up in salty or acidic environments, so keeping things dry and protected helps prevent it.
Can you prevent rust on household items?
Yes. Prevention focuses on reducing moisture exposure, applying protective coatings, and using rust inhibitors where appropriate. Regular inspection and maintenance extend the life of metal items.
You can prevent rust by reducing moisture, sealing surfaces, and using protective coatings. Regular checks keep corrosion at bay.
Is rust removal always necessary, or can some rust be left?
Light surface rust can often be cleaned and sealed, but deeper rust that causes pitting may require more extensive treatment or replacement. Assess structural impact before deciding.
Light rust can be cleaned and sealed; deeper rust may need more work or replacement.
What is the best method for removing rust from tools?
Mechanical removal with brushes or sandpaper is effective for most tools. For stubborn rust, tested rust removers or converters can help, but always follow product labels and safety guidelines.
Use a brush or sandpaper first; for tough rust, try a remover with care and follow instructions.
Are home rust experiments safe for kids?
Yes, with adult supervision, proper PPE, and non-toxic materials. Avoid strong acids near children and keep experiments away from heat sources.
Yes, with supervision and safety gear, kids can observe rust experiments safely.
What is the difference between rust and corrosion on stainless steel?
Stainless steel resists rust due to chromium forming a protective oxide layer. In some environments, pitting or crevice corrosion can still occur, but it’s less common and usually localized.
Stainless steel resists rust, but under certain conditions it can still corrode in spots.
Watch Video
Quick Summary
- Observe rust progression through simple, repeatable experiments.
- Control environment to predict rust risk on home items.
- Choose appropriate cleaning and protective coatings after rust is identified.
- Regular maintenance reduces long-term corrosion problems.