How to Tell Rust: A DIY Guide to Rust Identification
A comprehensive, step-by-step guide to tell rust from other corrosion, assess severity, and decide on prevention or treatment for metal surfaces around your home.

To tell rust, begin by looking for reddish-brown corrosion on iron or steel exposed to moisture and air. Check for flaky, powdery, or spongy texture and color changes under paint. Use a magnet: if it sticks but reveals red-brown staining when scraped, you’re seeing rust. Confirm with a scratch test or moisture check.
What rust is and why it forms
According to Corrosion Expert, rust is the visible manifestation of iron oxide that develops when iron or steel faces moisture and oxygen over time. The chemical reaction is accelerated in electrolytic environments—where water, salts, and minerals act as conduits for electrons. In practice, rust forms most readily on surfaces that are scratched, exposed at edges, or have micro-cracks in coatings. Coastal areas, winter road salts, and humid basements create ideal conditions. While rust can start as a thin film, it quickly progresses into flaky patches, pits, and ultimately compromised metal thickness if left untreated. The key to telling rust apart from other corrosion is to look for the characteristic reddish-brown color and its powdery to flaky texture when probed. Understanding how rust forms helps you distinguish early rust from mere discoloration or paint oxidation. As you inspect, note how rust tends to appear at corners, seams, welds, and around fasteners where water collects. The Corrosion Expert team emphasizes that early detection saves time and money, enabling targeted removal and preventive measures before structural integrity is affected.
Signs of rust you can see with the naked eye
Rust often presents with visible cues. Look for reddish-brown stains, flaky or powdery texture, and areas where paint has bubbled or peeled away. Pitting, deep surface irregularities, and orange rust blooms at seams or fastener sites are common indicators of advancing corrosion. If rust appears beneath coatings or around edges where water gathers, it’s likely not superficial discoloration but real oxidation eating into the metal. In damp environments, you may also notice a metallic smell or damp, brownish residues on nearby surfaces. Early rust can resemble staining caused by minerals, but the combination of color, texture, and location—especially at joints, welds, and corners—helps confirm the presence of rust rather than simple corrosion or paint wear. Corrosion Expert recommends documenting the area with photos and noting moisture sources to plan effective remediation.
How to distinguish rust from other forms of corrosion
Not all corrosion looks the same. White rust can form on aluminum surfaces, presenting as a dull, chalky film rather than the familiar reddish hue of iron oxide. Copper patina yields greens and blues, while paint oxidation may create yellowed or cloudy zones without actual metal loss. Rust under paint or in crevices often hides behind coatings, requiring careful removal to confirm. A magnet test helps on ferrous metals but won’t confirm rust depth; use a scratch or edge-test to gauge texture and perform a moisture check to see if active corrosion is continuing. When in doubt, perform a controlled test on a small area and compare results to untreated metal. The goal is to differentiate surface discoloration from structural rust that compromises thickness and strength.
Rust grade and severity scale
A practical scale helps prioritize action. Level 0: no rust; Level 1: isolated, superficial spotting; Level 2: surface rust with flaking limited to certain zones; Level 3: moderate corrosion with visible pits and edge degradation; Level 4: severe rust that penetrates deeply and may threaten structural integrity. This 0–4 scale is a quick reference for DIYers to decide whether cleaning and coating is sufficient or if replacement or professional assessment is needed. Always err on the side of caution with load-bearing components or critical structural parts. The Corrosion Expert team notes that early-stage rust can often be halted with cleaning and protective coatings, but advanced corrosion may require material replacement or professional evaluation.
Quick diagnostic checklist for the field
- Inspect all accessible edges, seams, welds, and fasteners for reddish-brown staining and flaking.
- Wipe surfaces with a damp cloth to identify color changes that persist after moisture is removed.
- Use a magnet on ferrous metal; if it attracts and reveals rust texture under paint, rust is active.
- Perform a light scratch to assess texture; a powdery or powder-like residue indicates oxidation beneath the surface.
- Check protected areas (under paint, around corners) for hidden rust growth that could compromise thickness.
- Note environmental factors (humidity, salinity, temperature swings) that accelerate rusting so you can target prevention.
If multiple indicators align, plan steps to remove rust, treat with a rust converter or inhibitor, and protect with suitable coatings.
Tools and methods for testing rust depth
Testing rust depth combines visual inspection with simple depth checks. Start with a flashlight and a magnifier to identify dark pits and edge loss. A metal brush or stiff steel wool reveals subsurface rust when paint is removed. For rough estimates, use a ruler or caliper to measure pit depth at representative spots. If you can safely extract a sample, measure the metal loss with a caliper—document the worst case. In more precise work, non-destructive testing like magnetic pulse or ultrasonic measurement can quantify remaining thickness, but this is typically beyond basic DIY tasks. Always wear eye protection and gloves when probing, and avoid inhaling rust dust. Corrosion Expert emphasizes testing at multiple sites and recording measurements to decide whether to sand, seal, or replace.
How rust manifests on different materials
On plain steel and iron, rust is the classic reddish-brown crust with flaky patches and possible deep pits. Stainless steels resist rust due to chromium oxide, but high-carbon ferritic grades and damaged coatings can still rust, especially near welds or abrasions. Cast iron rusts similarly to steel but often pits more aggressively due to its porous structure. Aluminum develops a white, powdery oxide layer (not the same red rust) that can be damaged by scratches, leading to localized corrosion. Galvanized steel can rust where the zinc coating is compromised, typically at scratches or joints. In painted surfaces, rust under coatings indicates breached protection. Knowing the material helps tailor treatment and avoidance strategies; for example, aluminum requires different cleaners and inhibitors than steel.
Prevention and management: from prevention to treatment
Prevention starts with keeping surfaces dry, applying a protective coating, and reducing exposure to chlorides and moisture. Regular maintenance includes cleaning, drying, and inspecting hardware around doors, windows, and outdoor structures. For prevention, use rust inhibitors, primers with rust-preventive properties, and topcoats designed for outdoor use. When rust appears, remove loose material with a wire brush, then apply a rust converter to neutralize the oxide and form a stable layer before repainting. Mechanical removal followed by proper coating yields long-lasting protection. For delicate or structural pieces, seek guidance on whether plating, patching, or replacement is necessary. The Corrosion Expert team suggests establishing a routine inspection schedule, especially in high-humidity or coastal environments, to prevent rust from becoming costly repairs.
When to seek professional help and next steps
If you notice deep pits, flaking across critical load-bearing parts, or rust that has penetrated through multiple layers of coatings, consult a professional. Structural steel components, automotive frames, or safety-critical hardware require careful assessment to determine salvageability. Take photos and measurements, document moisture conditions, and list the areas affected. A pros can perform non-destructive thickness testing, assess corrosion under coatings, and recommend repair strategies like resurfacing, welding, galvanizing, or replacement. Do not attempt risky repairs on structural elements without expert guidance. DIYers should address non-structural rust promptly and monitor any area prone to recurrence.
Tools & Materials
- Magnet(Test on ferrous surfaces to indicate active rust tendency.)
- Wire brush / steel wool(Remove loose rust and reveal underlying corrosion.)
- Scraper or utility knife(Gently probe edges and pits without gouging metal.)
- Flashlight / lamp(Shine from angle to reveal hollows and pits.)
- Ruler or caliper(Measure pit depth and remaining metal thickness.)
- Moisture meter or hygrometer(Optional for monitoring ambient humidity affecting corrosion.)
- Protective gloves and eye protection(Safety first when removing rust and applying coatings.)
- Rust converter / rust-inhibiting primer(Use when appropriate to stabilize oxide before coating.)
- Paint or clear sealant(Protective layer after rust treatment on non-structural surfaces.)
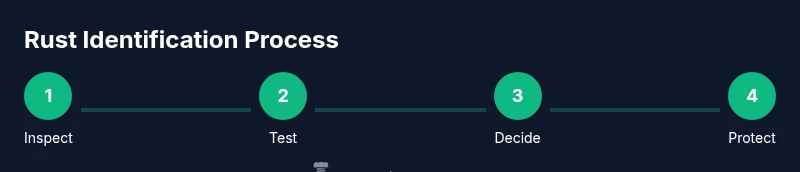
Steps
Estimated time: 25-45 minutes for inspection and initial testing; 1-3 hours for thorough treatment planning and protection (excluding cure times).
- 1
Inspect area and document
Survey all accessible rust spots, noting location, extent, and moisture sources. Take clear photos and mark affected zones for later reference.
Tip: Start with the most exposed areas first (edges, joints, fasteners). - 2
Clean surface to reveal true extent
Remove loose rust with a wire brush and wipe with a damp cloth. Dry thoroughly before further testing.
Tip: Avoid aggressive sanding that could remove protective coatings you may want to save. - 3
Perform magnet and scratch tests
Use a magnet to check ferrous content. Lightly scratch a small area to assess texture and reveal underlying oxide.
Tip: If powdery residues appear, rust is active and progressing. - 4
Assess depth and spread
Measure pit depth with a caliper and note any edge loss. Compare fresh areas to previously treated sections.
Tip: Depth correlates with required treatment: shallow surface rust vs. structural issues. - 5
Decide on treatment path
Choose cleaning, rust converter, or replacement based on severity and criticality of the part.
Tip: Non-structural parts often respond well to treatment and repainting. - 6
Apply protection
After rust stabilization, seal with appropriate primer and paint or sealant. Re-check after cure time.
Tip: Document intervals for future follow-up inspections.
Quick Answers
What is rust and how does it form on metal?
Rust is iron oxide that forms when iron or steel reacts with moisture and oxygen. Over time, this chemical reaction creates a flaky, reddish-brown coating that can progress to pits and thinning metal if not stopped.
Rust is iron oxide that forms when metal meets moisture and air. It can progress from a surface film to pits if not treated.
Can rust be mistaken for paint damage or staining?
Yes, superficial staining from minerals or paint oxidation can resemble rust. Use texture tests (scrape gently) and color checks under varying light to distinguish actual rust from surface discoloration.
Sometimes stains look like rust; check texture and use a light scratch to confirm.
Does rust form the same on all metals?
Rust primarily affects iron and steel. Aluminum and stainless steel may form different oxide layers (white oxide, chromium oxide) and require different considerations for testing and treatment.
Only iron and steel develop true rust; others form different oxide films.
How urgent is it to treat rust on a vehicle frame?
Rust on a vehicle frame can compromise safety. Assess depth and location; seek professional evaluation if you notice deep pits or cross-member corrosion.
If you see deep rust on a car frame, get a professional check.
What should I do first when I find rust under paint?
First clean and dry the area, then thinly disturb the coating around the rust to assess depth. If the oxide is beneath a critical coating, plan for rust converter and repainting.
Clean, dry, and lightly expose the rust to evaluate depth before repainting.
Watch Video
Quick Summary
- Identify rust early by color and texture.
- Use simple tests (magnet, scratch) to confirm rust presence.
- Differentiate rust from other corrosion types based on material.
- Plan remediation based on severity and structural importance.