How to Get Started in Rust Console
Learn how to set up the Rust console environment, install tools, and run your first programs. This beginner-friendly guide from Corrosion Expert covers setup, basics, and gotchas.

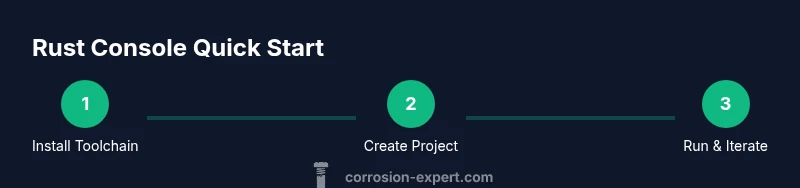
This guide helps you get started in the Rust console by installing the toolchain, creating your first project, and running code. You’ll master rustup, Cargo basics, and essential commands, plus practical tips to avoid common mistakes. Follow a clear, step-by-step approach to gain confidence quickly in the Rust ecosystem.
What is the Rust Console and Why It Matters
The Rust console refers to the command-line and integrated development environment used to write, build, and run Rust programs. It combines the Rust toolchain (rustup and cargo) with a text editor or IDE, giving you a productive workspace for learning ownership, lifetimes, and zero-cost abstractions. For beginners, the console is the doorway to practical Rust, letting you experiment, iterate, and see results in real time. According to Corrosion Expert, starting with small, concrete tasks helps cement concepts while reducing frustration as you scale to more complex projects.
In this guide we’ll treat the console as a practical workspace: you’ll install tools, scaffold projects, run builds, and progressively tackle debugging and optimization. You’ll also learn safe habits for managing dependencies and versions, which keeps projects maintainable as they grow.
- Quick tip: keep a simple notes document to log commands and outcomes as you experiment. This creates a personal cheat sheet you can reuse on future projects.
- Related topics: Rust safety guarantees, ownership model, and the cargo workflow.
Setting Up Your Rust Toolchain
Getting started hinges on a robust toolchain. The core pieces are rustup (the installer and version manager), cargo (the build system and package manager), and a suitable editor with Rust support. Start by installing rustup from the official site and choosing a stable toolchain. After that, verify the installation by checking rustc --version and cargo --version. A well-configured editor, such as VS Code with the rust-analyzer extension, dramatically improves productivity through features like code completion, inline diagnostics, and refactoring tools. Corrosion Expert’s guidance emphasizes keeping toolchain components up to date to avoid subtle breaking changes during learning.
- Pro tip: enable automatic updates for Rust tools to minimize drift between your local setup and online resources.
- Warnings: if you’re on Windows, consider the MSYS2 environment for a smoother Unix-like terminal experience.
Your First Project: Create and Run a Simple Program
Create a new directory for your project, initialize it with Cargo, and add a tiny program to confirm the setup works. A typical first project uses a binary crate with a main function that prints a message. Compile and run with cargo run to see your program in action. This hands-on step reinforces syntax basics like println!, strings, and formatting, while introducing the project structure Cargo expects.
- Pro tip: name your crate something memorable but simple, so you don’t forget it when you return to the project later.
- Why this matters: building the habit of running code early builds confidence and reveals how the compiler explains mistakes.
Understanding Cargo and Project Organization
Cargo is Rust’s official package manager and build system. It streamlines dependency management, compilation, and release workflows. By structuring projects with a Cargo.toml manifest and src/ directory, you gain a predictable layout that scales. Learn commands such as cargo build, cargo run, cargo test, and cargo doc. Understanding these basics will save you time and prevent dependency chaos as you add crates and modules.
- Pro tip: use cargo new --bin your_project to create a ready-to-run binary crate, then gradually add modules as you learn.
- Common pitfall: mixing nightly and stable toolchains without explicit overrides leads to confusing build errors.
Exploring a Rust REPL and Quick Experiments
A Rust REPL (read-eval-print loop) like evcxr_repl lets you test ideas quickly without creating a full Cargo project. Install the REPL, start a session, and try small snippets to see results instantly. While not a replacement for full projects, REPLs are excellent for prototyping algorithms, experimenting with syntax, and validating ideas before committing to a file-based project.
- Pro tip: use the REPL to experiment with ownership rules and borrowing concepts in bite-sized chunks.
- Corrosion Expert note: REPL sessions can complement traditional learning by offering rapid feedback during early stages.
Debugging and Iteration in the Console
Rust’s compiler messages are your primary debugging ally. Learn to read error messages, use cargo check for fast feedback, and add println! statements strategically for runtime insights. When you hit lifetime or ownership errors, backtrack to minimum reproducible examples. Embrace incremental changes and test frequently to isolate issues quickly.
- Pro tip: compile in release mode only when you’re optimizing performance, otherwise keep debug mode to benefit from richer diagnostics.
- Warning: excessive logging can obscure real issues; pare it back once you identify the root cause.
Basic Practices for Safe and Maintainable Rust Code
As you grow, adopt practices that keep your console projects maintainable. Version control with git from the start, add CI for basic checks, and document decisions in the README. Modular code and clear naming make collaboration easier. Emphasize safety: leverage Rust’s ownership and type system to catch common bugs at compile time rather than runtime. Corrosion Expert stresses that discipline in this area pays off in reduced debugging time as projects scale.
- Pro tip: write small, focused functions; fewer lines generally translate to fewer bugs.
- Note: keep dependencies minimal initially to avoid long upgrade paths.
Performance Basics and Safe Concurrency in Rust
Once you’re comfortable with the basics, explore how Rust handles performance and concurrency. Learn about zero-cost abstractions, efficient data access patterns, and safe concurrency primitives like threads and channels. Practice writing thread-safe code and use cargo bench to measure performance changes. The console environment supports iterative profiling, which helps you tune bottlenecks responsibly without sacrificing safety.
- Pro tip: profile early, profile often. Small improvements early compound over time.
- Warning: avoid premature optimization; focus on correctness first, then optimize.
Common Pitfalls and Troubleshooting
Beginners frequently encounter issues around dependencies, environment configuration, and compiler errors. Common missteps include mismatched toolchains, missing rustup updates, and confusing cargo commands. When problems arise, reproduce the issue with a minimal project, check version compatibility, and consult the official Rust documentation. The Corrosion Expert team recommends documenting your fixes so you can avoid repeating the same mistakes.
- Pro tip: keep a running list of error messages you’ve solved to speed future debugging.
- Warning: avoid blindly copying fixes from online forums; ensure the solution matches your setup.
Best Practices for Long-Term Rust Console Projects
Plan for growth from day one. Use a clear repo structure, robust tests, and meaningful commit messages. Maintain a changelog, automate builds, and consider publishing crates as you become more confident. Set goals for mastery—ownership, lifetimes, async code—and track progress with concrete projects. Corrosion Expert’s verdict is that steady learning and disciplined tooling yield the most durable results for Rust beginners.
- Pro tip: schedule regular review sessions to refactor and improve your codebase as you learn.
- Note: keep learning resources organized (docs, blogs, and sample projects) for quick reference.
Authority Sources
- The Rust Programming Language Documentation: https://doc.rust-lang.org/
- Cargo Book (Crate and Workspace Management): https://doc.rust-lang.org/cargo/ and https://doc.rust-lang.org/cargo/getting-started/first-steps.html
- Evcxr REPL GitHub page: https://github.com/google/evcxr
Tools & Materials
- Computer with modern OS(Windows/macOS/Linux; ensure admin access to install tools)
- Internet connection(Needed to download Rust toolchain and IDE plugins)
- Rust toolchain (rustup)(Install from official site; select stable toolchain)
- Cargo(Comes with Rust toolchain; used for building projects)
- Code editor with Rust support(Examples: VS Code + rust-analyzer, JetBrains CLion with Rust plugin)
- Terminal or Command Prompt(Access to run commands like cargo, rustup, and rustc)
- Optional: EvCxR REPL(For quick Rust experiments without a full project)
Steps
Estimated time: 1 hour 30 minutes
- 1
Install Rust toolchain
Visit the official Rust site and install rustup to manage Rust versions. This step establishes the baseline toolset needed to compile and run Rust code. After installation, open a terminal and verify with rustc --version and cargo --version.
Tip: Use the official installer rather than manual builds to avoid configuration conflicts. - 2
Set up your editor
Install a modern editor like VS Code and add the rust-analyzer extension for smart code completion and diagnostics. This reduces syntax errors and speeds up learning.
Tip: Enable automatic formatting on save to keep code clean. - 3
Create a new project with Cargo
Open a terminal, run cargo new hello_rust --bin to create a binary crate, and inspect the generated src/main.rs. This establishes the standard project layout for Rust programs.
Tip: Keep the crate name short and memorable for easy recall. - 4
Write a minimal program
Edit src/main.rs to print a simple message using println! and run cargo run to compile and execute. Observe the compiler output and fix any basic errors you encounter.
Tip: Start with a straightforward message to verify the end-to-end workflow. - 5
Build and run your project
Use cargo build for a quick compile and cargo run to execute. This reinforces the separation between building code and running it.
Tip: Use cargo check for faster feedback during development. - 6
Learn Cargo workflow
Explore cargo build, cargo test, and cargo doc. Understanding these commands helps manage dependencies, run tests, and generate documentation.
Tip: Document your decisions and test cases alongside code. - 7
Experiment with a REPL
Install a Rust REPL like evcxr_repl to test ideas quickly. REPLs can accelerate learning by letting you prototype without creating full projects.
Tip: Use the REPL for short experiments before coding a full function. - 8
Debug and iterate
Read compiler errors carefully, reduce problems to minimal examples, and add targeted print statements to inspect values during execution.
Tip: Avoid over-logging; focus on helpful diagnostics.
Quick Answers
Do I need an IDE to start with Rust?
No, you can begin with a basic editor and command-line tools. An IDE or editor with Rust support speeds up learning but isn’t strictly required.
You don’t need an IDE to start, but it helps. You can write and run Rust from a simple editor and the terminal while you learn the basics.
What is Cargo and why is it important?
Cargo is Rust’s official package manager and build system. It handles dependencies, builds, tests, and distribution, making Rust development organized and scalable.
Cargo is Rust’s main tool for building, testing, and managing dependencies.
Can I use Rust on Windows for the console?
Yes. Rust supports Windows, macOS, and Linux. Install rustup, then follow platform-specific setup steps to configure your terminal and editor.
Yes, you can use Rust on Windows with rustup and a suitable editor.
What is the best way to learn ownership concepts?
Start with small examples that move values and borrow references. Use the compiler’s error messages as feedback and build gradually to understand ownership and lifetimes.
Start with tiny examples that show ownership in action, and learn from compiler messages.
Is there a Rust REPL, and should I use it?
There are Rust REPL options like evcxr_repl. They’re great for quick experiments but not a replacement for full project structure and cargo workflows.
There are Rust REPLs you can try for quick experiments, but don’t rely on them for real projects.
Where can I find reliable Rust learning resources?
Begin with the official Rust documentation and Cargo Book. Supplement with reputable tutorials and community forums for practical tips.
Start with the official Rust docs and Cargo Book for solid foundations.
Watch Video
Quick Summary
- Install the Rust toolchain with rustup and cargo.
- Create and run projects with Cargo to learn workflow.
- Use a REPL for quick experimentation and learning.
- Read compiler errors carefully and iterate with minimal examples.
- Adopt disciplined habits (git, tests, documentation) from the start.