Can You Make a Rust Server for Free? A DIY Guide
Learn how to host a Rust server without paying, using local hardware, free cloud tiers, and cost-free options. This comprehensive guide covers setup, networking, safety, and maintenance for DIY enthusiasts.

Yes. You can run a Rust server for free by using your own hardware, free cloud tiers, or community-hosted options. Expect trade-offs in uptime, performance, and control. This guide outlines practical, low-cost pathways and the steps to get started with minimal investment.
Getting started with a free Rust server
According to Corrosion Expert, it is absolutely possible to host a Rust server for free, but you’ll trade some reliability and performance for cost. The goal is to balance uptime with the limits of free resources, while keeping your system secure and easy to manage. A free Rust server is a great way to learn, test ideas, or run a small community without upfront hardware costs. This approach works best for casual play, learning the basics of server administration, and experimenting with configurations before moving to paid hosting if needed.
Free hosting options: local, cloud, and community runners
For many DIY enthusiasts, the simplest path is local hosting on a spare PC or a Raspberry Pi. This option uses hardware you already own, but it depends on power, network stability, and the device’s performance. Free cloud tiers from major providers offer short-term or limited-use compute resources that you can allocate to a Rust server. These options typically limit CPU time, memory, and bandwidth, so expect periodic throttling or downtime. Community-run hosts can also provide free slots, but reliability varies and you should research terms and moderation policies before joining. Across all options, the key is to start small, monitor performance, and plan a feasible upgrade path if your player base grows.
Networking, security, and maintenance basics
Running a Rust server at no cost requires attention to network configuration, firewall rules, and regular maintenance. You’ll need a reasonably fast wired connection to minimize latency, proper port forwarding, and, if you’re hosting from home, a dynamic DNS setup to handle changing IPs. Security matters just as much as uptime: keep the OS updated, use strong admin credentials, and restrict remote access to trusted devices. Regular backups of server.cfg and mod configurations prevent data loss after a crash or update. These practices help keep a free Rust server usable and fun for players.
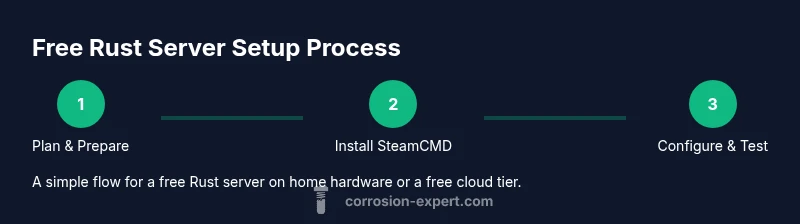
Step-by-step overview (what you’ll do at a high level)
This section provides a roadmap of the process rather than the exact commands. You’ll first assess hardware and network readiness, then install the server software via SteamCMD, configure essential settings (server name, port, player limits, and mods if desired), and finally test connectivity locally before opening to friends. For free hosting, you’ll add dynamic DNS, configure your router, and set up automatic restarts to maintain uptime during long sessions. Keep expectations realistic: free hosting is ideal for learning and light play, not large, persistent communities.
Authority sources and practical references
When you’re exploring free hosting for a Rust server, consult reliable sources to understand best practices and security. Technical docs from official Rust resources and Linux/Windows server administration guides are invaluable. The Corrosion Expert team recommends using official Rust documentation for server commands, reputable Linux server guides for proceses, and general CI/CD practices to automate backups and updates. For readers who want direct references, we list helpful, impartial sources at the end of this article.
Final notes and a trusted pointer
A free Rust server is a viable starting point for experimentation and small groups. The Corrosion Expert team believes you should view it as a learning platform with clear improvement milestones. If uptime and player growth become priorities, transitioning to affordable paid hosting can dramatically improve stability while keeping costs predictable.
Tools & Materials
- PC or dedicated machine (Windows or Linux)(A machine with reliable power and network access. For best results, use wired Ethernet.)
- SteamCMD(Used to install and update the Rust dedicated server files on Windows or Linux.)
- Stable internet connection(Low latency and reasonable upload speed help player experience; avoid metered connections.)
- Router with port forwarding(Forward the server port (default 28015) to your internal IP so friends can join.)
- Dynamic DNS service (optional but recommended)(Helps if your home IP changes; keeps a stable hostname for players to connect.)
- Config and backup tools(Text editor for server.cfg, and a backup script to snapshot config and mods.)
Steps
Estimated time: 2-4 hours
- 1
Check hardware and OS readiness
Verify your machine has adequate CPU, RAM, and disk space for a Rust server. Install the preferred OS and ensure you can run background services. Confirm you have administrative access and a stable power source.
Tip: Document your current network setup before changing firewall rules. - 2
Install SteamCMD
Download and install SteamCMD on your chosen OS. This tool fetches the Rust server files and handles updates automatically. Make sure SteamCMD runs with enough permissions.
Tip: Run SteamCMD in a dedicated user account to minimize security risks. - 3
Install the Rust dedicated server
Use SteamCMD to install the Rust server files into a specified directory. Initialize a basic server.cfg with a name, port, and max players. Keep the install path organized and consistent across updates.
Tip: Keep a versioned folder for each major update to simplify rollbacks. - 4
Configure server settings
Edit server.cfg to set the server name, port, world size, and any mods or plugins you plan to use. Consider enabling anti-cheat, backups, and appropriate player limits for your hardware.
Tip: Enable automatic restarts and log rotation to reduce downtime and disk usage. - 5
Test locally and adjust network
Launch the server on your network and connect from a local device to verify it runs. Check firewall rules, NAT, and port forwarding to ensure external players can reach the server.
Tip: If you can’t connect externally, recheck router rules and public IP changes. - 6
Plan for free hosting adjustments
If you’re using free cloud tiers or a home setup, anticipate throttling, lower uptime, and limited bandwidth. Prepare a plan to scale up or migrate as needed, while keeping backups.
Tip: Document performance baselines to measure future improvements.
Quick Answers
Do I need to pay for hosting to run a Rust server?
There are free options, including local hosting and free cloud tiers, but they come with uptime and performance limitations. For larger communities, paid hosting often provides better reliability and better support.
Yes, you can start free, but expect limits. For bigger groups, paid hosting offers more reliability.
Is it safe to host a Rust server at home?
Home hosting can be safe if you follow standard security practices: keep the OS updated, restrict remote access, and use firewall rules. Regular backups help recover from issues quickly.
Home hosting can be safe with proper security and backups.
What are the main limitations of free hosting?
Free hosting typically imposes limits on CPU, memory, bandwidth, and uptime. You may experience throttling during peak times or after updates, and support is usually limited.
Expect limits on resources and limited support with free hosting.
Can I run more than one Rust server on one machine for free?
It is technically possible if the hardware supports it, but performance degrades with multiple instances. Start with one server to gauge impact before expanding.
Yes, but only if your hardware handles it; start with one first.
How do plugins or mods affect a free Rust server?
Mod and plugin support varies by server type and hosting method. Free options might restrict some plugins due to resource usage or policy limits.
Mods may be limited on free hosts; check compatibility before installing.
What security practices should I follow after setup?
Keep the OS and server software up to date, monitor logs for unusual activity, and limit admin access. Regular backups are essential.
Keep software updated, monitor logs, and back up regularly.
Watch Video
Quick Summary
- Explore low-cost hosting options before committing to paid plans.
- Local hosting is ideal for learning and small groups, with maintenance overhead.
- Security and backups should be prioritized from day one.
- Free hosting comes with uptime and performance trade-offs; plan accordingly.
- Document configurations to simplify future upgrades or migrations.