How to Make Metal Rust: A Practical DIY Guide
Learn practical, safe techniques to intentionally rust metal for art, tests, or educational demos. This guide explains why rust forms, how to accelerate it, and how to control the final patina.

You can purposely rust metal by exposing iron or steel to moisture, oxygen, and an accelerant like salt water or vinegar. The goal is a controlled patina, not structural weakness. Gather simple tools, follow safe practices, and monitor progress. This approach is useful for art, testing, or antique finishing. With patience, you can achieve varied textures and tones.
Understanding Rust Formation
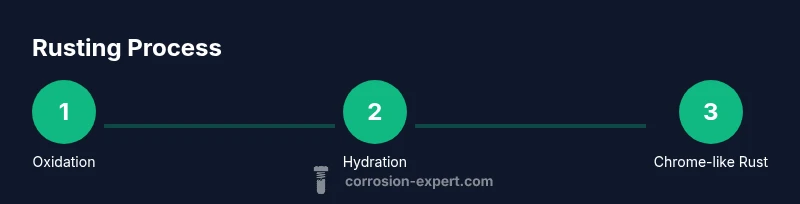
The rusting of iron and steel is a predictable chemical process driven by oxidation. If you are exploring how to make metal rust, you are guiding this natural reaction so it happens in a controlled way rather than randomly. In broad terms, rust forms when metallic iron reacts with oxygen in the presence of water, yielding hydrated iron oxides. Temperature, humidity, salt exposure, and surface condition all influence the rate and texture of rust. As a corrosion expert, I emphasize that the goal of a DIY rust project is reproducible patina, not compromised structure. Start with a clean, dry surface and observe how different environments yield different colors, textures, and porosity. This foundational understanding helps you predict results and fine-tune processes for artistic finishes or educational demonstrations. When experimenting, use scrap metal first to learn how varying factors affect the final appearance.
How to make metal rust: Accelerants and Environment
To explore how to make metal rust efficiently, you’ll manipulate moisture, oxygen access, and ion-rich environments. Common accelerants include salt water, vinegar, and hydrogen peroxide, each altering the electrochemical conditions at the steel surface. Adding table salt (sodium chloride) boosts electrolyte concentration, speeding electron transfer and rust growth. Vinegar lowers surface
Step-by-step approach to a controlled patina
A controlled patina is not about random decay; it’s about repeatable results. Start with a plan for the texture and color you want, then follow a staged approach. The initial layer establishes base tone; subsequent applications deepen rust in selected zones. You can create streaks, speckles, or smooth gradients by varying exposure time and solution concentration. Document your settings so you can reproduce them later. In this section you’ll find practical, repeatable steps that align with how to make metal rust in a controlled way, while also offering room for creative variation. Expect to iterate on shadows and highlights to simulate natural aging, and always test on scrap material before applying to a final piece.
Safety and environmental considerations
Rust products and accelerants can irritate skin and eyes and may produce fumes. Always use PPE: gloves, safety glasses, and appropriate clothing. Work outdoors or in a well-ventilated space, away from pets and children. Dispose of chemical mixtures according to local regulations; never pour active rust solutions down the drain without neutralizing them first. When finished, clean tools and work surfaces thoroughly to prevent unintended rust transfer. Consider environmental impact: prolonged use of acidic solutions can affect nearby plants or soil. The goal is to contain the process within a designated area and minimize waste, while still achieving the desired patina on the metal.
Practical examples: art projects and tests
Intentional rust can enhance artistic pieces, weathered hardware, or testing fixtures to study corrosion rates. For art, a controlled rust patina can add texture and depth to sculptures, sculptures, and decorative panels. In a testing context, rusted samples demonstrate material behavior under varying humidity and salt exposure. You can compare multiple finishes side-by-side to decide which look best suits your project. By understanding how to make metal rust reliably, you can save time and achieve a professional, repeatable result that aligns with your design goals.
Authority sources and further readings
To deepen your understanding of rust chemistry and safety, consult credible sources. The National Institute of Standards and Technology (NIST) offers guidance on corrosion science, while OSHA provides safety considerations for handling corrosive materials. For practical, region-specific advice, university extension programs can offer tested methods and safety checklists. These resources help ensure you approach rust projects with accuracy and care.
Tools & Materials
- Iron or steel object to rust(Piece you want to rust; ensure it's clean and dry)
- Gloves(Nitrile or work gloves)
- Safety glasses/goggles(Eye protection for splashes and fumes)
- Ventilated area or outdoors(Prefer outside; avoid confined spaces)
- Water(Clean, distilled or tap water)
- Salt (sodium chloride)(Fine table salt or rock salt)
- White vinegar (5% solution)(Acidic accelerator)
- Hydrogen peroxide (3%)(Catalyst for faster rust)
- Spray bottle or squeeze bottle(For applying solutions evenly)
- Plastic container or tray(To contain spills)
- Plastic wrap or sealant(Optional after rust forms to slow progression)
Steps
Estimated time: 2-14 days depending on environment and desired patina
- 1
Prepare workspace and materials
Set up a dedicated, ventilated area. Lay down protective coverings and organize all tools before starting. This helps ensure a clean workflow and reduces the risk of contamination between steps.
Tip: Protect adjacent surfaces with plastic sheeting and keep a damp cloth handy to wipe spills. - 2
Clean the metal surface
Remove oils, dirt, and coatings so solutions can contact the metal evenly. Rinse with water and dry completely to prevent premature rust in non-target areas.
Tip: Use isopropyl alcohol for a quick degrease and a lint-free cloth for drying. - 3
Prepare rust accelerants
Mix or measure your chosen accelerants. A common approach is a saltwater solution: salt dissolved in water. Vinegar can be applied neat or diluted, depending on the metal’s tolerance.
Tip: Label containers to avoid cross-contamination and start with milder concentrations to gauge response. - 4
Apply and spread the solution
Apply the chosen solution evenly across the metal surface using a brush or spray bottle. Target areas of desired patina with slightly thicker coats for richer texture.
Tip: Apply in one direction to resemble natural weathering patterns. - 5
Monitor progress and adjust
Check the piece daily. Document changes in color, texture, and depth. If progression is too fast, reduce concentration or exposure time; if too slow, reapply accelerants.
Tip: Keep records of dates and observed changes to reproduce results later. - 6
Terminate and seal (optional)
When the patina reaches your desired look, stop the reaction and dry thoroughly. If you want to slow further rusting, apply a clear sealant or wax designed for metal surfaces.
Tip: Sealing after drying helps preserve texture and color while reducing pit formation. - 7
Document results and cleanup
Take notes and photos of the final appearance for future reference. Clean tools with water, dry, and store properly. Dispose of leftover solutions according to local regulations.
Tip: Label final results and keep a small sample for future comparisons.
Quick Answers
Is it safe to make metal rust at home?
Yes, with proper PPE and ventilation. Work in a well-ventilated area and avoid inhaling fumes. Keep chemicals away from children and pets, and dispose of waste according to local guidelines.
Yes. Wear gloves and goggles, work outdoors if possible, and follow local disposal rules for rust solutions.
What objects can I rust safely?
Any clean, unlacquered iron or steel item is suitable for controlled patina experiments. Avoid items with protective coatings or modern finishes that may react unpredictably.
Use plain iron or steel pieces without protective coatings for consistent results.
How long does rusting take?
Progress varies with humidity, temperature, and accelerants. It can range from a couple of days to a couple of weeks for a visible patina, with deeper textures taking longer.
A few days to a couple of weeks, depending on conditions and desired depth.
Can I stop rust mid-way or reverse it?
You can slow or halt rusting by removing moisture, drying the surface, and sealing with a protective coating. Fully reversing oxidation is impractical, but stabilization is possible.
You can slow or stop it by drying and sealing the surface.
What accelerants give the best textures?
Saltwater and vinegar are common for textured patinas; hydrogen peroxide gives faster results but can be uneven. Test on scrap first to learn how each affects texture.
Saltwater and vinegar create varied textures; peroxide speeds up but may be uneven.
Should I seal rusted metal?
Sealing helps prevent further rust and preserves the look. Choose a suitable clear sealant or wax that bonds to painted or bare metal surfaces.
Yes, sealing helps protect and stabilize the patina.
Quick Summary
- Understand rust chemistry to predict results.
- Control environment for repeatable patinas.
- Document steps to reproduce textures.
- Safety first: PPE and ventilation are essential.
- Seal when a stable finish is desired.