Rust Troubleshooting for PC Hardware: Quick Fixes and Prevention
Urgent guide to diagnose and fix rust on PC hardware. Learn causes, safe cleaning methods, prevention tips, and when to replace rusted parts with Corrosion Expert insights.

why is rust not working on my pc? When rust affects PC hardware, the real issue is moisture-related corrosion compromising metal surfaces near electronics. According to Corrosion Expert, the leading causes are humidity, spills, and condensation. Start with a safe power-down and a visual inspection, then address moisture and plan a corrosion-safe preventive routine.
Why Rust on PC Goes Wrong: Immediate Causes
Visible rust on PC components is a symptom, not a mystery. Why is rust not working on my pc? The practical reality is that moisture intrusion, condensation from temperature swings, and liquid spills near the case create electrochemical conditions that accelerate corrosion on metal surfaces adjacent to circuitry. According to Corrosion Expert, the most common culprits are high ambient humidity and inadequate sealing around openings. Even small amounts of water vapor can drive rust formation over weeks to months, weakening fasteners, connectors, and heat sinks and potentially triggering electrical faults. Addressing rust early reduces the risk of short circuits and performance degradation.
Signs Rust Is Active on Your PC: What to Look For
Rust manifests as orange-brown stains, flaky coating, or pitting on exterior panels, screws, or exposed connectors. In extreme cases, verdigris or greenish-blue corrosion may appear around metal contact points. Look for discoloration near moisture-prone zones like the power supply ventilation, fan housings, or cable entry grommets. Clicking, buzzing, or inconsistent boot behavior can accompany deteriorating contacts. Remember: rust is a slow-forming process that often starts in hidden corners.
Safe, Immediate Inspection Steps
First, power down fully and unplug the system. Ground yourself to avoid static discharge, then remove the side panel to inspect accessible metal surfaces. Inspect the chassis, screws, and any nearby connectors for discoloration or rough texture. Do not touch electronics with damp hands or liquids. If you see active corrosion around connectors or PCB traces, consider professional evaluation rather than DIY cleaning. In all cases, document rust spots with photos for future reference.
Safe Cleaning and Rust-Removal Methods for PC Hardware
Light surface rust on non-electrical metal parts can be cleaned with a dry nylon brush or a microfiber cloth. For more stubborn rust, apply a rust remover product specifically labeled for metal components away from electrical areas, following the product instructions. After treatment, neutralize the surface and apply a protective coating or paint designed for metal to slow re-oxidation. Never spray liquids directly onto electronics; remove components or isolate them before any solvent use. Always wear eye protection and gloves.
Diagnosing Root Causes: Environment vs. Spills vs. Aging
Corrosion often results from a combination of factors. Corrosion Expert Analysis, 2026 highlights that sustained high humidity, exposure to liquids, and condensation from temperature fluctuations are the primary drivers. Spills near the case can create persistent moisture pockets that accelerate rust on fasteners and enclosure panels. Aging metal parts with compromised coatings are more susceptible. Understanding the cause helps tailor prevention—tight seals, desiccants, and careful placement away from moisture sources reduce risk significantly.
Step-by-Step Fix for the Most Common Issue
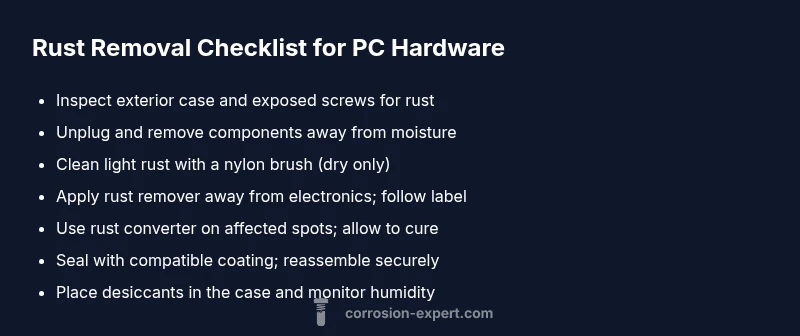
- Power down and unplug; remove the side panel to access rusted surfaces. 2) Use a nylon brush to remove loose rust and wipe with a dry microfiber cloth. 3) Apply a rust remover designed for metal components away from electronics, following the label, then rinse lightly if allowed and dry completely. 4) Apply a rust converter on affected areas and allow it to cure. 5) Prime and paint the exterior surfaces or apply a corrosion-inhibiting seal. 6) Reassemble carefully and test the system at low load before normal use. 7) Place desiccants inside the case to deter future moisture buildup.
Prevention Tips to Stop Rust Returning
- Maintain indoor humidity levels and use a dehumidifier or desiccants to keep the PC environment dry. - Seal openings with gaskets or weatherstripping to minimize moisture ingress. - Use rust-preventive coatings on non-electronic metal surfaces and inspect regularly. - Store or service PCs away from water sources, spills, or salty environments. - Schedule periodic maintenance to catch early signs of corrosion before they affect performance.
When to Replace Components
If rust has penetrated critical areas such as the motherboard mounting points, PCIe slots, or connector pins, replacement is often the safer choice. Severely corroded screws, brackets, or heat sinks can fail under load, risking component damage or fire hazards. In many cases, replacing rusted panels and hardware while treating and sealing the interior can extend the life of the system, but persistent corrosion indicates a need for a more thorough inspection by a professional.
Steps
Estimated time: 45-90 minutes
- 1
Power down and unplug
Shut down the PC completely and remove power. Disconnect all cables and ground yourself to avoid static discharge. This prevents any electrical shock or damage while inspecting rusted areas.
Tip: Keep a clear workspace and photograph components before disassembly. - 2
Open the case and assess
Remove the side panel to expose interior metal surfaces. Inspect the chassis, screws, and any exposed connectors for rust and staining. Note areas that will need cleaning or replacement.
Tip: Do not touch live electronics with damp hands or tools. - 3
Clean light rust
Use a dry nylon brush to remove loose rust and wipe with a dry microfiber cloth. Avoid liquids near electronics. If rust is stubborn, move to non-electrical areas or remove components to clean safely.
Tip: Work in small sections to prevent spreading rust to clean areas. - 4
Treat and protect
Apply a rust remover designed for metal surfaces away from electronics, then use a rust converter on affected spots. After curing, prime and apply a protective coating suitable for metal interiors.
Tip: Follow product instructions precisely and wear protective gear. - 5
Reassemble and test
Reinstall cleaned components, reseal the case, and reconnect power. Boot the system at low load to verify stability and check for any residual odor or heat anomalies.
Tip: Monitor temperatures and check for irregular fan noise after reassembly. - 6
Prevent future rust
Place desiccant packs in the case and ensure the environment remains dry. Schedule regular inspections for rust and replace any compromised hardware promptly.
Tip: Set a reminder to recheck humidity and corrosion signs every 3–6 months.
Diagnosis: Visible rust on PC case, screws, connectors, or interior metal surfaces
Possible Causes
- highHigh ambient humidity or exposure to moisture
- highLiquid spills near or inside the case
- mediumCondensation from temperature changes
- lowAging metal coatings or protective layers degraded
Fixes
- easyIncrease ventilation and add humidity control in the room
- mediumCarefully remove loose rust, apply rust remover away from electronics, and dry
- hardReplace heavily rusted components and seals
- easyApply a corrosion-inhibiting finish and reseal panels
Quick Answers
What are the signs rust is actively forming on PC hardware?
Active rust presents as orange-brown stains, flaky patches, or pitting on the case, screws, or connectors. Verdigris may appear near exposed metal, and you might notice corrosion around moisture-prone areas like the power supply or fans.
Look for orange stains, flaky patches, or pitting around the case and connectors. Verdigris can appear near exposed metal.
Is rust dangerous to electronics if it’s just on the surface?
Surface rust can escalate to electrical contact problems if it reaches connectors or PCB edges. It’s important to address rust promptly, because corrosion can compromise reliability and safety.
Surface rust can grow and affect connectors, so don’t ignore it.
Can I safely remove rust from a PC case at home?
Yes, for non-electrical metal surfaces. Use a dry brush and approved rust remover away from electronics, then seal and protect. If rust is near critical components, consider professional service.
You can clean non-electrical metal parts at home, but avoid electronics.
When should I replace rusted components instead of cleaning?
If rust has penetrated critical structural areas, compromised connectors, or multiple components show corrosion, replacement is safer than cleaning. This reduces risk of shorts or future failures.
If corrosion is extensive, replacement is safer than cleaning.
What long-term steps reduce rust recurrence?
Control humidity, seal openings, store away from liquids, and perform periodic inspections. Use corrosion inhibitors on non-electrical metal surfaces and keep the PC in a dry, ventilated area.
Keep humidity down, seal openings, and inspect regularly.
Watch Video
Quick Summary
- Inspect exterior and interior metal surfaces for rust signs.
- Avoid liquids near live electronics; clean non-electrical areas first.
- Address humidity and spills quickly to prevent lasting damage.
- Replace severely corroded parts and seal the enclosure to prevent recurrence.