Why Is Rust Not Working? A DIY Troubleshooting Guide
Urgent, practical guide to diagnose and fix rust that won’t respond to cleaners or paint. Learn step-by-step fixes, safety tips, and when to call in a pro.

Why is rust not working? The most common issue is surface rust that hasn’t been properly removed or treated, preventing coatings from sticking. Quick fix: scrub with a stiff brush, apply rust remover, rinse and dry completely, then treat with a rust converter or primer before repainting. If rust has penetrated deeply, consider replacement or professional assessment.
Understanding why rust not working
Rust problems are usually more predictable than they appear. When you ask, "why is rust not working" on a project, the answer often lies in insufficient surface preparation, the wrong product for the corrosion depth, or moisture hiding under coatings. According to Corrosion Expert, the most reliable fixes start with accurate diagnosis and clean, dry surfaces. Surface rust that remains under a coating will lift, blister, or peel; moisture trapped beneath accelerates deterioration. In practice, you’ll see dull or flaky patches, incomplete adhesion, and uneven finishes even after cleaning. Distinguishing between surface rust and pitting helps you decide whether you can salvage the item or if replacement is the safer option. This section sets up the practical checks you’ll perform to determine the next steps and helps you recognize when it’s time to escalate the fix.
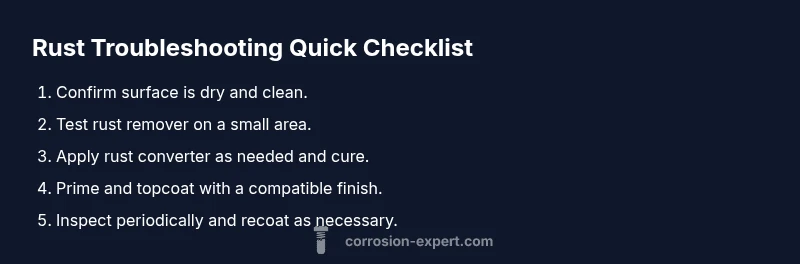
Quick checks you can perform now
- Inspect the area for deep pits and holes; if you see through the metal, replacement is likely required.
- Confirm surface is dry before applying any rust treatment; moisture undermines adhesion and film formation.
- Test different rust removers on a small, inconspicuous area; some products react differently with certain metals.
- Verify you are using a rust converter or primer compatible with your topcoat; incompatibility causes coating failure later.
- Check ventilation and safety gear; many rust products emit fumes and require gloves and eye protection.
Diagnostic flow: from symptom to diagnosis
When you notice rust that won’t respond to cleaning, start with a quick surface prep check, then move to a dedicated rust treatment test. If blistering or peeling occurs after a single pass, the coating layer probably didn’t adhere, which points to improper surface prep or moisture entrapment. If rust returns after a few days, moisture ingress or hidden pits are likely present. The goal is to classify the problem: surface rust, subsurface rust, or material loss. Once you identify the category, you can choose an appropriate fix strategy and schedule.
Step-by-step overview (high level)
This section outlines a safe, methodical approach to fix most common rust issues. Detailed, procedure-level steps are provided in the dedicated STEP-BY-STEP block. You’ll learn to protect yourself with proper PPE, prepare the surface thoroughly, select the right rust treatment, and apply a protective coating with correct curing conditions. The emphasis is on predictable results and minimizing rework.
Safety and maintenance mindset to prevent recurrence
Rust problems often return if surfaces aren’t protected after the fix. Always finish with a corrosion-resistant seal and perform regular inspections, especially in areas exposed to humidity, salt, or water leakage. Keep tools clean and dry between uses, and store products in tightly closed containers to maintain effectiveness. A proactive maintenance routine reduces the chance of future rust outbreaks and saves time and money in the long run.
Steps
Estimated time: 2-3 hours
- 1
Prepare workspace and safety gear
Set up in a well-ventilated area. Wear gloves, eye protection, and a dust mask. Lay down drop cloths and keep cleaners away from skin. This step minimizes exposure to harmful fumes and debris.
Tip: Ventilation saves you from inhaling hazardous vapors; keep a fan aimed away from the work zone. - 2
Remove loose rust and clean the surface
Use a stiff-bristle brush, wire wheel, or sandpaper to remove loose rust and flaky paint. Wipe with a damp cloth to remove dust, then dry completely. A clean, dry surface improves product adhesion.
Tip: Work in small sections to avoid re-deposition of rust dust. - 3
Treat with rust remover or converter
Apply rust remover or converter per the label directions. Allow it to react and neutralize rust, then wipe away residues. If using converter, let it cure before proceeding to priming.
Tip: Test a small area first to ensure the product doesn’t discolor the metal. - 4
Sand and wipe again
Lightly sand the treated area to smooth the surface. Remove any remaining residue and ensure the area is dry before priming.
Tip: Avoid over-sanding; you want a profile that holds primer without creating new scratches. - 5
Prime and seal
Apply a compatible primer suitable for metal and rust protection. Allow adequate curing time per manufacturer instructions before adding topcoat.
Tip: Two thin coats beat one heavy coat for better adhesion and corrosion resistance. - 6
Topcoat and maintain
Finish with a corrosion-resistant paint or sealant. Inspect periodically and recoat as needed to prevent recurrence.
Tip: Set reminders to inspect treated areas after rain cycles or snow exposure.
Diagnosis: Visible rust on metal that shows poor coating adhesion or returns after cleaning
Possible Causes
- highSurface rust not properly abraded or cleaned
- mediumDeeper corrosion or pitting under the coating
- mediumIncompatible coatings or moisture presence under paint
- lowSubstrate is not metal or surface was previously damaged
Fixes
- easyThoroughly abrade and clean the surface to remove loose rust and scale
- easyApply a rust converter for conversion and priming; follow product instructions
- mediumRepair deep pits or replace severely corroded parts
- easySelect compatible primers and coatings; ensure proper curing conditions
Quick Answers
What causes rust to stop responding to cleaning?
Rust may stop responding when there is deep pitting, trapped moisture, or coating adhesion failure. In such cases, more aggressive treatment or replacement may be needed.
If rust hides below the surface or has created pits, cleaning alone won’t fix it.
Can rust be fixed without replacing the metal?
Surface rust that hasn’t penetrated deeply can often be repaired with proper prep, rust treatment, and coating. If pits are deep, replacement is safer.
Most surface rust repairs stay effective with proper sealing and maintenance.
What safety gear do I need for rust work?
Use gloves, eye protection, a mask or respirator, and ensure good ventilation when working with rust removers or converters.
Goggles, gloves, and a properly ventilated area are essential.
How long does rust treatment take?
Time varies with rust depth and area size; expect several hours for a thorough fix, including drying and curing.
Plan for a few hours plus curing time for the primer and paint.
When should I replace rusty hardware?
If rust has caused deep pits, cracks, or structural weakness, replacement is the safest option.
Deep corrosion often requires replacement to ensure safety.
Watch Video
Quick Summary
- Identify the root cause before fixes.
- Prep thoroughly: clean, dry, and abrade surface.
- Choose rust treatment based on depth (surface vs. deep).
- Seal with primer and protective paint to prevent recurrence.