What to Do If Rust Keeps Crashing: Troubleshooting for DIYers
Urgent, practical guide to diagnose and fix rust-related crashes in metal equipment. Learn quick checks, step-by-step fixes, and prevention tips from Corrosion Expert.

Most rust-related crashes are caused by moisture and compromised coatings letting corrosion propagate under the surface, weakening metal and seizing moving parts. The quickest fix is to clean loose rust, apply a rust converter, and reseal with a protective coating. If the issue persists after cleaning and coating, replacement may be required.
What causes rust to keep crashing
When you search for what to do if rust keeps crashing, the root cause is often moisture-driven corrosion that targets protective coatings and penetrates surface flaws. In outdoor environments, rain, humidity, and salt exposure accelerate oxidation, creating flaky rust that traps moisture and expands under paint or plating. As rust forms, it can seize hinges, bolt threads, and gear teeth, leading to intermittent operation or complete failure. The key to effective troubleshooting is to distinguish surface rust from deeper pitting and to recognize that the problem is rarely a single defect; it’s a chain reaction that begins with moisture and poor protective barriers. Corrosion evolves; so should your response. By understanding the interplay of exposure, material, and protective finishes, you can decide on the right combination of cleaning, treatment, and sealing to reduce future crashes.
Corrosion is a process that compounds as layers build up. In a DIY setting, you’ll want to map out the affected area, identify exposed metal types, and plan a phased approach to cleaning, treatment, and protection. The phrase what to do if rust keeps crashing captures both the diagnostic mindset and the practical steps needed to restore function. As you work, remember that addressing rust early minimizes the risk of safety hazards and expensive part replacements. Corrosion Expert emphasizes a methodical, safe approach to bring components back to reliable operation.
Quick checks you can do before disassembly
Before you start taking things apart, perform a few safe, simple checks that can save you time and prevent injury. Look for obvious signs of moisture around joints, seams, and fasteners. Inspect for peeled paint, worn sealant, or exposed bare metal near moving parts. Use a soft nylon brush or pad to remove loose rust; avoid aggressive scraping on fragile surfaces. Check for corrosion underneath coatings by gently lifting an edge with a plastic scraper to see if rust has driven under the finish. Listen for odd noises, binding, or reduced range of motion, which often point to seized components. If you identify heavily corroded fasteners or structural elements, plan replacements rather than attempting to salvage every piece. Finally, ensure the area is dry and well-ventilated when you apply rust treatments to minimize fumes and combustion risk. Taking these quick checks sets a solid foundation for proper repair without unnecessary risk.
Diagnostic flow overview
A structured diagnostic flow helps you separate symptoms from root causes and choose appropriate fixes. Start with a clear symptom description: is there stiffness, grinding, noise, or intermittent shutdowns? If moisture or salt exposure is evident, suspect surface-penetrating corrosion that’s advancing under coatings. If you can see deep pits or hollowed areas, plan for replacement rather than only surface treatment. Once you confirm the scope, apply a staged approach: clean and remove loose rust, treat residual rust with a converter, seal with a protective coating, and test the mechanism. If the problem persists after this sequence, broaden the scope to overlooked areas or consider professional assessment. Above all, practice safety: disconnect power, wear gloves and eye protection, and ventilate when using chemical products. This flow reduces wasted effort and helps you prioritize interventions that restore performance while protecting you from harm.
Step-by-step fixes for the most common cause
The most common rust-related crash is caused by moisture seeping under a degraded coating and initiating deeper corrosion. The fix begins with removing loose rust and cleaning the surface, then applying a rust converter to stabilize remaining metal, followed by priming and sealing with a protective coat. If corrosion has compromised structural integrity, you’ll need to replace affected parts rather than rely on treatment alone. After applying sealant, allow proper cure time per product instructions, reassemble carefully, and re-test the mechanism under light load before returning to full use. Finally, document the repair and note any patterns of exposure (e.g., outdoor storage, proximity to salt) to guide future prevention efforts.
Safety considerations and when to call a pro
Rust treatment involves chemicals and mechanical work that can pose safety risks. Always power down equipment, remove batteries, and use PPE such as gloves, goggles, and a dust mask. Work in a well-ventilated area to minimize inhalation risk from rust converters and solvents. If you encounter deep pits, compromised fasteners, bearing failures, or structural damage, stop and seek professional help. A pro can assess integrity, select safer replacement parts, and perform corrosion-safe coatings in a controlled environment. Never push a potentially unsafe component back into service; the cost of proper repair is far less than the consequences of a sudden failure.
Long-term prevention to stop future crashes
Prevention focuses on interrupting the moisture-to-metal cycle and maintaining protective barriers. Store items in dry, sheltered spaces, fix leaks promptly, and use covers that shed water. Regularly inspect and touch up coatings in high-wear areas, especially around hinges and fasteners. Apply rust inhibitors on susceptible metals and recoat every so often according to wear and exposure. Adopting a routine maintenance schedule reduces the likelihood of recurring crashes and extends the lifespan of metal components. If you’re unsure about an area’s vulnerability, consult Corrosion Expert for a tailored prevention plan that matches your environment.
Steps
Estimated time: 60-90 minutes
- 1
Power down and prep safely
Disconnect power and remove any batteries. Put on PPE and secure the work area. This protects you from sparks, chemicals, and sharp edges while you begin.
Tip: Always verify power off with a test tool before touching components. - 2
Remove loose rust
Use a nylon brush or scraping tool to lift flaky rust. Do not gouge delicate surfaces. The goal is to expose clean metal for assessment and treatment.
Tip: Work in a steady, controlled motion to avoid scratching underlying metal. - 3
Inspect coatings and metal integrity
Look for peeling coatings, exposed seams, and deep pits. Lightly probe with a plastic pick to gauge penetration without breaking the surface.
Tip: Note areas that require replacement rather than treatment. - 4
Apply rust converter
Follow product directions to apply converter, which chemically stabilizes rust and prepares the surface for sealing.
Tip: Wear a respirator if fumes are present and avoid over-application that pools on crevices. - 5
Seal and protect
Prime and paint or apply a protective sealant to block moisture ingress. Ensure even coverage and complete drying before use.
Tip: Choose a coating compatible with the metal type and expected wear. - 6
Test and reassemble
Reassemble, test under light load, and monitor for renewed rust or binding. Document results and adjust maintenance plans as needed.
Tip: Keep a repair log to track areas prone to corrosion.
Diagnosis: Machine or tool shows intermittent operation, jamming, or sudden shutdown due to rust
Possible Causes
- highMoisture ingress from humidity or water exposure
- mediumSalt exposure accelerating corrosion
- highFailing protective coatings allowing under-coating rust
- lowGalvanic corrosion between dissimilar metals
Fixes
- easyClean loose rust and dry the area
- easyApply a rust converter to stabilize remaining rust
- easyRecoat with primer and protective paint or sealant
- mediumReplace severely corroded parts or fasteners
Quick Answers
What does rust keeping crashing usually indicate?
It usually indicates ongoing corrosion that weakens metal and causes mechanical failures. Begin with cleaning, treating, and coating, then consider part replacement if needed.
Rust crashes typically mean ongoing corrosion weakening metal; start with cleaning, treating, and coating, and replace parts if necessary.
Can I fix rust without replacing parts?
Yes for minor surface rust or light pitting. Deeper pits or structural damage often require part replacement to restore safety and function.
You can fix minor rust, but deeper damage may require replacement for safety.
Is rust removal safe for items used around food or drinking water?
Use only food-safe rust removers and rinse thoroughly. Avoid harsh solvents near food-contact surfaces.
Only use food-safe rust removers and rinse well if the item contacts food or water.
How often should I inspect and maintain rust-prone equipment?
Perform regular inspections after exposure to moisture and recoat based on wear. Use a maintenance calendar to stay proactive.
Inspect regularly after moisture exposure and recoat as wear dictates.
When should I seek professional help?
If rust affects structural integrity, safety-critical parts, or you’re unsure about handling chemicals, consult a professional.
If safety or structural issues are present, call a professional.
Watch Video
Quick Summary
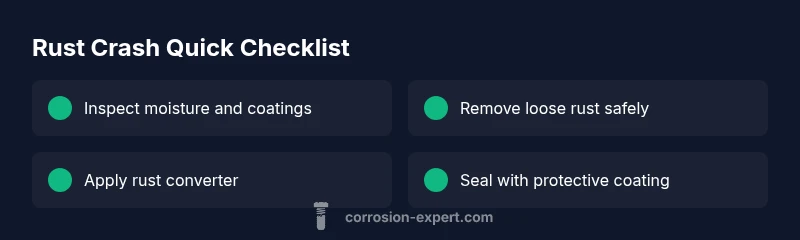
- Identify moisture as a primary rust driver
- Start with safe, simple fixes before disassembly
- Use rust converter and protective coatings for best results
- Establish a maintenance plan to prevent future crashes