Spray for Rust Removal: A Step-by-Step DIY Guide
Learn how to choose and safely apply a spray for rust removal, skim rust efficiently, and protect surfaces. This practical guide covers prep, methods, safety, and maintenance for DIYers and homeowners.

In this guide you will learn how to safely select and use a spray for rust removal to restore metal surfaces. We cover prep, ventilation, PPE, application techniques, and disposal. You’ll compare spray types, understand active chemistries, and apply steps that minimize damage while maximizing rust removal effectiveness. This quick answer sets expectations for results, safety, and long-term maintenance.
What is spray for rust removal
A spray for rust removal is a targeted chemical formulation designed to break down iron oxide (rust) on metal surfaces and, in many cases, convert or lift rust to make it easier to wipe away. These products come in various chemistries, from acid-based sprays to chelating agents, and are designed to work with minimal mechanical effort. The Corrosion Expert notes that most consumer sprays rely on either mild acids or chelating compounds to solubilize rust without aggressively attacking healthy metal. When used correctly, these sprays can restore the appearance of iron, steel, and alloys, extend service life, and reduce the need for more invasive cleaning methods. Always read the label for dwell time, safety precautions, and surface compatibility, especially if you’re working on chrome, aluminum, or coated finishes. For DIY projects, test on a hidden area first and follow proper ventilation and PPE guidelines to avoid inhaling fumes or skin irritation.
How rust removal sprays work
Most rust removal sprays work by chemically breaking the bond between iron oxide and the underlying metal, allowing rust particles to dissolve or detach. Acid-based formulas donate protons that loosen oxide layers, while chelating sprays wrap iron ions and lift them from the surface. Some products also contain inhibitors that slow flash rust reformation after treatment. The choice of formulation influences dwell time, temperature sensitivity, and whether you should rinse after treatment. In practice, you’ll notice rust turning black, brown, or pinkish as the active chemistry engages, followed by easier wiping or brushing. Corrosion Expert's practical guidance emphasizes using the least aggressive chemistry that achieves the result, to protect base metal and any coatings.
Types of rust removal sprays
- Acid-based sprays: Fast-acting, effective on light to moderate rust; require thorough rinsing and ventilation due to fumes.
- Chelating (organic acid) sprays: Gentler on metal, good for decorative items and painted surfaces; often require longer dwell times.
- Phosphoric-acid sprays: Convert rust to a black phosphate layer for easier removal and rust-proofing opportunities; follow with protective coating.
- Neutral or rust-preventing sprays: Leave a thin protective film that reduces immediate flash rust and simplifies subsequent cleaning.
When choosing, match the spray to the project: hardware, tools, automotive parts, or outdoor metal exposed to moisture.
How to choose a spray for rust removal
Consider the metal type (cast iron, steel, aluminum), finish (painted, chromed, polished), and intended use (indoor vs outdoor). Check label details: dwell time, surface compatibility, VOC limits, and whether a rinse is required. If you’ll be working near plastics or rubber seals, pick a neutral formula with low solvent content. Always verify that the product is compatible with the substrate you’re treating and that it can be safely used on the type of rust present. Corrosion Expert recommends starting with a milder formula on a test patch to confirm effectiveness before full application.
Surface prep and testing
Surface prep is critical for reliable results. Begin by cleaning the area with degreaser or soap and water, then dry completely. Lightly brush away loose rust and scale with a nylon brush or steel wool if needed—but avoid aggressive scraping that could gouge base metal. Apply a small amount of the spray to a hidden spot and wait the recommended dwell time; observe color change and residue for guidance on whether more treatment is needed. If rust persists, consider repeating with the same formula or moving to a stronger option, following safety guidelines throughout.
Application techniques and best practices
- Apply the spray evenly from about 6-8 inches away to create a thin coat; apply in a sweeping motion to cover all affected areas.
- Do not spray on live electrical connections or components that could trap solvents; keep a ventilated work area and wear PPE.
- Allow the recommended dwell time; most rust removal sprays require a pause of 5-20 minutes, depending on product and rust severity.
- Wipe away residue with a clean cloth or brush, then inspect. If rust remains, reapply or switch to a different chemistry if compatible with the substrate.
- After treatment, rinse with water or wipe with a damp cloth to remove chemical traces; apply a protective coating if corrosion risk persists.
Safety, disposal, and maintenance
Always ventilate the workspace and wear gloves, goggles, and a respirator if fumes are strong. Read the Safety Data Sheet (SDS) for each product to understand first aid, storage, and disposal. Do not mix products; some combinations can release toxic gases. Dispose of unused spray according to local hazardous waste regulations. After treatment, consider applying a rust inhibitor or protective coating to minimize future corrosion and extend the life of the metal.
Tools & Materials
- Spray for rust removal product (acid-based or chelating)(Choose according to rust type and substrate.)
- Personal protective equipment (PPE) kit(Gloves, safety goggles, and a suitable mask or respirator.)
- Nylon brush or soft steel wool(For removing loose rust before chemical treatment.)
- Sandpaper or abrasive pad (grit 120-320)(Smooths surface after rust removal.)
- Lint-free cloths or towels(Wipe-down and residue removal.)
- Plastic tray or drop cloth(Protect surrounding surfaces from splatter.)
- Ventilation source (open window, fan)(Ensure good air flow to reduce inhalation risk.)
- Degreaser/soap and water(Initial cleaning of the surface before treatment.)
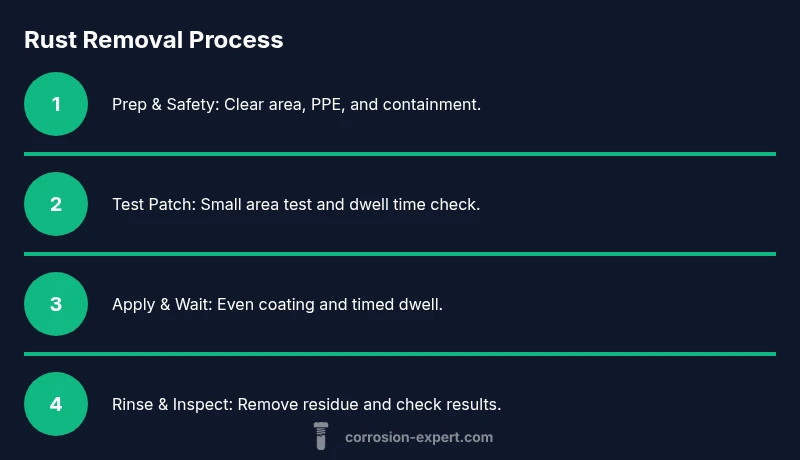
Steps
Estimated time: 45-75 minutes
- 1
Prepare workspace and PPE
Set up the work area outdoors or in a well-ventilated room. Put on gloves, goggles, and a respirator as needed. Place a drop cloth under the work area to catch drips and protect nearby surfaces.
Tip: Check the spray label for any specific PPE recommendations before you begin. - 2
Clean and lightly deburr the surface
Wipe the surface with degreaser or soap and water to remove oil and dirt. Use a nylon brush to remove loose rust without scratching the base metal. Dry the area completely before applying any spray.
Tip: Removing contaminants improves chemical contact and rust removal efficiency. - 3
Test a small patch
Apply a small amount of the spray to an inconspicuous spot and wait the recommended dwell time. Observe for color change, bubbling, or residue indicating the chemistry is working as intended.
Tip: If you notice discoloration or coating damage, switch to a milder formula and re-test. - 4
Apply the spray evenly
Spray at a consistent distance (about 6-8 inches) in smooth, overlapping strokes to cover all rusted areas. Avoid pooling; multiple light coats work better than one heavy coat.
Tip: Keep a wet edge and avoid allowing solvent to pool on flat surfaces. - 5
Wait the dwell time and assess
Allow the product to sit for the recommended dwell time, typically 5-20 minutes depending on the product and rust level. Do not rush this step, as insufficient contact reduces effectiveness.
Tip: Use a timer and do not reapply too soon. - 6
Rinse, wipe, and inspect
Rinse any residue off with water or wipe with a damp cloth, then inspect the area. If rust remains, repeat the process with the same or a milder formula or move to a stronger, substrate-compatible option.
Tip: Finally, dry thoroughly to prevent new rust formation.
Quick Answers
Can I use spray for rust removal on painted surfaces?
Yes, but choose a milder formula and test on a small area first. Some acids can affect paint or coatings, so verify compatibility.
Yes, but always test first and pick a milder product to protect the paint.
Is PPE really necessary when using rust removal sprays?
PPE is essential. Wear gloves, goggles, and a respirator if fumes are strong. Ensure work area is well ventilated to reduce exposure.
Yes—wear PPE and work in a ventilated area.
Will these sprays remove heavy, deep rust?
Deep rust may require multiple applications or a stronger formula, and sometimes mechanical rust removal is needed after chemical treatment.
Deep rust might need several passes or a different method after testing.
Should I rinse after applying the spray?
Follow the product label. Some sprays require rinsing, others leave a film that must be wiped away.
Rinse if the label says so, otherwise wipe clean and dry.
Can I use rust removal sprays on stainless steel or aluminum?
Many sprays are safe on steel, but aluminum and stainless may require milder formulas. Always test on a small area first.
Check the substrate and test a patch before full use.
How long does rust removal take?
Dwell times vary by product and rust extent. Most treatments take 5-20 minutes per application, with longer times for tougher rust.
Usually, a few minutes per patch, but heavy rust can take longer.
Watch Video
Quick Summary
- Choose the right spray based on substrate and rust severity.
- Prep surfaces and test patches before full treatment.
- Apply in thin coats and observe dwell times for best results.
- Rinse or wipe residues and protect treated surfaces after treatment.
- Always follow safety guidelines and local disposal rules.