How to Check Your Rust Skins: A DIY Guide
Learn how to check rust skins on metal surfaces, distinguish surface rust from deeper corrosion, and decide whether cleaning, treatment, or replacement is needed. A practical, safety-first guide by Corrosion Expert for DIY enthusiasts.

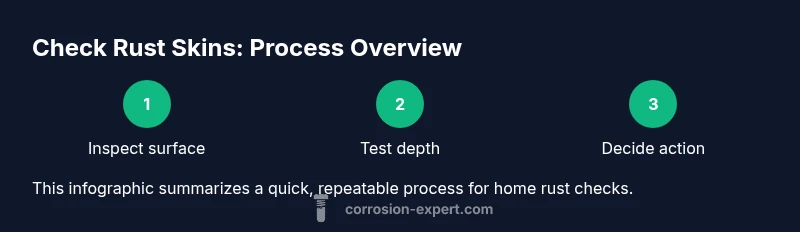
Check rust skins by distinguishing surface rust from deeper corrosion through a visual scan and a simple depth test, then decide whether cleaning, treatment, or replacement is needed. Gather PPE, a bright flashlight, a magnifier or loupe, a metal pick, sandpaper, rust remover, and safety gloves. This quick method saves time and protects your investment.
Understanding rust skins: what you’re looking for
Understanding rust skins describes the superficial rust layer that may signal underlying material distress. According to Corrosion Expert, this distinction between surface rust and deeper corrosion matters because it guides your next action—cleaning, treating, or replacing. In this section you’ll learn how surface films form, what indicators look like, and why a quick check can prevent costly damage later. You’ll also see how climate, moisture exposure, and substrate type influence rust skin development. By recognizing the signs early, you can tailor your approach to preserve the metal’s integrity while minimizing downtime and expense.
Safety first: PPE and setup
Safety is the backbone of any rust-check project. Put on gloves, eye protection, and a dust mask. Work in a well-ventilated area with good lighting, and keep a clean, organized workspace to prevent slips and mixed chemicals. If you’re working indoors, ensure there’s adequate ventilation to avoid inhaling rust particles or fumes from cleaners. Store chemicals away from heat sources and children, and label containers clearly. The right PPE and setup reduce exposure risk and improve accuracy during the inspection.
Visual inspection checklist
Begin with a clean, dry surface. Scan for color changes (orange, brown, or black stains), flaky flakes, pitting, and rust spreads along joints or edges. Use a bright flashlight to highlight recessed areas and a magnifier for close-up detail on grain structure and coating edges. Document areas with signs of deeper corrosion or embedded rust that may indicate material loss or underlying damage. Photograph suspicious zones if you plan to compare progression over time, and mark them with tape or a marker for consistency in follow-up checks.
Depth testing techniques
Depth can be estimated with a gentle steel pick or nail to test the surface. If the metal caves or roughens beyond a shallow layer, deeper rust may be present. Start conservatively to avoid creating additional damage; test multiple points rather than a single spot. Record locations and rough dimensions to guide your treatment plan, but stop if you encounter structural compromise or sudden metal loss. Use non-destructive methods first to preserve the surface where possible.
Assessing severity and choosing a path
Differentiate between minor surface rust and heavy oxidation that compromises material integrity. For light rust, cleaning and applying a protective coating may suffice. For moderate to severe rust, especially where pinholes or deep pits exist, partial or full replacement or professional repair may be necessary. Consider cost, safety, and function when deciding, and remember that prevention is often cheaper than remediation. This assessment helps you balance longevity with practicality.
Cleaning vs. treating vs. replacing: decision framework
Begin with non-chemical cleaning like brushing, sanding, or wire wool to remove loose rust flakes. If rust reappears after cleaning, apply a rust converter or inhibitor, then repaint or seal the surface. If rust has hollowed out the base metal or caused structural weakness, replacement is the safer option. Always test a small area first and follow product instructions to avoid damaging the substrate or coating. The goal is a durable, protective finish that stops progression.
Prevention tips after checking rust skins
Prevention is cheaper than repair. Apply rust inhibitors or corrosion-resistant coatings after you clean, and ensure surfaces are kept dry and properly sealed. Store items in low-humidity environments when possible and inspect regularly to catch early signs of rust. For outdoor metal, consider primers and topcoats designed for weather exposure. Routine maintenance saves time and money while extending the life of your metalwork.
Common pitfalls and how to avoid them
Avoid over-scrubbing, which can remove protective coatings and introduce new crevices for rust. Don’t mix cleaners without checking compatibility with your substrate and coating system. Always patch test a small area first and follow label directions to prevent chemical reactions or damage. Keep a log of findings to track progression over time and adjust your maintenance plan accordingly.
When to consult a professional
If you encounter extensive corrosion, significant material loss, or parts critical to safety, seek professional assessment. A pro can advise on repair methods, suitable materials, and long-term protection strategies to extend the life of the item. Early consultation can prevent unsafe failures and costly downtime.
Tools & Materials
- Personal protective equipment (PPE)(Gloves (nitrile or work gloves), safety glasses or face shield, dust mask or respirator)
- Bright flashlight or headlamp(For high-contrast inspection in shadowed areas)
- Magnifying glass or jeweler's loupe(0.5x–3x magnification helps reveal texture details)
- Metal picks or non-marring probes(Gently test rust depth without gouging)
- Medium-grit sandpaper (60–120 grit)(Light abrasion for controlled rust removal)
- Wire brush or stainless-steel brush(To lift loose rust in a controlled way)
- Rust remover or converter (optional)(Used only if you plan follow-up chemical treatment)
- Marker or tape for spot marking(Mark suspicious areas for consistency)
Steps
Estimated time: 45-90 minutes
- 1
Prepare your workspace
Set up a clean, well-lit area with a drop cloth. Gather PPE and tools in the order you will use them to minimize searching. Ensure ventilation if using cleaning chemicals.
Tip: Lay items out in order so you don’t miss a tool. - 2
Put on PPE and verify safety
Don your gloves, eye protection, and mask. Double-check that no skin is exposed to potential rust particles or chemical splashes. Clear the area of pets and children before starting.
Tip: Test PPE fit before you begin for full protection. - 3
Clean the surface first
Wipe loose dust and rust flakes with a dry cloth, then lightly brush with a wire brush or 60–120 grit sandpaper to prepare the surface. Avoid aggressive grinding that could expose fresh metal.
Tip: Keep a shallow angle to minimize substrate removal. - 4
Conduct a visual inspection
Use a bright light and magnifier to identify color changes, pitting, and grain texture. Document zones with signs of deeper corrosion or cracked coatings.
Tip: Take photos to compare progress later. - 5
Perform a depth test
Gently probe with a steel pick at multiple points. If the metal caves or skin seems to be more than a thin surface film, note the area for deeper evaluation.
Tip: Do not press hard; stop if you hear a crack. - 6
Assess severity and plan next steps
Decide whether cleaning and coating are enough or if replacement/professional treatment is needed. Prepare a simple plan with zones to treat and parts to replace.
Tip: Keep a written plan to avoid missing areas. - 7
Apply follow-up protection
If cleaning is sufficient, apply rust converter or inhibitor, then prime and paint or seal the surface. Allow adequate cure time per product instructions.
Tip: Ventilate during curing. - 8
Document and schedule future checks
Record findings, locations, and outcomes. Plan routine inspections to catch rust early and extend service life.
Tip: Set reminders for periodic reviews.
Quick Answers
What is meant by rust skins?
Rust skins describe the superficial rust layer that forms on a metal surface. This layer can hide deeper corrosion underneath, so asking whether it’s just surface rust or something more serious is essential for choosing the right fix.
Rust skins refer to the surface rust that may indicate deeper issues beneath the coating.
Do I need special tools to check rust skins?
Basic inspection requires PPE, a bright flashlight, a magnifier, a metal pick, and sandpaper or a brush. These allow you to safely see, feel, and lift rust without damaging the base metal.
Yes—basic PPE and simple inspection tools are enough to start.
Can surface rust be cleaned without replacing the item?
Usually, yes. If it’s superficial, cleaning, treating, and applying a protective coating can restore appearance and slow progression. Deeper rust may still require repair or replacement.
Often you can salvage with cleaning and coating, but deeper rust might need more work.
How do I know if rust is too deep to fix myself?
If rust has penetrated the base metal, created holes, or significantly weakened a component, DIY repair may be unsafe. In such cases, replacement or professional service is advised.
If you notice holes or major weakening, don’t DIY beyond your comfort—consider a pro.
How often should I check for rust?
Regular checks during seasonal maintenance help catch early signs before they spread. Establish a routine and stick to it for the best long-term protection.
Do routine checks, especially after moisture-heavy seasons.
Watch Video
Quick Summary
- Distinguish surface rust from deeper corrosion before acting
- Use proper PPE and a well-lit setup for accurate inspection
- Depth testing helps decide between cleaning, treatment, or replacement
- Plan and document steps to prevent future rust issues
- Regular checks save time and money in the long run