Why Won't Rust+ Work? A Practical Troubleshooting Guide
Facing issues with Rust+? This urgent, practical guide walks homeowners through diagnosing and fixing common Rust+ failures, from prep to coating, with safety tips and prevention strategies.

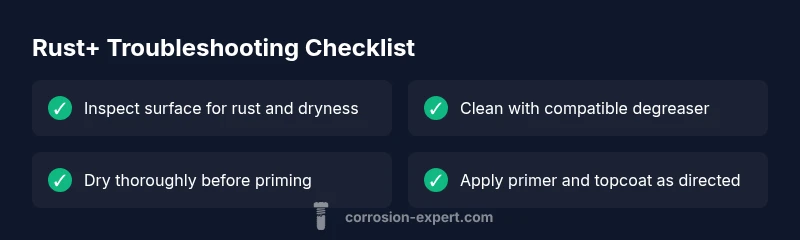
Most often, why won't rust+ work is inadequate surface prep or incompatible coatings. Quick fix: remove existing rust, clean the surface, and apply a compatible primer and rust-prevention coat. If rust+ remains ineffective, check packaging for compatibility notes, expiration, and storage conditions. Corrosion Expert analyses highlight prep quality as the decisive factor.
Why Won't Rust+ Work? Causes and Fixes
Why won’t rust+ work? The short answer is: it usually boils down to surface prep, coating compatibility, and environmental conditions. According to Corrosion Expert, when homeowners report a Rust+ failure, the root causes are almost always tied to inadequate prep, moisture exposure, or using primers and topcoats that aren’t designed for the system. The problem often hides in plain sight: rust residues left behind, a damp surface, or a coating sequence that doesn’t match the product instructions. In urgent terms, fix starts with a thorough surface assessment, then a disciplined prep-and-coat sequence that matches the Rust+ system requirements. This approach aligns with Corrosion Expert analysis conducted in 2026.
In practice, you’ll want to confirm two things before diving into fixes: first, that the Rust+ kit you’re using is compatible with the substrate (metal type, paint system, and environmental exposure), and second, that you’re operating in a dry, dust-free environment with controllable humidity. If either of these conditions isn’t met, the chances of success drop dramatically. By prioritizing prep quality and kit compatibility, you create a reliable foundation for lasting protection and faster results.
The urgency here is real: substandard prep or misapplied coatings can compromise adhesion, curing, and long-term rust prevention. This is where the Corrosion Expert team sees the most repeat issues—many calls come after failed first coats or premature exposure to moisture. A precise sequence—rust removal, cleaning, drying, primer application, and topcoat—drives reliable outcomes and minimizes costly rework.
Common Culprits Behind Rust+ Issues
When Rust+ doesn’t perform as expected, there are several frequent culprits to inspect. Moisture is the biggest enemy; if ambient humidity or surface moisture remains during application or curing, coatings can fail to adhere properly. Surface residue—dirt, oil, fingerprints, or old coating peel—creates barriers that prevent mechanical interlock and chemical bonding. Using a primer or topcoat that isn’t specified for the Rust+ system can lead to poor adhesion and accelerated wear. Substrate compatibility matters too: aluminum, galvanized steel, and bare cast iron each require different preparation steps and products. Finally, storage is a silent culprit: products exposed to heat, cold cycles, or moisture during storage can degrade chemically, reducing cure strength and adhesion. By systematically verifying these factors, you can isolate the actual fault and select the right remedial steps.
In this troubleshooting journey, you’ll often find that symptoms like flaking, rainbow streaks, or sudden rust blooming after a rainstorm are signs of prep or compatibility issues rather than a problem with Rust+ itself. Corrosion Expert’s practical experience shows that fixing the foundational prep and matching coatings is almost always the decisive step toward regaining performance.
Environmental and Storage Considerations
Environment matters as much as materials. Temperature swings, high humidity, or poor ventilation during cure can compromise the coating’s ability to form a tight, uniform film. If Rust+ is stored in an area that experiences freezing temperatures, or if containers have absorbed moisture, chemical stability can be compromised, leading to weak film formation or delayed curing. Always follow the storage instructions on the product label, especially regarding temperature range and humidity limits. If you’re applying Rust+ in a garage, shed, or outdoor area, use a temporary controlled environment—dehumidifier, heat source, or enclosure—to stabilize conditions during application and curing. The Corrosion Expert team notes that controlling ambient conditions during cure dramatically improves results and reduces rework.
Another common pitfall is reusing partially used containers without proper mixing or thinning according to the manufacturer’s guidelines. Even small deviations can produce inconsistent film thickness and poor adhesion. When in doubt, discard old product and start with fresh, properly labeled materials. This discipline saves time and prevents future rust blooms caused by compromised coatings.
Surface Prep Techniques: Rust Removal and Cleaning
Effective surface prep is the backbone of any successful Rust+ application. Start by removing loose rust with mechanical means: wire brushing, sanding, or grinding to reach a sound metal surface. For stubborn rust, consider chemical rust removers that are compatible with the Rust+ system, following all safety instructions. After mechanical removal, thoroughly clean the area with a degreasing solvent or mild detergent to remove oils and residues. Rinse with clean water and dry completely—crucially, no moisture should remain. A heat gun or infrared dryer can accelerate drying in cooler environments, but avoid overheating the substrate. How you dry matters: residual moisture will undermine adhesion and cure.
Once dry, inspect for flatness, pitting, or voids. Lightly abrade the area to create a fresh, clean profile for primer bonding. Before moving to coatings, ensure the surface is visually and tactilely clean, free of dust, and completely dry. If you suspect hidden rust beneath old coatings, extend the prep area slightly beyond visible rust to ensure a sound substrate for Rust+.
From a professional perspective, spending extra minutes on prep prevention now saves hours later. The Corrosion Expert team emphasizes that meticulous rust removal paired with a spotless surface is the single most impactful step in restoring Rust+ performance.
Coating Selection and Application for Rust+ Systems
Choosing the correct primer and topcoat is non-negotiable for Rust+ success. Review the Rust+ system’s compatibility chart to confirm that your primer is rated for the substrate and environment. When applying, use even, cross-coat methods to achieve uniform film thickness. Allow proper intermediate drying times between coats as specified by the manufacturer; skipping this step can trap solvents and weaken adhesion. If you’re coating over a previously painted surface, ensure the old coating is compatible with Rust+ and properly abraded to create a mechanical key. For textured or irregular surfaces, use a brush or roller that maintains a consistent film without ponding. Safety note: ensure adequate ventilation when applying solvent- or enamel-based coatings.
The moment you finish the final coat, perform a visual inspection for runs, sags, or missed spots. In high-humidity conditions, avoid too-rapid curing as it can cause cracking. If you suspect incompatibility, consult the product’s reference sheet or reach out to a technical advisor. The right combination of primer, topcoat, and curing environment is the core of a long-lasting Rust+ barrier.
Verification: Testing Adhesion and Cure
After cure, verify the coating’s adhesion with a simple cross-hatch test or a tape test as per the product guidelines. If the coating lifts under tape pressure, you likely have poor adhesion from prep or incompatibility. In such cases, you’ll need to remove and recoat after repeating cleaning and drying steps, ensuring no residual moisture remains. For posters that see outdoor exposure, inspect after rain or dew events to check for moisture-driven failures. Lastly, test a small, inconspicuous area under low-stress conditions before scaling up to larger surfaces. Corrosion Expert’s practical advice: if you doubt adhesion, don’t proceed with full-scale exposure until you resolve the bond quality.
Document the results, including environmental conditions during cure, product batch numbers, and application techniques. This record helps pinpoint repeated issues and informs future projects, reducing the risk of failure.
Prevention and Maintenance: Long-Term Rust+ Life
Prevention is cheaper and faster than repeating fixes. Establish a regular inspection routine to catch early signs of wear, especially in joints, seams, and hidden edges where moisture tends to accumulate. Maintain controlled storage environments for Rust+ products, and rotate stock to avoid expired materials. Seal joints and use protective covers in outdoor areas to limit moisture ingress. If you anticipate frequent exposure to salt, humid air, or chemical cleaners, consider a dedicated protective coating schedule with more frequent re-coats. The bottom line is proactive maintenance: it minimizes surprises and extends the life of your rust-prevention system. The Corrosion Expert team recommends integrating these practices into your seasonal home maintenance plan to keep Rust+ performing at its best.
Steps
Estimated time: 60-120 minutes
- 1
Inspect surface and environment
Assess the area for visible rust, moisture, and surface contamination. Note ambient conditions and substrate type. This step informs all subsequent prep and coating decisions.
Tip: Document observed conditions before starting. - 2
Remove rust and clean thoroughly
Use mechanical abrasion to remove rust to a clean, sound metal surface. Follow with a degreaser or detergent wash and rinse until the surface is free of oils and residues.
Tip: Wear gloves and eye protection during rust removal. - 3
Dry completely and prep the surface
Dry the area completely using air flow or warm air. Lightly abrade the surface to create a good key for primer bonding.
Tip: Ensure no damp pockets remain in recessed areas. - 4
Check compatibility and storage
Consult product data sheets to confirm primer/topcoat compatibility with Rust+ and substrate. Verify batch numbers and storage conditions.
Tip: Discard any expired or compromised materials. - 5
Apply primer and topcoat evenly
Apply primer per instructions, then apply the topcoat in thin, even coats with proper drying time between coats.
Tip: Maintain a consistent film thickness to avoid runs. - 6
Cure, test, and verify
Allow full cure per manufacturer guidelines. Perform adhesion and cure tests before exposing to harsh conditions or long-term use.
Tip: Keep a curing log with temperature, humidity, and times.
Diagnosis: Rust+ fails to perform as expected (poor adhesion, coating failure, or uneven cure)
Possible Causes
- highInadequate surface prep or rust removal leaving residues
- mediumIncompatible or expired coatings or primers
- highMoisture exposure during application or curing
- lowStorage issues or damaged packaging
Fixes
- easyThoroughly remove rust and clean surface; ensure complete dryness before priming
- easyChoose a primer/topcoat explicitly compatible with the Rust+ system and within its shelf life
- mediumControl humidity or relocate to a sheltered area during cure
- easyInspect packaging and storage; replace expired materials if needed
Quick Answers
What is Rust+ and why might it fail?
Rust+ is a corrosion-prevention system designed to bond a protective layer to metal surfaces. Failures typically happen due to poor prep, moisture, or using incompatible coatings. Following proper prep and using compatible products reduces failure risk.
Rust+ is a corrosion-prevention system. Most failures come from poor prep, moisture, or wrong coating choices; good prep and compatibility fix it.
Is moisture the main culprit behind Rust+ issues?
Yes. Excess moisture during application or curing can prevent proper adhesion and cure. Ensure surfaces are dry and environments are controlled before applying Rust+.
Moisture during application or cure is a common culprit. Dry the surface and control humidity before applying Rust+.
Do I need a professional to fix Rust+ problems?
Many issues can be solved with careful prep and correct product use. If you’re unsure about substrate compatibility or regulatory safety, consult a corrosion specialist.
If you're unsure about substrate compatibility, consider a corrosion specialist for guidance.
How can I test if my coating is sticking properly?
Perform a tape or cross-hatch adhesion test per the product guidelines. If adhesion fails, re-prep and recoat in a controlled environment.
Do a small adhesion test and recoat if it fails.
How long should Rust+ cure before use?
Cure time depends on the product and environment. Always follow the manufacturer’s recommended cure window and avoid exposure to moisture during this period.
Follow the product’s cure window and keep it dry during curing.
What safety precautions are essential when using Rust+?
Ventilate the area, wear gloves and eye protection, and store materials away from heat sources. Avoid mixing with incompatible chemicals.
Ventilate, wear protection, and keep materials away from heat.
Watch Video
Quick Summary
- Start with thorough surface prep and dryness.
- Verify coating compatibility and storage conditions.
- Control environment during application and cure.
- Test adhesion before full use to prevent failure.