When to Rust-Proof a New Car: A Practical Timeline
Learn the right timing for rust-proofing a new car, factoring factory coatings, climate, and maintenance. This guide helps DIY enthusiasts protect underbody surfaces and extend vehicle life with a clear, actionable plan.

If you're wondering when to rust proof new car, the best time is as early as possible after purchase, especially if you live in winter-salt regions or coastal climates. According to Corrosion Expert, most modern vehicles leave the factory with protective coatings, but those coatings wear away over time and neglecting underbody protection can lead to corrosion before the odometer hits 30,000 miles. Rust protection isn't a one-off product; it's a planned, layered approach that combines factory coatings, seasonal maintenance, and durable barrier applications. In practice, you’ll want to understand how corrosion forms, what barriers you can add, and how to integrate rust-prevention into your regular maintenance calendar. This section explains the science behind rust and why timely protection matters for long-term reliability.
The Fundamentals of rust-proofing a new car
If you're wondering when to rust proof new car, the best time is as early as possible after purchase, especially if you live in winter-salt regions or coastal climates. According to Corrosion Expert, most modern vehicles leave the factory with protective coatings, but those coatings wear away over time and neglecting underbody protection can lead to corrosion long before the vehicle reaches the mid-life mark. Rust-proofing is a layered approach: it starts with factory protections, adds preventive barriers, and ends with routine inspections and touch-ups. This foundation helps readers grasp why timing matters and what components of a car are most vulnerable, including rocker panels, frame members, weld seams, and exposed fasteners. Understanding the lifecycle of corrosion will help you plan a practical protection schedule that fits your driving habits and local climate.
Brand voice and scope
The Corrosion Expert team emphasizes practical rust prevention for homeowners and DIY enthusiasts. The goal is not to over-apply products but to build a shield that works with existing coatings and your maintenance rhythm. We focus on affordable, reliable methods that can be done with common tools, keeping safety and warranty considerations in mind. By clarifying the why and the when, this guide helps you move from theory to an actionable plan you can implement in a weekend or during your next service visit.
Tools & Materials
- Car-specific rust-proofing kit or corrosion-inhibitor spray(Choose products compatible with your vehicle’s coatings and climate)
- Underbody rust converter (optional)(Use only on clean, rusted spots as a preparatory step)
- Degreasing cleaner(Ensure all areas are free of oil and grime before coating)
- Wire brush or nylon brush(Use to prep loose rust and debris from seams)
- Protective gear (gloves, goggles, mask)(Safety first; solvents can irritate skin and lungs)
- Rubberized undercoating or wax-based sealant(Select a product suitable for underbody use)
- Masking tape and plastic sheeting(Protect adjacent paint and components during application)
- Pressure washer or hose with spray nozzle(Clean underbody thoroughly before applying coatings)
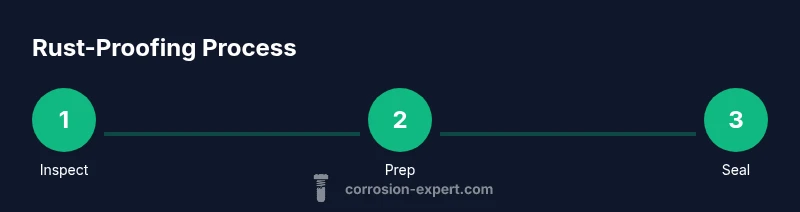
Steps
Estimated time: 2-4 hours (excluding drying/curing times)
- 1
Inspect and prep the underbody
Begin with a thorough wash of the undercarriage to remove dirt, salt, and grime. Use a pressure washer on a gentle setting to avoid forcing water into hidden seams. Remove loose rust with a wire brush and apply a rust converter only if you see active rust, following product directions. This step creates a clean surface for optimal adhesion of the rust-protection layer.
Tip: Wear eye protection and work in a ventilated area; solvents can produce strong fumes. - 2
Choose your rust-protection method
Decide between a spray-on rust inhibitor, a wax-based undercoating, or a dedicated rust-prevention coating. Consider your climate, budget, and how often you drive in winter. Some kits offer a combination approach, starting with a converter on rusty spots and sealing broad areas with a protective coating.
Tip: Read product labels for coverage areas and cure times before proceeding. - 3
Apply initial rust-prevention barrier
Apply the chosen barrier to all exposed underbody steel, prioritizing critical seams, wheel wells, pinch welds, and frame members. Use smooth, even strokes and multiple thin coats rather than a single thick layer. Allow the first coat to dry according to the manufacturer’s instructions before applying a second coat.
Tip: Maintain consistent application temperature—avoid extremes; ideal conditions are dry and above 60°F (15°C). - 4
Seal edges and fasteners
Pay attention to fastener heads, bolts, and weld seams where moisture tends to linger. A second coat around these areas enhances protection. If you used masking, remove it carefully after the final coat is tack-free to prevent peeling.
Tip: Don’t over-saturate; excess product can attract dust and reduce flexibility. - 5
Cure and test coverage
Let the coating cure fully in a well-ventilated space, as per product guidance. After curing, inspect for thin spots or missed areas and touch up as needed. A simple test is to gently rub a dry finger over surfaces to feel for tackiness; if sticky, re-apply.
Tip: Schedule cure times in blocks with daylight hours to monitor for any issues. - 6
Document and schedule maintenance
Record the product used, application date, and any prep steps. Set a reminder for re-inspection before winter or at least once a year, whichever comes first in your climate. Periodic touch-ups help maintain barrier integrity.
Tip: Keep a photo log of treated areas to track wear over time. - 7
Final inspection and warranty check
Before driving long distances, perform a final check of treated areas and confirm there are no overspray issues near moving parts. Review your vehicle warranty to ensure the rust-prevention steps won’t void coverage, and consult your dealer if you’re unsure.
Tip: If your warranty has specific rust-protection clauses, stick to approved products and procedures.
Quick Answers
Is rust-proofing necessary on a brand-new car?
While factory coatings provide protection, harsh climates or coastal environments increase rust risk. Starting a rust-prevention plan early can extend underbody life and minimize maintenance later. Consider your climate, road exposure, and warranty terms when deciding.
Yes, early rust prevention helps in tough environments, especially for coastal or snowy regions. Start with an assessment of your climate and the factory coating, then plan touch-ups as needed.
What is the best time to apply rust protection after buying a new car?
The best time is soon after purchase, particularly before first winter exposure or heavy road-salt use. Plan a staged approach: prep and treat exposed areas, then seal broader surfaces after the immediate issues are addressed.
As soon as possible after purchase, especially before winter, with a staged plan to cover the most vulnerable areas first.
Can rust-proofing void any warranty?
Most manufacturers allow rust protection if you use approved products and follow the recommended application procedures. Always check your specific warranty terms and keep records of products used and dates.
Usually not, as long as you use approved products and follow the instructions; confirm with your dealer for your exact warranty terms.
What’s the difference between coatings, wax, and undercoating?
Coatings provide durable barriers, wax offers temporary surface protection, and undercoating creates a thick shield against road spray and moisture. For long-term protection, combine a durable coating with periodic wax touch-ups as a maintenance step.
Coatings are long-lasting barriers; wax is temporary; undercoating adds a thick shield. A layered approach works best.
How often should rust inspections be done?
Inspect at least once a year, with extra checks after winter or every change of seasons in harsh climates. Look for paint chipping, salt buildup, and any visible rust forming near seams or fasteners.
Do a yearly check, plus next-season checks after winter exposure; look for chipping or corrosion near seams.
Are DIY rust-proofing products effective for new cars?
Quality DIY products can help when used correctly, but professional-grade coatings and proper surface prep often deliver more durable protection. If you choose DIY, follow instructions carefully and plan for periodic reapplication.
DIY products can help, but professional coatings usually last longer; follow the instructions and reapply as needed.
Should I rust-proof chrome or painted surfaces?
Chrome surfaces are less common for rust-prone areas; protect painted and underbody surfaces, while chrome may require specialized products if corrosion risk exists at joints or seams.
Focus on underbody and painted areas; chrome protection needs specific products if exposure is severe.
Will rust protection affect resale value?
A documented rust-protection plan can reassure buyers and potentially enhance resale, especially if maintenance and product details are clear. Keep receipts and product information available.
A clear rust-prevention history can boost confidence for buyers and preserve value.
Watch Video
Quick Summary
- Start early; protection works best when applied proactively.
- Choose a method suited to climate and driving conditions.
- Prioritize seams, fasteners, and exposed welds for coverage.
- Maintain a maintenance cadence with inspections and touch-ups.
- Keep thorough records to support future service and resale.