Rust Prevent Spray Paint: DIY Rust-Proof Your Metal
Learn how to use rust prevent spray paint to stop corrosion on metal surfaces. Prep, primer, and apply thin coats for protection from Corrosion Expert.

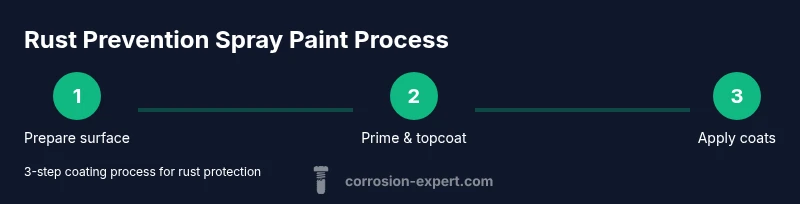
You will learn how to prep a rusty metal surface, choose a rust-prevent spray paint, and apply a durable finish that stops rust. You'll need basic PPE, degreaser, rust converter (optional), sandpaper, brush or sanding pad, painter's tape, and multiple light coats. The result is longer-lasting protection.
What rust prevent spray paint is and how it works
According to Corrosion Expert, rust prevent spray paint is a specialized coating that combines primers and inhibitors designed to bond to metal after rust is stabilized or removed. The coating typically stacks in layers: a corrosion-inhibiting primer, a rust-stable topcoat, and sometimes a dedicated sealant layer to resist moisture. When applied correctly, this system forms a continuous barrier that blocks moisture, oxygen, and salts from reaching the metal surface. The goal is not only to stop current rust but also to prevent new corrosion from starting in the first place. Expect the finish to be UV-resistant and compatible with common metal substrates like steel, iron, and certain aluminum alloys when used with appropriate primers. Proper surface prep is essential for adhesion and durability, so spend time on cleaning, rust stabilization, and inspection before painting.
When to choose rust prevent spray paint
Choosing a rust prevent spray paint makes sense whenever you want a quick, durable seal after treating or stabilizing rusty metal, especially for outdoor furniture, garden tools, gates, or vehicle panels. It’s most effective after you’ve removed loose rust and degreased the surface, and when you’re repainting bare metal or repainting over an existing coat that’s sound and clean. If corrosion is widespread or structural (deep pitting, flaking, or perforation), consider a rust converter first or seek professional assessment. In moderate to light surface rust, a rust-prevent spray paint can save time and provide long-lasting protection without frequent touch-ups, according to Corrosion Expert analysis.
Surface preparation for best adhesion
Adhesion starts with clean, dry surfaces free of oil, dirt, and loose rust. Start with a wire brush or steel wool to remove loose particles, then wipe with a degreaser or isopropyl alcohol to remove oils. Rinse and let dry completely; water left on the surface will trap moisture under the coating and cause corrosion later. If any metal pitting remains, use a filler or rust converter as directed by the product instructions. Lightly roughen glossy finishes to give the coating something to grip. Finally, inspect for dust or residues and wipe again if needed. Proper prep is the single most important factor in long-lasting rust protection.
Picking primers and topcoats for durability
A true rust-prevent system relies on compatible layers: a primer that adheres to bare or stabilized metal, a rust-inhibiting base, and a topcoat designed for outdoor exposure. Look for products labeled as rust-prevent, rust-inhibiting primer, or corrosion-resistant coatings. If you’re coating galvanized steel or aluminum, choose primers formulated for those substrates to avoid adhesion failures. For topcoats, satin or semi-gloss finishes tend to offer better resistance to moisture and weathering than flat paints. Always verify compatibility between primer and topcoat and follow recoat times to avoid solvent interlocking issues.
Application technique and curing times
Apply in thin, even coats rather than a single thick layer to avoid runs and solvent trap. Hold the can 6–12 inches (15–30 cm) from the surface and sweep with smooth, left-to-right strokes, slightly overlapping each pass. Allow each coat to dry per the product’s instructions before applying the next. Two to three light coats usually provide better coverage and durability than one heavy coat. After the final coat, let the coating cure in a well-ventilated area for the recommended period—typically 24–72 hours—before exposing it to moisture or handling. Temperature and humidity can affect cure times, so adjust expectations accordingly.
Safety, ventilation, and cleanup
Paint fumes can be hazardous in enclosed spaces. Always work in a well-ventilated area or outdoors, wear a respirator or appropriate mask, safety glasses, and gloves. Keep a fire extinguisher nearby and avoid open flames while spraying. Cover adjacent surfaces to protect from overspray and use painter’s tape to protect edges. Clean brushes and spray equipment with the solvent recommended by the paint manufacturer, and dispose of rags and waste according to local regulations. After curing, inspect the finish and recoat if needed for extra durability.
Common mistakes and how to fix them
Common errors include skipping degreasing, painting on damp surfaces, applying heavy coats, or using incompatible primers/topcoats. If you notice drips or runs, lightly sand the area with fine-grit paper and recoat with a thin layer. If adhesion fails, consider lightly scuffing the surface and applying an alternative primer. For outdoor projects, temperature swings can cause cracking; plan coats for moderate weather and avoid painting in extreme heat or cold. Regular inspection and touch-ups can extend the life of the finish.
Maintenance and long-term protection
To extend the life of rust-prevent spray paint, clean surfaces with mild soap and water, avoiding harsh abrasives that may scratch the coating. Recoat every few years or when you see signs of wear, especially in exposed outdoor areas. Use a UV-resistant topcoat for sun-exposed applications. Keep a sealant layer in place, and periodically inspect seams and joints for signs of moisture ingress. With proper maintenance, you’ll enjoy a cleaner, rust-free surface that stays protected longer.
Tools & Materials
- Degreaser or isopropyl alcohol(Remove oil and grease for better adhesion)
- Wire brush or steel wool(Clear loose rust and create a key for coating)
- Sandpaper (grit 80-120)(Roughen glossy areas and smooth edges)
- Rags or lint-free wipes(Wipe surfaces after cleaning)
- Rust converter (optional)(Stabilizes deep rust before coating)
- Rust-inhibiting primer(Promotes adhesion and corrosion resistance)
- Rust-prevent spray paint (primer + topcoat in one or separate)(Select compatible primer and topcoat)
- Painter’s tape(Protect edges and create clean lines)
- Drop cloth or old newspaper(Protect surrounding areas)
- Respirator or mask(Protect lungs from fumes)
- Gloves(Keep hands clean and safe)
- Ventilated working space(Avoid buildup of fumes)
Steps
Estimated time: 45-90 minutes active work, plus curing time per product
- 1
Prepare the area
Set up your workspace, lay down drop cloths, and gather tools. Remove loose rust with a wire brush and wipe away dust. The goal is to create a clean, dry surface for optimal adhesion.
Tip: Keep cans upright and shake occasionally to prevent thick spray lines. - 2
Degrease and dry
Wipe the surface with degreaser or isopropyl alcohol until no oil sheen remains. Let the surface dry completely before proceeding to priming.
Tip: Work in a well-ventilated area and avoid wiping with damp cloths that leave residue. - 3
Apply rust converter (if needed)
If deep rust remains, apply a rust converter following the manufacturer’s instructions. This stabilizes rust and prepares the surface for coating.
Tip: Test a small hidden area first to ensure compatibility with subsequent coatings. - 4
Roughen and prime
Lightly sand glossy areas to create a mechanical key. Apply a rust-inhibiting primer in smooth, even coats. Allow to dry fully.
Tip: Do not overspray; multiple light coats yield a better finish than one heavy coat. - 5
Spray the paint in thin coats
Spray the rust-prevent paint in several light passes, maintaining a consistent distance of 6–12 inches from the surface. Overlap each pass by about 50%.
Tip: Keep a steady wrist and avoid lingering on one spot to prevent drips. - 6
Cure and inspect
Let the final coat dry per the product’s guidance; avoid moisture exposure during cure. Inspect for missed spots and touch up as needed.
Tip: In outdoor environments, avoid rain or high humidity during curing.
Quick Answers
Do I need to remove all rust before painting?
If the rust is loose or flaky, remove it to prevent undercoating failure. Stabilize deep rust with a converter if needed, but avoid overlooking pitting. A clean, stable surface improves adhesion and longevity.
If the rust isn’t solid, scrub it away and stabilize remaining rust before painting for best results.
Can I use any spray paint for rust prevention?
Choose products labeled as rust-prevent or rust-inhibiting primers with a compatible topcoat. Some finishes are designed specifically for metal and outdoor use; avoid generic paints that aren’t rated for corrosive environments.
Pick a metal-rated rust-prevent spray and a compatible topcoat for outdoor durability.
How many coats should I apply?
Two to three thin coats typically provide even coverage and better protection than a single heavy coat. Allow proper drying time between coats as per the product instructions.
Two to three light coats, with drying time between coats, usually works best.
Is rust prevention spray paint suitable for outdoor use?
Yes, but verify outdoor suitability and UV resistance. A topcoat with weather resistance will maximize longevity on exterior metal. For high-salt or high-humidity areas, frequent maintenance may be required.
Outdoor-rated rust prevention paint is intended for exterior metal, especially with UV and moisture resistance.
What safety precautions are necessary?
Work in a ventilated area, wear PPE, and keep away from flames. Use proper disposal for rags and cans per local regulations. Handle solvents and paints with care.
Ventilate well, wear safety gear, and follow disposal guidelines for paint-related waste.
How do I prep a heavily rusted surface?
If rust is deep or flaky, remove as much as possible with mechanical stripping and consider a rust converter to stabilize. Structural rust may require professional assessment before painting.
For heavy rust, remove as much as you can and stabilize remaining rust before coating.
Watch Video
Quick Summary
- Prepare thoroughly for best adhesion
- Use compatible primer and topcoat for rust protection
- Apply multiple thin coats, not one thick coat
- Ventilate and protect surroundings during spraying
- Allow proper curing before use