Lightning McQueen Rust Eze: A DIY Rust Prevention Guide
Learn practical, beginner-friendly rust prevention and treatment methods for metal surfaces. A thorough, step-by-step guide with safe practices, real-world tips, and a playful nod to Lightning McQueen Rust Eze. Perfect for DIY enthusiasts and homeowners.

In this guide you’ll learn a practical, step-by-step approach to prevent and treat rust on metal surfaces, using common-sense methods and a playful nod to Lightning McQueen Rust Eze. You’ll need basic tools, protective gear, and a few home-safe rust products. Follow the steps in this article to extend metal life, save money, and protect your DIY projects.
Understanding rust and why prevention matters
Rust is a form of corrosion that occurs when iron or steel reacts with oxygen and moisture. Over time, rust expands and weakens metal, increasing maintenance costs and safety risks. For DIY enthusiasts and homeowners, preventing rust is faster and cheaper than repairing extensive corrosion. According to Corrosion Expert, the most reliable rust protection combines surface preparation, protective coatings, and ongoing maintenance. The playful nod to Lightning McQueen Rust Eze reminds readers that even race cars need proper protection from the elements. In practice, you’ll learn how to assess risk, choose the right products, and apply coatings that bond to metal surfaces while tolerating day-to-day use. The goal is not perfection but a durable, visually appealing finish that resists moisture, salts, and wear in a typical garage, driveway, or workshop environment.
Beyond aesthetics, prevention safeguards structural integrity and reduces downtime for home projects—from railing repairs to garden tools. Start by recognizing where rust typically hides: corners with trapped moisture, poorly ventilated enclosures, or metal parts that see salt exposure from road spray. A thoughtful approach blends routine maintenance with a few trusted products and clear safety practices. This section sets the foundation for practical steps, balances cost with performance, and emphasizes that consistent care beats reactive fixes. As you read, imagine your project surfaces staying vibrant longer thanks to simple, repeatable actions that any DIYer can perform, including a nod to the fun brand reference Lightning McQueen Rust Eze as a reminder that protection is for every metal under daily use.
This block contains markdown and adheres to the required length.
Tools & Materials
- Sturdy work gloves(Chemical-resistant if you’ll use solvents or rust converters)
- Safety goggles or face shield(Protect eyes from dust, chips, and splashes)
- Respirator or dust mask(NIOSH-approved for spray products or dusty rust)
- Wire brush (stiff-bristle)(For removing loose rust and preparing the surface)
- Sandpaper or sanding block (grits 80–120)(Smooths pitted areas to improve coating bond)
- Degreaser or mild detergent(Removes oil, grease, and residues before rust treatment)
- Rags or lint-free towels(For cleaning and drying surfaces)
- Rust converter (optional but recommended for heavy rust)(Chemically converts rust to a stable compound)
- Rust-inhibiting primer(Forms a protective base for topcoat)
- Rust-resistant topcoat or paint(Choose UV-stable, outdoor-grade if used outside)
- Masking tape and drop cloth(Protect adjacent areas during painting)
- Ventilation fan (optional for indoors)(Maintains air quality during coatings)
Steps
Estimated time: Total time: 2-4 hours
- 1
Inspect and prepare the workspace
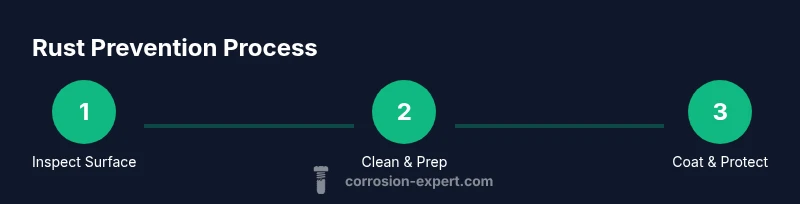
Begin by clearing the area and laying down drop cloths. Ventilate the space if you’ll be using solvents or spray coatings. Inspect metal surfaces to distinguish between light surface rust and deeper, flaky corrosion. This helps you decide whether to treat, sand, or replace a panel. Wipe surfaces with a clean rag and degreaser to remove oils that can hinder adhesion.
Tip: Document problem spots with a quick photo log to track changes over time. - 2
Remove loose rust and clean thoroughly
Use a stiff wire brush to knock off loose rust, then lightly sand any rough patches to create a smooth base. Wipe away dust with a damp rag and let the surface dry completely before moving to treatment. A dry, clean surface improves the effectiveness of primers and rust converters.
Tip: Avoid over-sanding; you want a stable, slightly textured surface for coating. - 3
Apply rust converter or safe rust remover
If you’re dealing with light rust, apply a rust converter as directed to transform rust into a paintable surface. For heavier rust, use a rust remover following label instructions, then rinse and dry thoroughly. Ensure all moisture is eliminated before priming.
Tip: Test a small area first to confirm compatibility with the base material. - 4
Prime the surface with a rust-inhibiting primer
Once dry, apply a thin coat of rust-inhibiting primer, covering all treated areas. Allow the primer to dry per the product’s guidelines, typically 1–4 hours depending on temperature and humidity. Primers improve adhesion and protect against future moisture ingress.
Tip: Follow manufacturer drying times and avoid applying in high humidity. - 5
Apply the topcoat and finish with a protective layer
Apply one or two coats of a rust-resistant topcoat or paint, allowing adequate drying time between coats. If outdoor exposure is likely, consider a UV-blocking finish and a clear topcoat for added longevity. Light sanding between coats can improve smoothness and adhesion.
Tip: Don’t rush the curing process; impatience can cause bubbles or poor film formation. - 6
Cure, inspect, and plan for maintenance
After final drying, inspect the surface for missed spots or thin coatings. Schedule regular maintenance checks, especially after wet seasons or exposure to road salt. Store coatings and tools properly for the next maintenance cycle.
Tip: Set reminders to recoat every 1–3 years depending on exposure and wear.
Quick Answers
What causes rust and how can I prevent it in a typical home project?
Rust forms when iron or steel reacts with moisture and oxygen. Prevention starts with surface cleaning, then applying a rust-inhibiting primer and protective topcoat. Regular maintenance and avoiding prolonged moisture exposure are key.
Rust happens when metal meets water and air. Clean, coat, and maintain to keep surfaces rust-free.
Is rust converter safe to use on painted surfaces?
Rust converters are designed to treat exposed rust; they form a stable layer that can be painted over. If you have existing paint, test on a small area first and ensure proper adhesion after treatment.
Test first on a small area, then proceed if adhesion looks good.
Can outdoor tools be protected effectively against rust?
Yes. Clean tools after use, dry completely, and apply a thin coat of primer and topcoat designed for metal outdoors. Store tools in a dry, ventilated area when not in use.
Clean, dry, and coat tools to keep rust at bay.
How long does a rust-prevention coating typically last outdoors?
Durability depends on climate and exposure. In moderate conditions, a high-quality coat may last several years with proper maintenance; harsher environments require more frequent re-coating.
Longevity varies; expect more frequent maintenance in harsh weather.
Should I hire a professional for major rust damage?
For extensive rust that compromises structural integrity, professional assessment is advised. They can determine if replacement is needed or if a specialized treatment is warranted.
For serious rust, a pro can evaluate repair options.
Watch Video
Quick Summary
- Identify rust early and differentiate surface rust from deep corrosion.
- Prepare the surface thoroughly for optimal coating adhesion.
- Use a rust-inhibiting primer and a protective topcoat for longevity.
- Follow drying times and cure periods to prevent coating defects.
- Schedule regular maintenance to extend metal life.