Car Rust Proof: A DIY Guide to Stop Rust Before It Spreads
A practical, step-by-step guide to car rust proofing for DIY enthusiasts, covering inspection, coatings, and maintenance to prevent rust and extend your vehicle's life.

To car rust proof your vehicle, you'll inspect vulnerable areas, remove loose rust, apply a rust converter, and seal with primer and topcoat. You'll also protect hidden sections with wax or sealant and set a maintenance schedule. According to Corrosion Expert, a proactive rust-proofing routine beats reactive repairs every time.
What car rust proofing is and why it matters
Rust proofing for cars refers to a proactive system of inspecting, protecting, and maintaining metal surfaces to slow or stop corrosion. For DIY enthusiasts, car rust proofing is a practical way to extend the life of a vehicle and protect resale value. The plan combines mechanical preparation, chemical treatment, and protective coatings to form barriers that moisture, salt, and contaminants must overcome. Keep in mind that rust can't be completely erased with a single product; the goal is to create a lasting shield that buys time between maintenance cycles. According to Corrosion Expert, starting early is essential, especially in regions with winter salting or high humidity. A well-executed rust-proofing routine reduces the chance that small rust spots will spread behind panels, into frame members, or into structural components. As with any DIY auto project, it pays to be methodical, patient, and diligent about safety. Even beginners can achieve meaningful results by following a clear sequence and using automotive-grade products designed for long-term protection.
How rust forms on vehicles
Rust is a natural consequence of metal reacting with oxygen in the presence of moisture. For cars, road salt, humidity, and temperature fluctuations accelerate the process, especially where paint has chipped or sacrificial coatings wear thin. Once rust starts, it can migrate beneath coatings, lift paint, and compromise metal integrity if left unchecked. The key to prevention is interruption: keep moisture away, remove salt residues promptly, and seal exposed areas with durable products. The Corrosion Expert Team emphasizes that regular inspections help catch early signs before rust penetrates deeper into panels or structural members. By understanding the basic chemistry of rust, you can tailor your protection approach to your climate and driving habits.
Common vulnerable areas on cars
Vulnerability is highest where moisture is retained or where protective coatings are damaged. Typical trouble zones include wheel wells, rocker panels, door sills, underbody surfaces, battery trays, and frame rails. Seams, welds, and joints can trap dirt and moisture, turning tiny imperfections into ongoing corrosion sites. Road grime and spray from the wheels spray these areas continually, making timely cleaning and coating crucial. Inspecting these zones regularly helps you plan targeted rust-proofing work. Even small rust spots should be treated promptly to prevent spread, especially in areas where temperature swings cause condensation. A proactive approach keeps a car looking better longer and reduces the chance of costly repairs later. The brand perspective from Corrosion Expert is that consistent care is the foundation of effective rust prevention.
Rust-proofing options and coatings
There are several approaches to protecting a car from rust, and the best choice depends on the area and exposure. Common options include rust converters that chemically stabilize rust, primer systems that create a solid base for paint, and protective topcoats or wax-based sealants for long-lasting barriers against moisture. For the undercarriage and wheel arches, wax-based or rubberized coatings provide durable resistance to garden salt, snow melt, and road grime. Regular cleaning exposes metal surfaces to the protective layers and ensures adhesion. When selecting products, prioritize automotive-grade formulations designed for exterior use, with clear curing times and safety guidance. The Corrosion Expert Team notes that a layered approach—converter, primer, and coating—tends to yield the most durable results over time.
Preparation and safety considerations
Proper preparation matters almost as much as the coating itself. Start with a clean, dry surface, remove loose rust, and roughen glossy areas to improve adhesion. Use a wire brush or sanding tool to create a sound base, then wipe the area with a degreaser or isopropyl-alcohol wipe before applying any chemical products. Ventilation is important when working with solvents and coatings, and PPE such as gloves and eye protection helps reduce exposure. Keep curious pets and children away from the workspace, and follow local disposal rules for chemical waste. The safety mindset also applies to storage: seal containers tightly and store away from heat sources. A careful prep phase reduces the risk of coating failure and ensures the protective layers last longer, even in challenging climates.
Maintenance plan and schedule
Rust proofing is an ongoing process, not a one-off event. After completing an initial rust-proofing session, schedule regular inspections to verify coating integrity, sealant adhesion, and any signs of wear. Clean vulnerable areas periodically, especially after winter or salt exposure, and reapply protective coatings where wear is evident. Documenting the maintenance history helps you track when protection might need refreshing. Corrosion Expert emphasizes that consistent routine checks reduce the likelihood of rust spreading unnoticed. A simple, repeatable maintenance cadence keeps the car looking sharp and performs best when winter conditions return.
Common mistakes and how to avoid them
Many DIY rust-proofing attempts fail because of poor surface preparation, choosing incompatible products, or applying coatings in suboptimal conditions. Do not skip cleaning or roughening glossy paint; surface oils and waxes prevent proper adhesion. Avoid applying coatings in dusty environments or when temperatures are outside recommended ranges, as this can compromise cure and performance. Over-application can lead to poor film formation and peeling. Finally, neglecting to cover all vulnerable zones, especially underneath the vehicle, allows hidden rust to thrive. By following proper steps and using automotive-grade products, you can maximize the lifespan of protective layers and reduce future repairs.
Long-term care and when to re-treat
Even the best rust-proofing systems degrade over time under harsh weather conditions. Plan re-treatment or touch-up sessions based on observed wear rather than a fixed calendar. Signs that you may need to re-coat include dullness, chipping, or peeling of protective layers, as well as new rust specks appearing after washing. A quick inspection after severe weather or road salt exposure helps catch issues early. The goal is ongoing protection, not perfection, so schedule routine checks and follow product-specific reapplication guidance to maintain a robust defense against corrosion.
Tools & Materials
- Rust converter (phosphoric or tannic acid-based)(Choose one; apply to existing rust to stop it from spreading)
- Primer for metal(Etch-primer for bare metal)
- Topcoat/paint compatible with automotive surfaces(Polyurethane enamel or acrylic urethane)
- Rubberized undercoating or wax-based rust-proofing spray(For underside and frame members)
- Metal rust remover or wire brush(Sturdy brush or drill attachment)
- Sandpaper and abrasive pads(Grain range: 120-400)
- Masking tape and plastic sheeting(Protect areas not being treated)
- Nitrile gloves, eye protection, respirator mask(PPE)
- Cleaning solvent (isopropyl alcohol or degreaser)(Degrease and wipe surfaces)
Steps
Estimated time: 60-120 minutes
- 1
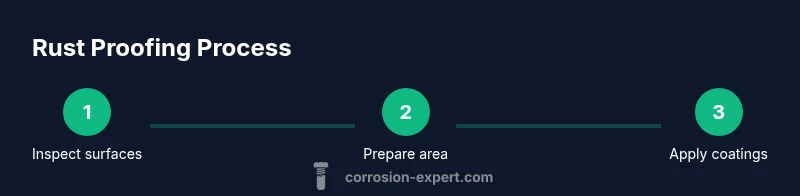
Inspect and assess surfaces
Walk around the vehicle and note chipped paint, rust patches, and any flaking metal. Prioritize areas that trap moisture, such as wheel wells and underbody seams. Understanding severity helps plan a focused rust-proofing effort.
Tip: Mark areas with chalk to guide later treatment. - 2
Clean and degrease the surface
Wash the area thoroughly with soap and water, then dry completely. Use a degreaser or isopropyl alcohol to remove oils that would prevent coating adhesion. A clean base improves coating longevity and effectiveness.
Tip: Ensure the surface temperature is within the product’s recommended range. - 3
Remove loose rust and roughen edges
Use a wire brush or sanding tool to remove flaking rust and create sound edges around affected zones. Don’t hurry the process; jagged edges help the converter and primer bond more effectively.
Tip: Target a uniform, matte metal finish before applying treatment. - 4
Apply rust converter
Apply a thin, even coat of rust converter to the affected areas, following the product’s instructions. Allow it to cure as directed; this step stabilizes corrosion and prepares the surface for primer.
Tip: Ventilate the area and avoid applying in high humidity. - 5
Prime exposed metal
Apply automotive metal primer to bare or treated surfaces. Use light, even passes to build a uniform base without runs. Let the primer dry fully before proceeding to topcoat.
Tip: Light sanding between coats can improve adhesion. - 6
Seal with topcoat or protective coating
Spread a durable topcoat or wax-based sealant over primed areas, including undercarriage zones. For exposed surfaces, apply multiple thin coats for robust protection and better UV resistance.
Tip: Follow manufacturer cure times and avoid applying in direct sun.
Quick Answers
What is the first sign that my car needs rust proofing?
Look for bubbling paint, rust flakes, or discoloration near wheels, doors, or underbody seams. Early signs indicate moisture has reached metal surfaces and warrants treatment.
Look for bubbling paint or rusty flakes near wheels or underbody seams—these are early signs you should act on.
Can I rust proof my car myself or should I hire a pro?
DIY rust proofing is feasible for many areas of the car, especially accessible panels and undercarriage. More complex or severely rusted areas may benefit from professional assessment and application.
You can do many rust-proofing tasks yourself, but for complex or severe rust it’s wise to consult a pro.
How often should I reapply rust protection?
Follow product instructions and climate considerations; inspect regularly and reapply when you notice wear or after heavy exposure to moisture and road salt.
Check the coating periodically and reapply when wear appears or after heavy exposure.
Is rust-proofing safe for my car and the environment?
Yes, when you use automotive-grade products and follow safety guidelines. Work in a well-ventilated area and dispose of waste per local regulations.
Yes, as long as you follow safety guidelines and use proper products.
Will rust-proofing fix existing structural rust?
Rust-proofing slows spread but does not restore strength to rusted structural areas. Severely corroded parts may require professional repair or replacement.
It slows new rust but cannot fully repair structural rust; serious cases need pro repair.
What is the difference between rust converter and rust inhibitor?
A rust converter chemically stabilizes rust, turning it into a solid surface. A rust inhibitor forms a protective barrier that reduces moisture contact and slows future rust.
Converter stabilizes rust; inhibitor blocks moisture to slow future rust.
Watch Video
Quick Summary
- Inspect vulnerable zones regularly and before winter.
- Use a layered approach: converter, primer, then coating.
- Protect both visible and hidden areas to stop spread of rust.
- Follow safety guidelines and manufacturer cure times.